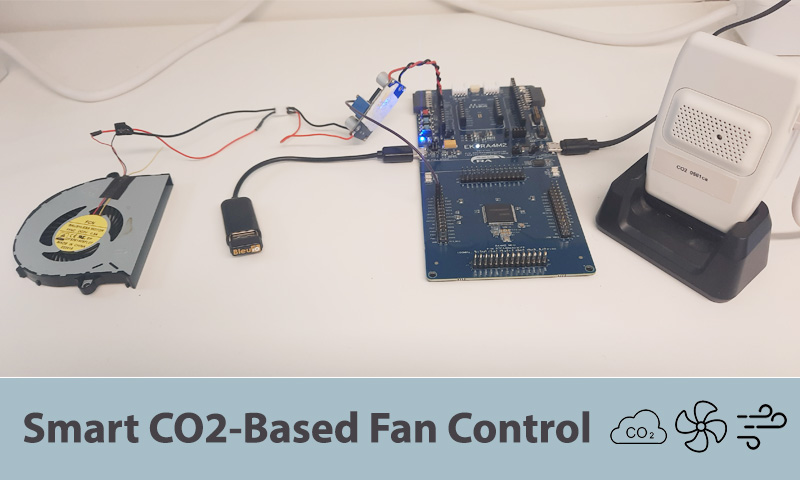
This project showcases how to integrate the Renesas EK-RA4M2 microcontroller with a BleuIO BLE USB dongle to create a smart air ventilation system. By using HibouAir‘s CO2 parameter, an air quality monitoring device, the system continuously monitors indoor air quality and automatically controls a fan based on CO2 levels.
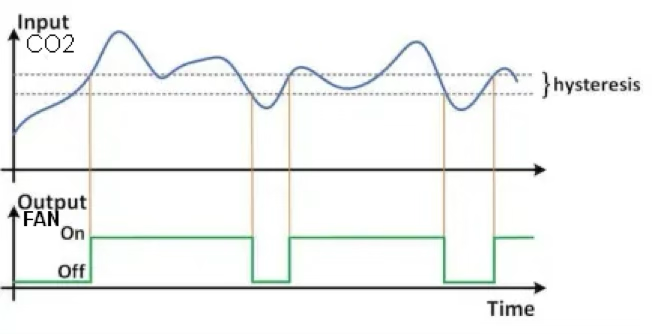
The BleuIO dongle scans for HibouAir’s BLE advertising data to retrieve real-time CO2 readings. When the CO2 concentration exceeds 600 ppm, the system activates the fan to improve air circulation. Once the CO2 level drops below 550 ppm, the fan is turned off to conserve energy.
This implementation demonstrates a practical IoT-based air quality control solution, making indoor environments healthier and more efficient.
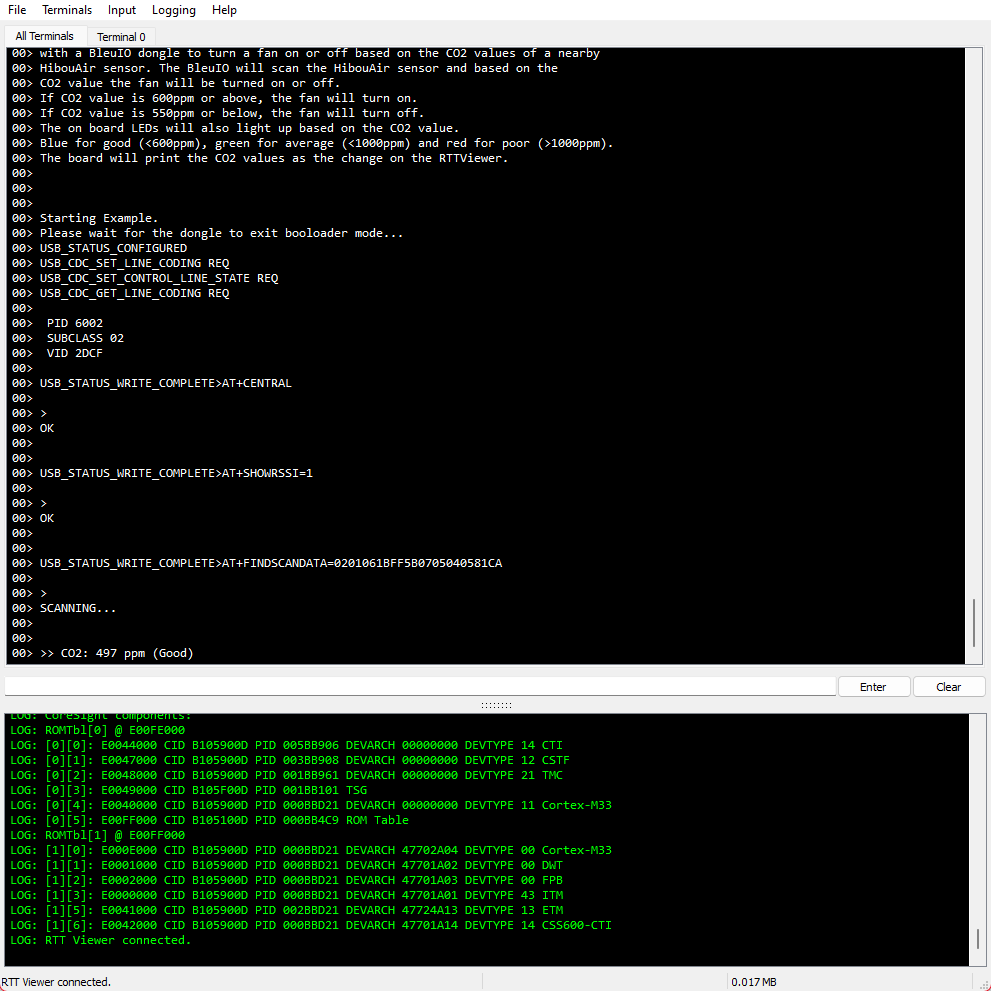
The EK-RA4M2 board prints the CO2 values, as they change, on the RTTViewer.
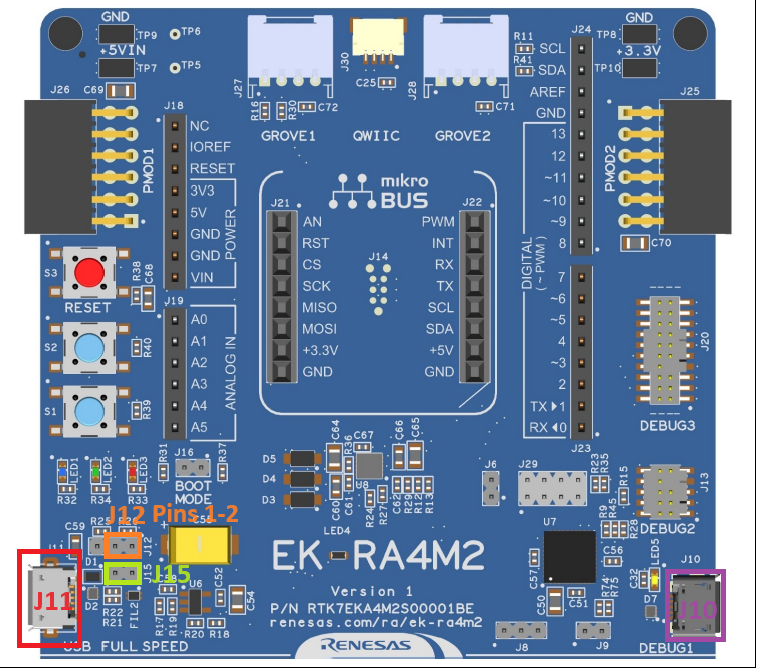
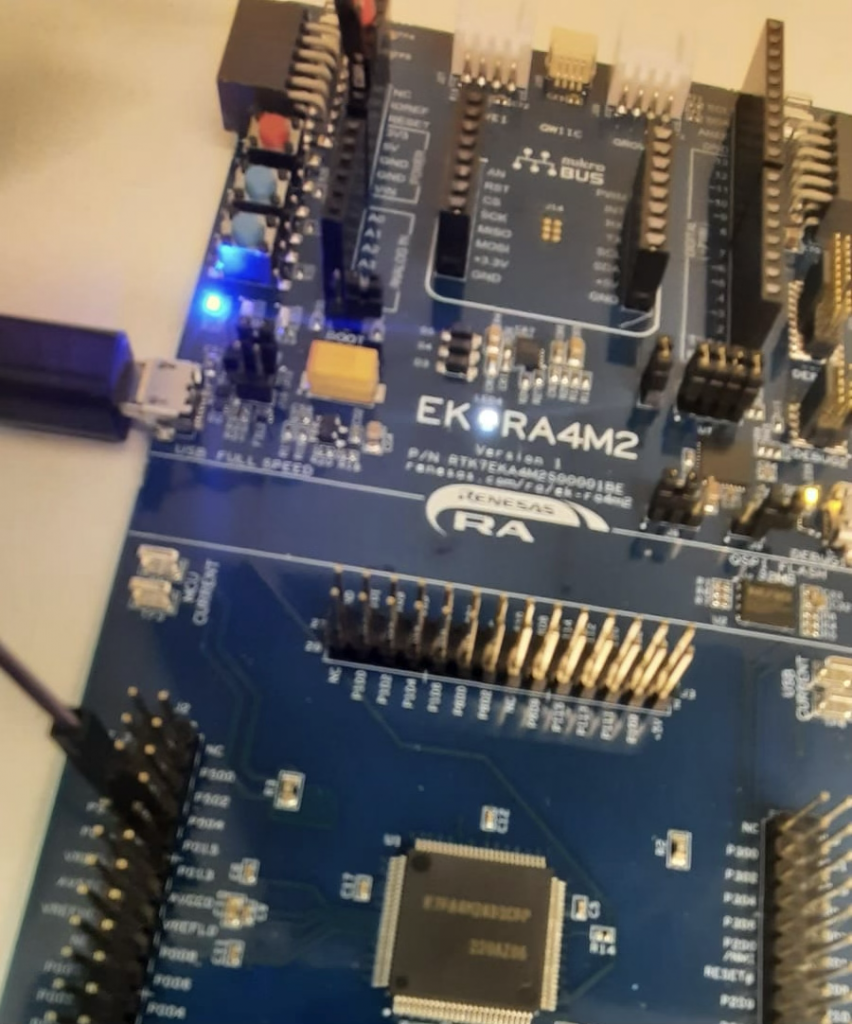
Connect a Micro USB device cable (type-A male to micro-B male) between J10 (Debug1) and a Computer USB port.
Plug in a BleuIO Dongle in the USB OTG Cable (type-A female to micro-B male) and connect it to J11 (USB Full Speed).
Make sure Jumper J12 is placed on pins 1-2
Remove Jumper J15 pins
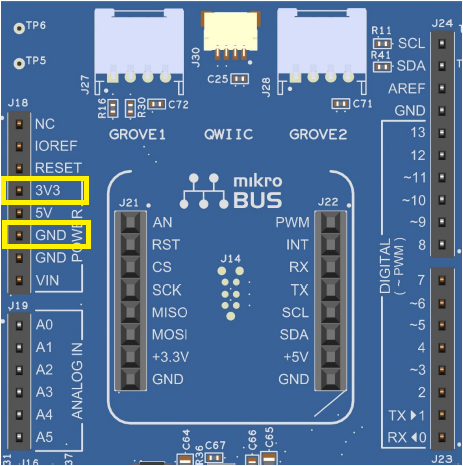
Connect the fan power adapter to 3V3 and GND on the developer kit like this:
The fan power adapter will also need to be connected to GPIO pin 505 on the developer kit to turn it on and off:
Importing project
Open e² studio IDE
Choose a workspace and click ‘Launch’
Download or clone the example project. Place the folder ‘bleuio_ra4m2_fan_example’ in workspace.
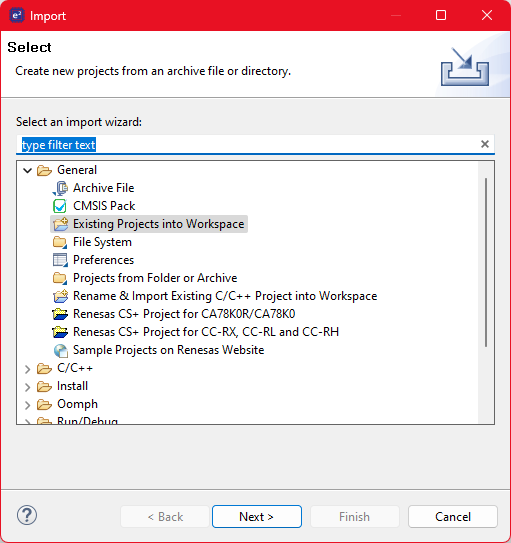
Choose Import Project
Select ‘Existing Projects into Workspace’ under the ‘General’ tab:
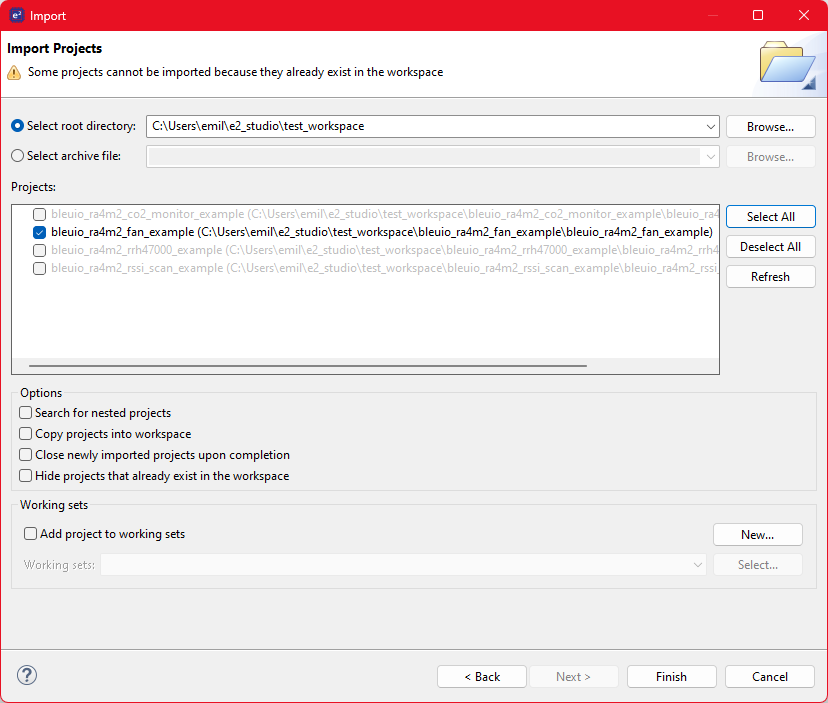
Click the ‘Browse…’ button and open the folder where the ‘bleuio_ra4m2_fan_example’ project folder is located:
Finally select the project and click ‘Finish’. You have now imported the the project!
Running the example
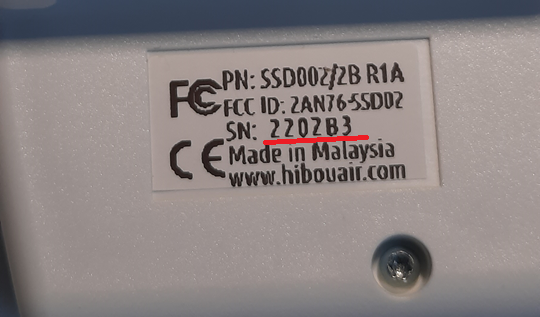
Go to file ‘usb_hcdc_app.c’ under ‘src/’ and edit line 41 to the board ID of the HibouAir Sensor:
#define BOARD_ID_TO_SCAN “2202B3”
The board ID is printed on the back of the HibouAir sensor:
You can also threshold values to change when the fan should start and stop.
The defines can be found on row 45 and 47 in ‘usb_hcdc_app.c’ under ‘src/’:
/* CO2 threshold value 1. If at this value or above, the fan will start. */ #define CO2_FAN_ROOF 600 /* CO2 threshold value 2. If at this value or below, the fan will stop. */ #define CO2_FAN_FLOOR 550
Build the project by clicking the building icon:
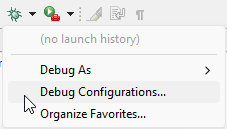
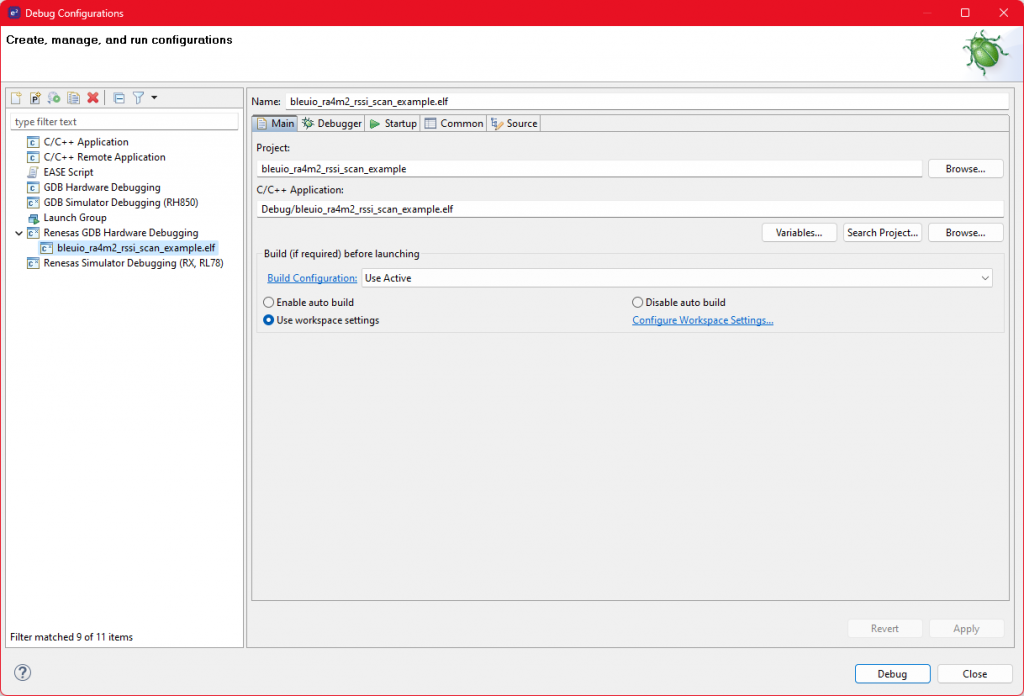
Use Debug to download and run the project. The first time you need to configure the debug settings. Click down arrow to the right of the Debug icon and select ‘Debug Configurations…’
Under ‘Renesas GDB Hardware Debugging’ select ‘bleuio_ra4m2_fan_example.elf’ and click ‘Debug’
The debug is now configured and the ‘Debug’ icon can be used next time to run the project.
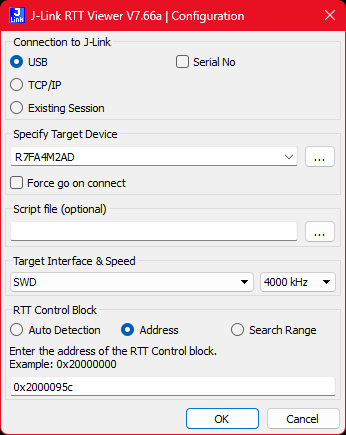
Open RTTViewer. Connect and use these settings:
Connection to J-Link: USB
Specify Target Device: R7FA4M2AD
Target Interface & Speed: SWD 4000kHz
RTT Control Block: Address 0x2000095c
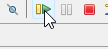
On the debugger screen in e² studio click the ‘Resume’ icon twice to run the project.
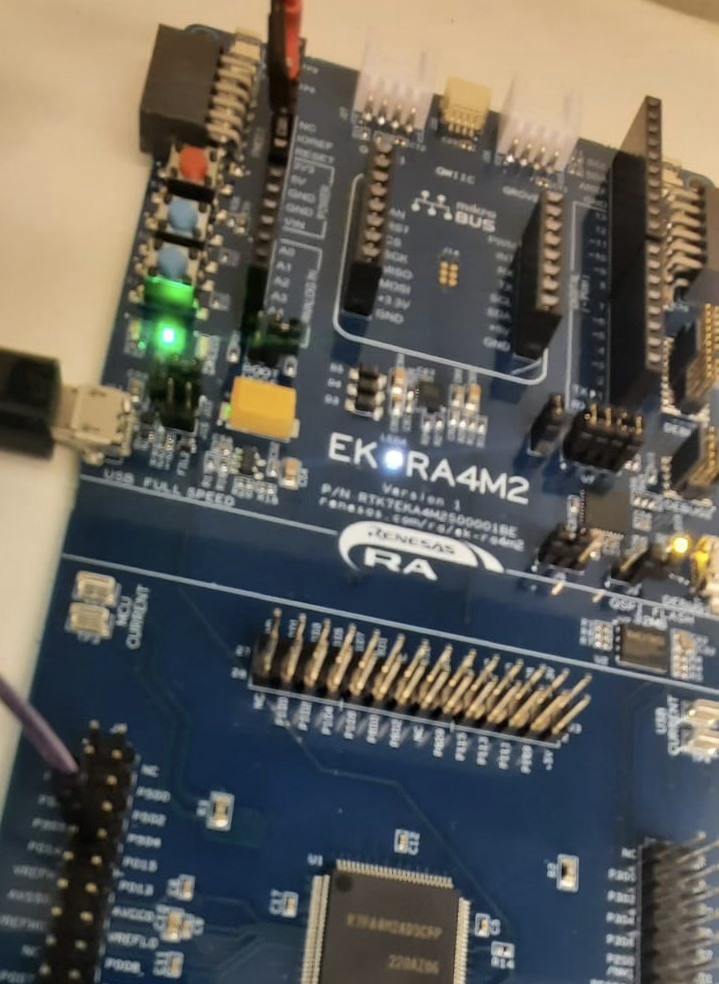
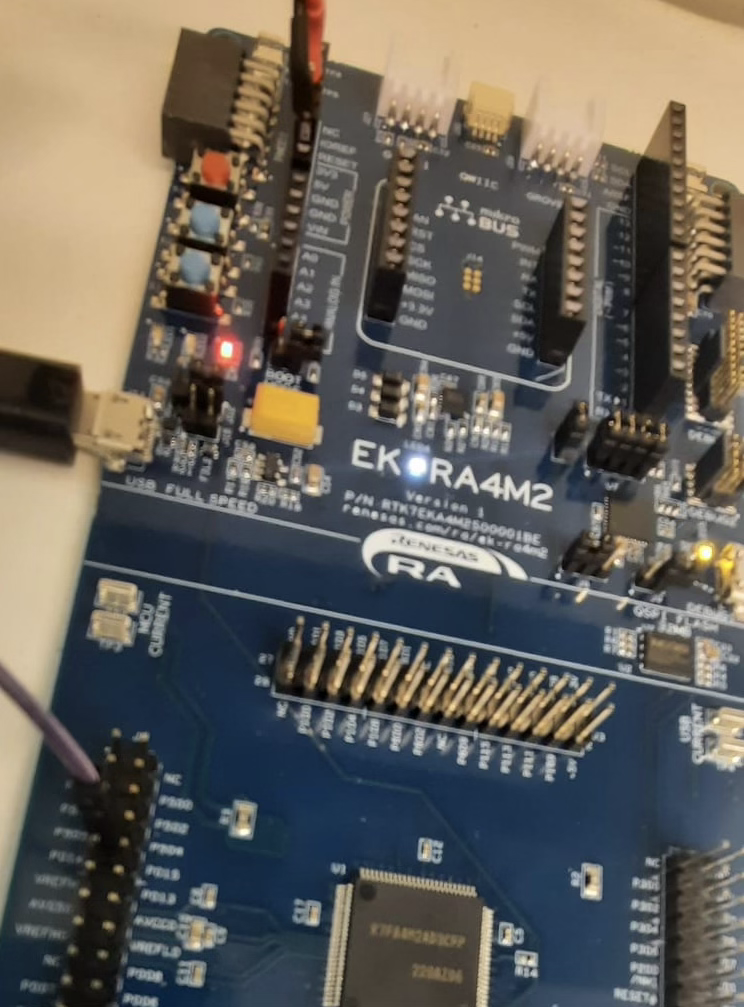
The application is now running. When starting up you should notice all LEDs lighting up for one second then only the red LED will be on. It will turn off as soon as the BleuIO is configured.
You should now see the output on the RTTViewer.
If CO2 value is 600ppm or above, the fan will turn on.
If CO2 value is 550ppm or below, the fan will turn off.
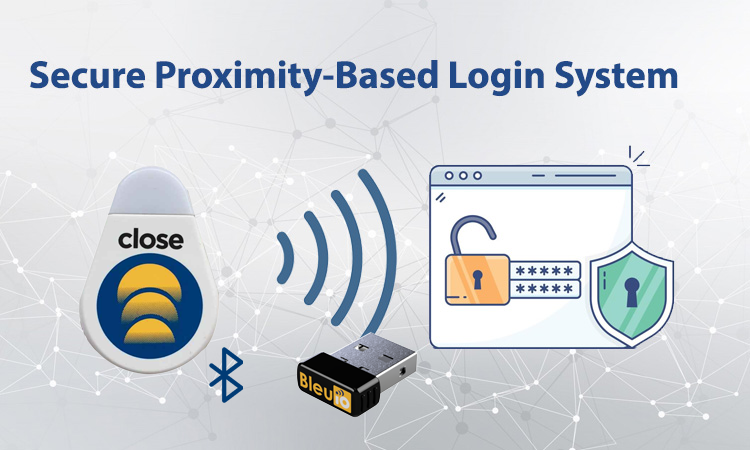
Bluetooth Low Energy (BLE) provides a powerful mechanism to enhance security through proximity-based authentication. This tutorial showcases how to create a secure login system using Node.js, Express, and BLE technology. The project demonstrates how BLE scanning can verify the presence of an authorized BLE device (such as Close Beacon) in range before granting access. This offers an extra layer of protection for your applications.
Why This Project?
With the increasing need for secure authentication mechanisms, BLE (Bluetooth Low Energy) offers a lightweight, reliable, and energy-efficient solution. This project demonstrates how you can utilize a BleuIO USB dongle to securely check the proximity of a specific Close Beacon’s mac address before granting access to sensitive resources.
Key Features:
Node.js Integration: Simplifies server-side logic using JavaScript.
BLE Device Scanning: Checks for the presence of an authorized device based on its MAC address.
Flexible Hardware Support: While this project uses Close Beacon, any BLE device can be used for authentication.
Enhanced Security: Adds an additional layer of security to the login process.
Practical Example: Serves as a foundation for more advanced BLE-based applications.
Practical Use Cases
Extra Security Layer: Combine BLE proximity detection with traditional authentication methods for added security.
Access Control Systems: Enable access to sensitive areas only when an authorized device is nearby.
BLE-Powered IoT Applications: Use BleuIO for real-time device monitoring and communication.
Dependencies: Install express and serialport using npm: npm install express serialport
How It Works
Step 1: Frontend (HTML and JavaScript)
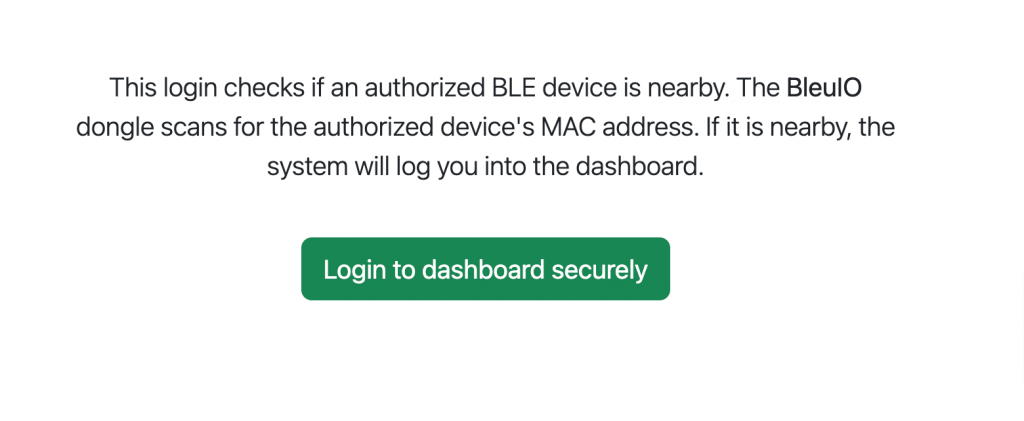
The index page displays a button, “Login to dashboard securely.” When clicked, it sends a request to the server to scan for BLE devices.
index.html:
<!-- index.html -->
<!DOCTYPE html>
<html lang="en">
<head>
<meta charset="UTF-8" />
<meta name="viewport" content="width=device-width, initial-scale=1.0" />
<link
href="https://cdn.jsdelivr.net/npm/bootstrap@5.3.3/dist/css/bootstrap.min.css"
rel="stylesheet"
integrity="sha384-QWTKZyjpPEjISv5WaRU9OFeRpok6YctnYmDr5pNlyT2bRjXh0JMhjY6hW+ALEwIH"
crossorigin="anonymous"
/>
<title>Login Securely</title>
</head>
<body>
<div class="container text-center mt-5">
<br />
<div class="row">
<div class="col-md-6 offset-md-3">
<p class="lead">
This login checks if an authorized BLE device is nearby. The
<strong>BleuIO</strong>
dongle scans for the authorized device's MAC address. If it is
nearby, the system will log you into the dashboard.
</p>
</div>
</div>
<br />
<button class="btn btn-success btn-lg" id="scanBtn">
Login to dashboard securely
</button>
<div id="listScan"></div>
</div>
<script>
document.getElementById('scanBtn').addEventListener('click', () => {
fetch('/scanbledevice')
.then((response) => response.json())
.then((data) => {
// Log the response for debugging
console.log(data.message);
// Redirect to /dashboard if the device is nearby
if (data.success) {
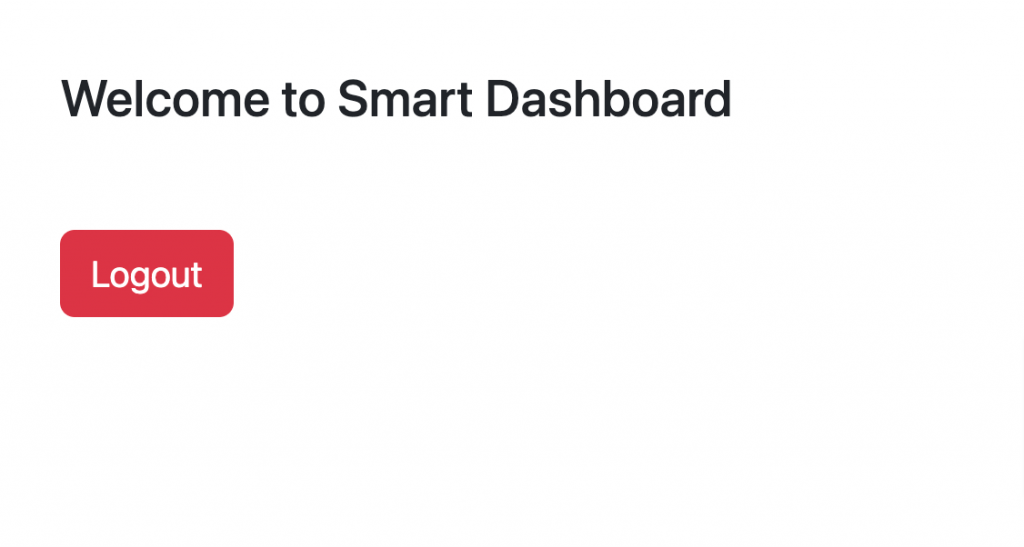
window.location.href = '/dashboard';
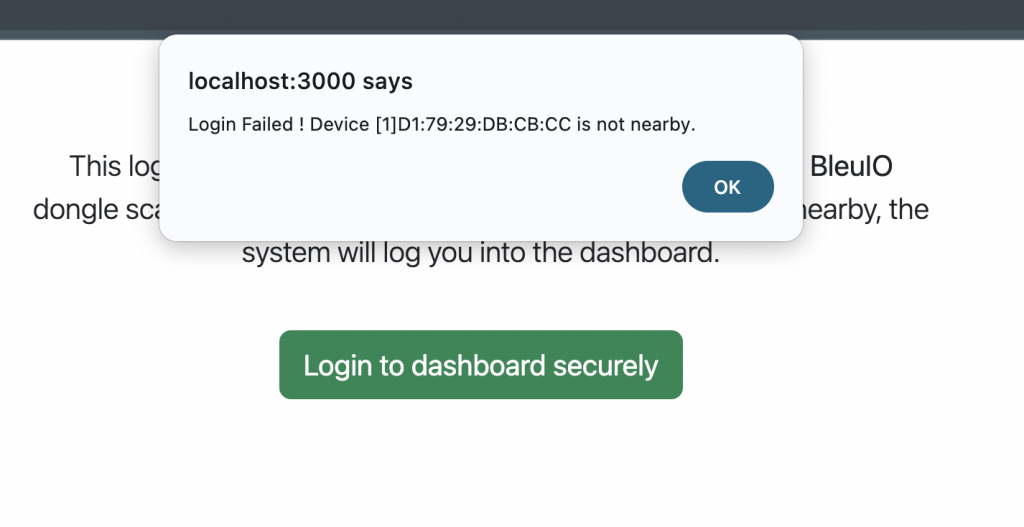
} else {
alert(data.message); // Show a message if the device is not nearby
}
})
.catch((err) => {
console.error('Error:', err);
alert('An error occurred while scanning for devices.');
});
});
</script>
</body>
</html>
The server handles requests to scan for BLE devices, manage the serial port connection, and redirect users to the dashboard.
server.js:
// server.js
const express = require('express');
const { scanBLE, disconnectBLE } = require('./script');

const app = express();
const port = 3000;

// Serve the HTML file
app.get('/', (req, res) => {
  res.sendFile(__dirname + '/index.html');
});
app.get('/dashboard', (req, res) => {
  res.sendFile(__dirname + '/dashboard.html');
});
app.get('/disconnect', (req, res) => {
  disconnectBLE()
    .then((message) => {
      res.json({ success: true, message });
    })
    .catch((err) => {
      console.error('Error during disconnect:', err);
      res
        .status(500)
        .json({ success: false, message: 'Failed to disconnect serial port' });
    });
});

// Endpoint to fetch the list of serial ports
app.get('/scanbledevice', (req, res) => {
  scanBLE()
    .then((bleDevice) => {
      const targetMacAddress = '[1]D1:79:29:DB:CB:CC';

      // Check if the target device is nearby
      const isNearby = bleDevice.some((line) =>
        line.includes(targetMacAddress)
      );

      // Respond with a message
      if (isNearby) {
        res.json({
          success: true,
          message: `Device ${targetMacAddress} is nearby.`,
        });
      } else {
        res.json({
          success: false,
          message: `Login Failed ! Device ${targetMacAddress} is not nearby.`,
        });
      }
    })
    .catch((err) => {
      console.error('Error during BLE scan:', err);
      res
        .status(500)
        .json({ success: false, message: 'Error fetching BLE devices.' });
    });
});

// Start the server
app.listen(port, () => {
  console.log(`Server is running on http://localhost:${port}`);
});
Step 3: BLE Scanning Logic
The script connects to the BleuIO dongle, configures it, and scans for nearby devices.
script.js:
// script.js
const { SerialPort } = require('serialport');
var firstPort = '';
var readDataArray = [];
var openPort;
// Function to fetch the ble device list
function scanBLE() {
  return new Promise((resolve, reject) => {
    SerialPort.list()
      .then((ports) => {
        //filter ports to get BleuIO path
        // windows
        /* result = ports.filter(
            (portVal) =>
              portVal.pnpId && portVal.pnpId.includes("VID_2DCF&PID_6002")
          ); */
        //Mac
        result = ports.filter(
          (portVal) =>
            portVal.manufacturer &&
            portVal.manufacturer.includes('Smart Sensor Devices')
        );
        // get the first port path of the BleuIO connected to computer
        firstPort = result[0] && result[0].path;
        openPort = new SerialPort({ path: firstPort, baudRate: 115200 });
        // function to read serial port data
        const readData = (dm) => {
          return new Promise((resolve, reject) => {
            openPort.on('readable', () => {
              let data = openPort.read();
              let enc = new TextDecoder();
              let arr = new Uint8Array(data);
              let rawString = enc.decode(arr);

              // Split response into lines and trim extra spaces or empty lines
              let lines = rawString
                .split(/[\r\n]+/)
                .filter((line) => line.trim() !== '');
              readDataArray.push(...lines);

              // Log each line for better readability
              lines.forEach((line) => console.log(line));

              if (rawString.includes(dm)) {
                return resolve(readDataArray);
              } else {
                return resolve(readDataArray);
              }
            });
          });
        };

        // put the dongle to central role
        openPort.write('AT+CENTRAL\r', (err) => {
          if (err) {
            return reject(
              new Error('Error setting dongle to central role ' + err.message)
            );
          } else {
            // Set the RSSI filter
            openPort.write('AT+FRSSI=-56\r', (err) => {
              if (err) {
                return reject(
                  new Error('Error setting RSSI filter ' + err.message)
                );
              } else {
                // Scan for BLE devices for three seconds
                openPort.write('AT+GAPSCAN=3\r', (err) => {
                  if (err) {
                    return reject(
                      new Error('Error initiating BLE scan ' + err.message)
                    );
                  } else {
                    setTimeout(() => {
                      resolve(readData('SCAN COMPLETE'));
                    }, 3500);
                  }
                });
              }
            });
          }
        });
      })
      .catch((err) => {
        console.error('Error listing serial ports:', err);
        reject(err);
      });
  });
}
function disconnectBLE() {
  return new Promise((resolve, reject) => {
    if (openPort && openPort.isOpen) {
      openPort.close((err) => {
        if (err) {
          console.error('Error closing serial port:', err);
          return reject(err);
        }
        console.log('Serial port disconnected.');
        resolve('Disconnected');
      });
    } else {
      console.log('No serial port to disconnect.');
      resolve('No port to disconnect');
    }
  });
}

module.exports = { scanBLE, disconnectBLE };
Full source code is available at github. Source code
Output
This project is an example of how to integrate BleuIO with Node.js to build a BLE-powered secure login system. The source code is available and can be adapted for your use case. Start experimenting with BleuIO today and unlock the potential of BLE in your applications!
Awareness of Air quality monitoring importance for health and productivity has been increasing lately, especially in indoor environments like offices and homes. In this tutorial, we’ll demonstrate how to create a real-time CO₂ monitoring application using Go, a modern programming language with a vibrant community, alongside the BleuIO BLE USB dongle and HibouAir, a BLE-enabled air quality sensor.
This project showcases how to use Go’s simplicity and performance to build an efficient application that scans for CO₂ data, decodes it, and provides real-time notifications on macOS when the CO₂ level exceeds a critical threshold. By using BleuIO’s integrated AT commands, you can focus on your application logic without worrying about complex embedded BLE programming.
Project Overview
The goal of this project is to:
Use BleuIO to scan for BLE advertisements from HibouAir, which broadcasts real-time CO₂ levels.
Decode the advertised data to extract CO₂ concentration.
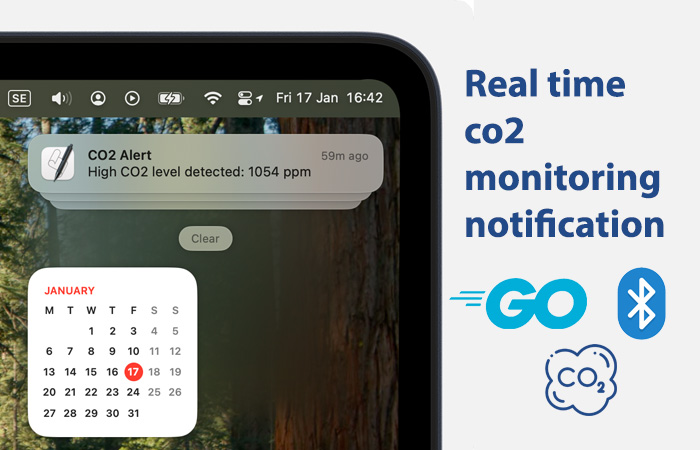
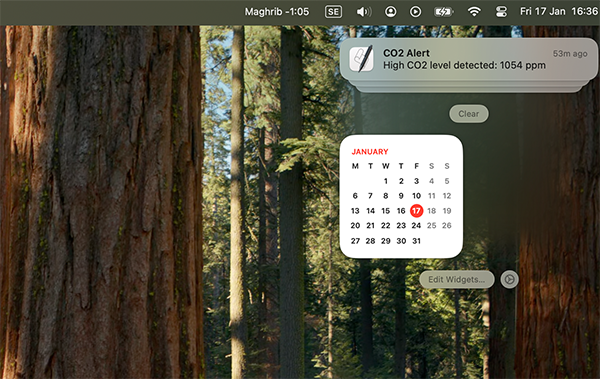
Send a real-time macOS notification when CO₂ levels exceed a specified threshold (1000 ppm in this example).
Notifications are implemented using the macOS osascript utility, ensuring you are immediately alerted about high CO₂ levels on your laptop screen.
Why This Project Is Useful
When you’re focused on work, you might not notice subtle changes in your environment. This application ensures you’re notified directly on your laptop screen when CO₂ levels become unsafe. This is especially helpful for:
Office Workers: Monitor meeting rooms or shared spaces where ventilation may be insufficient.
Remote Workers: Ensure a healthy workspace at home without distractions.
Educational Settings: Keep classrooms or labs safe for students and staff.
Technical Details
Tools and Devices
Programming Language: Go – Chosen for its simplicity, performance, and active community.
BLE USB Dongle: BleuIO – Simplifies BLE communication with built-in AT commands.
CO₂ Monitoring Device: HibouAir – Provides real-time air quality metrics over BLE.
How It Works
Initialize the Dongle:
Set the BleuIO dongle to the central role to enable scanning for BLE devices.
Scan for Advertised Data:
Use the AT+FINDSCANDATA command to scan for HibouAir’s advertisements containing air quality data.
Decode CO₂ Information:
Extract and convert the relevant part of the advertisement to get the CO₂ level in ppm.
Send Notifications:
Use Go’s exec.Command to invoke macOS osascript and display a desktop notification if the CO₂ level exceeds the threshold.
func main() { // Open the serial port mode := &serial.Mode{ BaudRate: 9600, } port, err := serial.Open("/dev/cu.usbmodem4048FDE52CF21", mode) if err != nil { log.Fatalf("Failed to open port: %v", err) } defer port.Close()
// Initial setup: Set the dongle to central mode err = setupDongle(port) if err != nil { log.Fatalf("Failed to set up dongle: %v", err) }
// Repeatedly scan for advertised data and process it for { err := scanAndProcessData(port) if err != nil { log.Printf("Error during scan and process: %v", err) } time.Sleep(10 * time.Second) // Wait before the next scan (interval) } }
// setupDongle sets the dongle to central mode func setupDongle(port serial.Port) error { _, err := port.Write([]byte("AT+CENTRAL\r")) if err != nil { return fmt.Errorf("failed to write AT+CENTRAL: %w", err) } time.Sleep(1 * time.Second) // Ensure the command is processed
buf := make([]byte, 100) _, err = port.Read(buf) if err != nil { return fmt.Errorf("failed to read response from AT+CENTRAL: %w", err) }
fmt.Println("Dongle set to central mode.") return nil }
// scanAndProcessData scans for advertised data and processes it func scanAndProcessData(port serial.Port) error { _, err := port.Write([]byte("AT+FINDSCANDATA=220069=2\r")) if err != nil { return fmt.Errorf("failed to write AT+FINDSCANDATA: %w", err) }
time.Sleep(3 * time.Second) // Wait for scan to complete
buf := make([]byte, 1000) n, err := port.Read(buf) if err != nil { return fmt.Errorf("failed to read scan response: %w", err) }
response := string(buf[:n])
// Extract the first advertised data firstAdvertisedData := extractFirstAdvertisedData(response) if firstAdvertisedData == "" { fmt.Println("No advertised data found.") return nil }
// Extract the specific part (6th from last to 3rd from last) and convert to decimal if len(firstAdvertisedData) >= 6 { extractedHex := firstAdvertisedData[len(firstAdvertisedData)-6 : len(firstAdvertisedData)-2]
decimalValue, err := strconv.ParseInt(extractedHex, 16, 64) if err != nil { return fmt.Errorf("failed to convert hex to decimal: %w", err) } fmt.Printf("CO₂ Value: %d ppm\n", decimalValue)
// Send notification if CO₂ value exceeds 1000 if decimalValue > 1000 { sendNotification("CO₂ Alert", fmt.Sprintf("High CO₂ level detected: %d ppm", decimalValue)) } } else { fmt.Println("Advertised data is too short to extract the desired part.") } return nil }
// extractFirstAdvertisedData extracts the first advertised data from the response func extractFirstAdvertisedData(response string) string { scanner := bufio.NewScanner(strings.NewReader(response)) for scanner.Scan() { line := scanner.Text() if strings.Contains(line, "Device Data [ADV]:") { parts := strings.Split(line, ": ") if len(parts) > 1 { return parts[1] } } } if err := scanner.Err(); err != nil { log.Printf("Error scanning response: %v", err) } return "" }
// sendNotification sends a macOS notification with the specified title and message func sendNotification(title, message string) { script := `display notification "` + message + `" with title "` + title + `"` cmd := exec.Command("osascript", "-e", script) err := cmd.Run() if err != nil { log.Printf("Error sending notification: %v", err) } }
This project demonstrates how to build a real-time CO₂ monitoring application using Go, BleuIO, and HibouAir. By using Go’s capabilities and BleuIO’s ease of use, you can focus on the logic of your application and quickly adapt the solution to your specific needs.
We want to take a moment to thank all our customers for their continued support and trust in our products. BleuIO has been an integral part of many innovative projects, and we are committed to maintaining the high quality and reliability that our users expect.
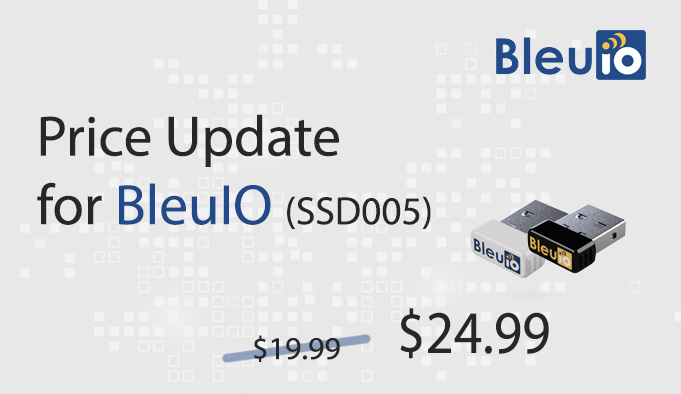
As we welcome the New Year 2025, we want to inform you of an upcoming adjustment to the price of our BleuIO unit (part number SSD005).
Starting January 20, 2025, the price will be updated from $19.99 to $24.99.
This decision was made due to the rising costs we have experienced over the past years. Despite these challenges, we have worked hard to keep our prices competitive while continuing to deliver top-quality products.
We remain dedicated to providing value and innovation through our offerings. This adjustment will allow us to sustain our commitment to quality, customer service, and product enhancements in the years ahead.
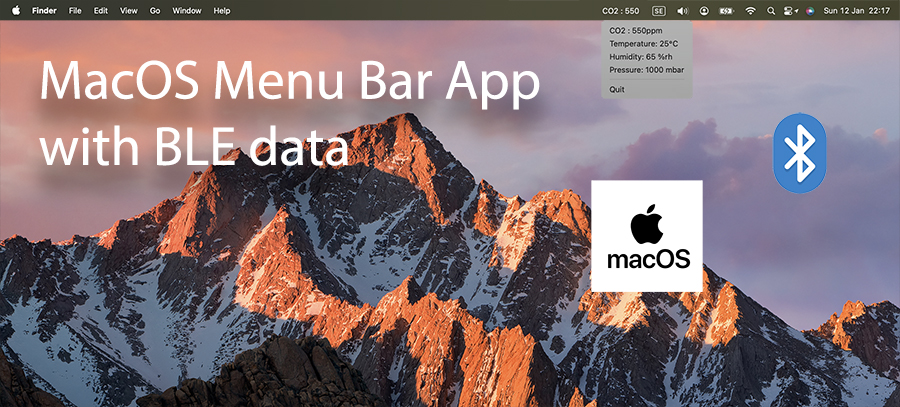
In this tutorial, we will guide you through creating a BLE real-time macOS menu bar application using the BleuIO USB BLE dongle. BleuIO is an incredibly versatile tool that simplifies the development of BLE (Bluetooth Low Energy) applications, making it ideal for developers looking to build innovative projects with ease.
macOS menu bar applications offer a seamless way to monitor and interact with data in real time without requiring a dedicated application window. By leveraging the power of the BleuIO dongle, we can create a menu bar app that provides live updates on environmental metrics like temperature, humidity, and CO2 levels. This project demonstrates how BleuIO can be integrated into real-time applications, showcasing its potential for BLE-based projects.
Why is This Project Useful?
Real-Time Updates: The app fetches BLE data at regular intervals and updates the macOS menu bar dynamically.
Ease of Access: The macOS menu bar provides a non-intrusive interface, allowing users to access live data at a glance.
Extensibility: This tutorial serves as a starting point for developers to explore more advanced BLE applications with BleuIO.
Requirements
To complete this project, you will need:
BleuIO USB BLE Dongle: A powerful and easy-to-use BLE dongle for developing BLE applications.
HibouAir – Air Quality Monitor: A BLE-enabled air quality monitor that broadcasts real-time environmental data such as temperature,pressure,voc,light, humidity, and CO2 levels.
macOS System: A macOS device with Python 3 installed.
Python Libraries:
rumps: For creating macOS menu bar applications.
bleuio: For communicating with the BleuIO dongle.
How Real-Time Updates Are Handled
The app connects to the BleuIO dongle and scans for BLE advertisements air quality data from HibouAir. Using a timer, the app periodically initiates a scan every 2 minutes. The decoded data is then displayed directly in the macOS menu bar, providing real-time updates without user intervention.
Step-by-Step Guide
Step 1: Set Up the Environment
Ensure you have a macOS system with Python 3 installed.
Install the necessary dependencies using pip: pip install rumps bleuio
Plug in your BleuIO USB dongle.
Step 2: Project Overview
Our goal is to:
Connect to the BleuIO dongle.
Put the dongle in Central Mode to scan for BLE advertisements.
Scan for real time air quality data from HibouAir
Decode the advertisement data to extract temperature, humidity, pressure, and CO2 levels.
Update the macOS menu bar with the decoded data in real time.
Step 3: Writing the Code
Below is the Python script for the macOS menu bar app. This code handles the dongle initialization, data scanning, decoding, and menu updates.
import rumps
import time
import json
from datetime import datetime
from bleuio_lib.bleuio_funcs import BleuIO
boardID="220069"

# Function to decode advertisement data
def adv_data_decode(adv):
    try:
        pos = adv.find("5B0705")
        if pos == -1:
            raise ValueError("Invalid advertisement data: '5B0705' not found.")

        dt = datetime.now()
        current_ts = dt.strftime("%Y/%m/%d %H:%M:%S")

        # Temperature decoding
        temp_hex = int(adv[pos + 22:pos + 26][::-1], 16)  # Reversed bytes
        if temp_hex > 1000:
            temp_hex = (temp_hex - (65535 + 1)) / 10
        else:
            temp_hex = temp_hex / 10

        # Pressure decoding (convert from little-endian)
        pressure_bytes = bytes.fromhex(adv[pos + 18:pos + 22])
        pressure = int.from_bytes(pressure_bytes, byteorder='little') / 10

        # Humidity decoding (convert from little-endian)
        humidity_bytes = bytes.fromhex(adv[pos + 26:pos + 30])
        humidity = int.from_bytes(humidity_bytes, byteorder='little') / 10

        return {
            "boardID": adv[pos + 8:pos + 14],
            "pressure": pressure,
            "temp": temp_hex,
            "hum": humidity,
            "co2": int(adv[pos + 46:pos + 50], 16),
            "ts": current_ts,
        }
    except Exception as e:
        print(f"Error decoding advertisement data: {e}")
        return {}


# Callback function for scan results
def my_scan_callback(scan_input):
    try:
        scan_result = json.loads(scan_input[0])
        data = scan_result.get("data", "")

        decoded_data = adv_data_decode(data)

        # Update menu with decoded data
        app.update_menu(decoded_data)

    except Exception as e:
        print(f"Error parsing scan result: {e}")

# Callback function for events
def my_evt_callback(evt_input):
    cbTime = datetime.now()
    currentTime = cbTime.strftime("%H:%M:%S")
    print(f"\n\n[{currentTime}] Event: {evt_input}")

class AirQualityApp(rumps.App):
    def __init__(self):
        super(AirQualityApp, self).__init__("CO2 : 550")
        self.my_dongle = None  # Placeholder for the dongle object
        self.co2_item = rumps.MenuItem(title="CO2 : 550ppm", callback=lambda _: None)
        self.temp_item = rumps.MenuItem(title="Temperature: 25°C", callback=lambda _: None)
        self.hum_item = rumps.MenuItem(title="Humidity: 65 %rh", callback=lambda _: None)
        self.press_item = rumps.MenuItem(title="Pressure: 1000 mbar", callback=lambda _: None)

        self.menu = [
            self.co2_item,
            self.temp_item,
            self.hum_item,
            self.press_item,
            None  # Separator
        ]

        # Establish connection and start scanning on startup
        self.connect_dongle()
        self.start_periodic_scan()

    def connect_dongle(self):
        try:
            self.my_dongle = BleuIO()  # Initialize the dongle
            self.my_dongle.register_evt_cb(my_evt_callback)  # Register event callback
            self.my_dongle.register_scan_cb(my_scan_callback)  # Register scan callback
            print("Dongle connected successfully.")

            # Set the dongle to central mode
            response = self.my_dongle.at_central()
            print("Dongle is now in central mode.")

        except Exception as e:
            print(f"Error connecting to dongle: {e}")

    def scan(self, _=None):  # Added `_` to accept the timer argument
        try:
            # Start scanning for specific data
            response = self.my_dongle.at_findscandata(boardID, 3)
            print(f"Scan initiated. Response: {response.Rsp}")
        except Exception as e:
            print(f"Error during scan: {e}")

    def start_periodic_scan(self):
        try:
            rumps.timer(120)(self.scan)  # Run the scan method every 30 seconds
        except Exception as e:
            print(f"Error setting up periodic scan: {e}")

    def update_menu(self, decoded_data):
        try:
            self.title = f"CO2 : {decoded_data.get('co2', 'N/A')}ppm"  # Update app title
            self.co2_item.title = f"CO2 : {decoded_data.get('co2', 'N/A')}ppm"
            self.temp_item.title = f"Temperature: {decoded_data.get('temp', 'N/A')}°C"
            self.hum_item.title = f"Humidity: {decoded_data.get('hum', 'N/A')} %rh"
            self.press_item.title = f"Pressure: {decoded_data.get('pressure', 'N/A')} mbar"
        except Exception as e:
            print(f"Error updating menu: {e}")

if __name__ == "__main__":
    app = AirQualityApp()
    app.run()
Note : Make sure to change the BoardID to your HibouAir CO2 device on line 6
Step 4: Run the App
Save the script as bleuio.py.
Run the script using: python bleuio.py
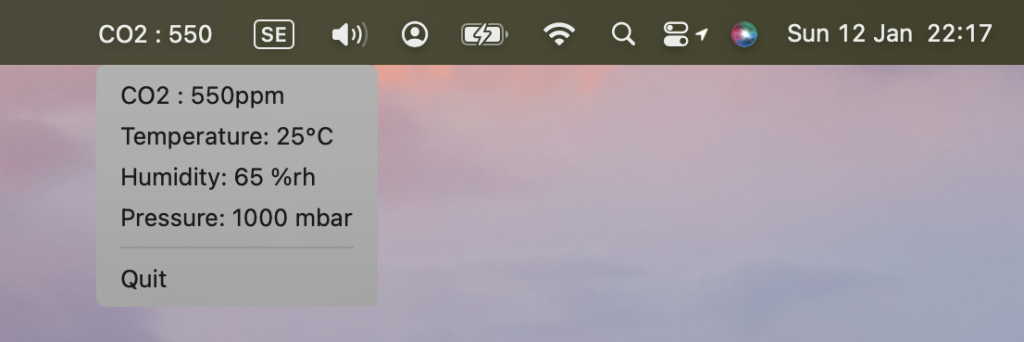
The app will appear in the macOS menu bar with latest CO2 value. Click the icon to view the live BLE data updates.
Output
Extending the Project
This project is a foundation for exploring the capabilities of BleuIO. You can extend it to:
Monitor additional BLE devices.
Implement alert notifications for specific data thresholds.
Log the data to a file or send it to a cloud service for further analysis.
This tutorial demonstrates how to create a real-time macOS menu bar application using the BleuIO dongle. By following this guide, you’ll not only learn how to handle BLE data but also understand how to integrate it into user-friendly macOS applications. BleuIO opens up endless possibilities for BLE-based projects, and we’re excited to see what you create next!
The BleuIO JavaScript library has received another exciting update, now moving to version 1.1.3 supporting BleuIO Firmware v2.7.7. This release continues to expand the library’s capabilities and ensures compatibility with the latest BleuIO firmware.
Here’s a breakdown of the key new commands introduced in version 1.1.3:
at_connectbond(): This function enables scanning for and initiating a connection with a selected bonded device, even if the peer bonded device is advertising with a Private Random Resolvable Address.
Example: at_connectbond('40:48:FD:EA:E8:38')
at_sra(): This command toggles verbose scan result indexing on or off.
1 for on, 0 for off.
Example: at_sra(1)
at_siv(): Similar to at_sra(), this command toggles verbose scan result indexing on or off.
1 for on, 0 for off.
Example: at_siv(1)
at_assn(): Enables or disables displaying device names in scan results from AT+FINDSCANDATA and AT+SCANTARGET scans (off by default).
1 for on, 0 for off.
Example: at_assn(1)
at_assm(): Turns on or off showing the Manufacturing Specific ID (Company ID) in scan results from AT+GAPSCAN, AT+FINDSCANDATA, and AT+SCANTARGET scans (off by default).
1 for on, 0 for off.
Example: at_assm(1)
at_connscanparam(): Allows setting or querying the connection scan window and interval used.
Example: at_connscanparam('200=100')
Refer to the BleuIO documentation for more details on AT+CONNSCANPARAM.
at_scanparam(): Enables setting or querying scan parameters.
Example: at_scanparam('2=0=200=100=0')
Detailed usage can be found in the BleuIO documentation under AT+SCANPARAM.
at_sat(): Turns on or off showing address types in scan results from AT+FINDSCANDATA and AT+SCANTARGET scans (off by default).
1 for on, 0 for off.
Example: at_sat(1)
at_setuoi(): Allows setting a Unique Organization ID, which is stored in flash memory and persists through power cycles. The ID is displayed in the response of the ATI command. Any previously set ID is cleared when a new one is set.
Max length: 100 characters.
Example: at_setuoi('Your Unique Organization ID')
at_clruoi(): Clears any previously set Unique Organization ID.
How to Update
Updating to the BleuIO JavaScript library 1.1.3 is straightforward. Use the following command to install the latest version:
npm i bleuio
Documentation and Further Details
For comprehensive documentation, usage examples, and detailed guidelines on the new functionalities introduced in version 1.1.3, visit the official NPM page: BleuIO NPM Page.
This update solidifies BleuIO’s commitment to providing robust tools for BLE development. Explore the new features and enhance your Bluetooth Low Energy projects with greater customization and efficiency.
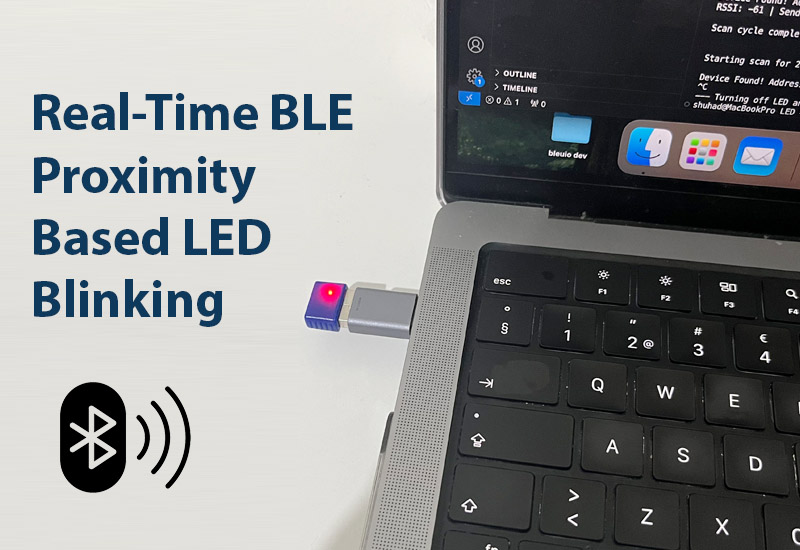
BleuIO, a versatile BLE USB dongle, simplifies BLE application development with its powerful AT commands and cross-platform compatibility. This tutorial demonstrates how to use BleuIO with Python to build a real-time BLE proximity-based LED control system.
In this example, we focus on monitoring the RSSI (Received Signal Strength Indicator) of a specific BLE device and controlling the LED blinking rate of BleuIO based on proximity. The closer the device, the faster the blinking rate. The script also ensures clean termination, turning off the LED when the program exits.
This tutorial uses the BleuIO Python library to showcase a practical use case. However, the concepts can be implemented in any programming language.
Graceful Termination: The script turns off the LED when terminated with Ctrl + C.
Output
This example demonstrates how easy it is to use BleuIO for BLE applications. Whether you’re building proximity-based solutions or exploring BLE capabilities, BleuIO’s AT commands and Python library make it simple to get started.
Take this script, adapt it to your needs, and unlock the potential of BLE with BleuIO!
We’re excited to announce the release of new firmware updates for our popular BleuIO and BleuIO Pro Bluetooth Low Energy USB dongles. These updates focus on improving the stability and performance of the devices while addressing some critical bugs reported by our users.
With these firmware releases, both BleuIO and BleuIO Pro are now better equipped to handle connection and scan operations, ensuring a smoother experience for developers building Bluetooth Low Energy (BLE) applications.
BleuIO Pro Firmware v1.0.2
The latest firmware for BleuIO Pro brings significant stability improvements and important bug fixes.
Key Updates
Stability Improvements:
Improved general stability for more consistent performance.
Enhanced stability during connection and scan operations.
Bug Fixes:
Resolved issues with incorrectly formatted verbose responses.
Fixed a bug where notifications/indications and GATT read operation responses would be cut off if they exceeded a certain length.
Fixed an issue where advertising would not automatically restart after a disconnection in verbose mode.
These improvements ensure a seamless experience for developers using BleuIO Pro in their BLE projects, whether for scanning devices, establishing connections, or maintaining robust advertising.
BleuIO Firmware v2.7.7
The new firmware for BleuIO focuses on improving the dongle’s overall stability and addressing bugs that could hinder performance.
Key Updates
Stability Improvements:
Enhanced general stability for day-to-day operations.
Improved connection and scan stability to ensure reliable performance during development and testing.
Bug Fixes:
Resolved issues with incorrectly formatted verbose responses.
These updates further solidify BleuIO as a reliable solution for developers working on BLE applications across various platforms.
How to Update Your Firmware
To take advantage of these updates, download the latest firmware from our firmware page. Ensure you select the correct firmware for your device—BleuIO or BleuIO Pro.
We’ve included a detailed step-by-step guide on the firmware page to make the update process simple and straightforward.
We encourage all users to update their firmware to the latest version to benefit from these stability improvements and bug fixes.
Renesas, a global leader in semiconductor solutions, has highlighted our Bluetooth Low Energy (BLE) USB dongle BleuIO in their Success Stories section. This recognition is a testament to the innovation and dedication behind BleuIO, making it easier for developers to create BLE applications.
A Seamless Way to Add Bluetooth Connectivity
In their feature titled A Seamless Way to Add Bluetooth Low Energy Connectivity to IoT Devices, Renesas acknowledges BleuIO’s plug-and-play simplicity and versatility. Built around Renesas’ SmartBond™ DA14695 Bluetooth chip, BleuIO helps developers to create secure and efficient BLE 5.2 applications with minimal effort. Whether you’re a beginner or an experienced developer, BleuIO eliminates complexities, allowing you to focus on your application logic.
Driving Innovation with Renesas
Renesas’ support has been instrumental in BleuIO’s success. Their contributions have enabled us to deliver a product that meets the highest standards of performance and reliability. As highlighted in their article, our partnership with Renesas has helped us scale globally, reaching new markets and delivering innovative solutions to our customers.
Read the full article on Renesas’ website here and discover how BleuIO can empower your IoT projects.
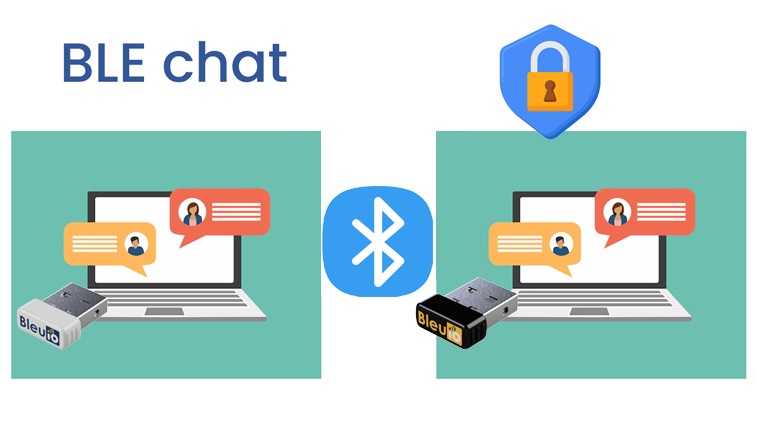
Bluetooth Low Energy (BLE) has become a core technology in the modern world, enabling secure and efficient communication for IoT devices, wearables, healthcare gadgets, and more. One of the fascinating applications of BLE is in creating private communication systems. In this tutorial, we will explore how to create a BLE chat application using the BleuIO USB dongle, a powerful yet simple device for BLE application development.
Why This Project?
With increasing concerns about privacy, BLE chat offers a solution that keeps communication entirely local. Unlike internet-based messaging systems, BLE chat does not rely on servers or cloud storage, ensuring that no data leaves your devices. This project demonstrates a simple prototype of such a BLE-based communication system.
How It Works
The project involves two laptops, each connected to a BleuIO USB dongle. For simplicity, we designate one laptop as User 1 (Central role) and the other as User 2 (Peripheral role). Here’s a high-level breakdown of the workflow:
Setup: Each laptop runs a script to initialize its BleuIO dongle. User 1 starts in a dual role and acts as the central device. User 2 also sets its dongle in a dual role but begins advertising itself.
Connection: Once User 2 starts advertising, it displays its MAC address. User 1 uses this MAC address to connect to User 2.
Messaging: After establishing a connection, the users can send and receive messages in real time. The communication is direct and local, with no reliance on external servers.
Setting Up the Project
The source code for this project is available on GitHub: BLE Chat Source Code. You can explore, experiment, and build on it to fit your needs.
Steps to Set Up the Project:
Clone the Repository Open a terminal on both computers and run git clone https://github.com/smart-sensor-devices-ab/ble-chat.git
Install Dependencies Navigate to the project directory and install the required Node.js dependencies cd ble-chat npm install
Run the Server Start the server by running node server.js Ensure the server is running on both computers. The terminal should display messages confirming the dongle is detected.
Running the Scripts
Once the servers are running on both computers, follow these steps to use the BLE chat application:
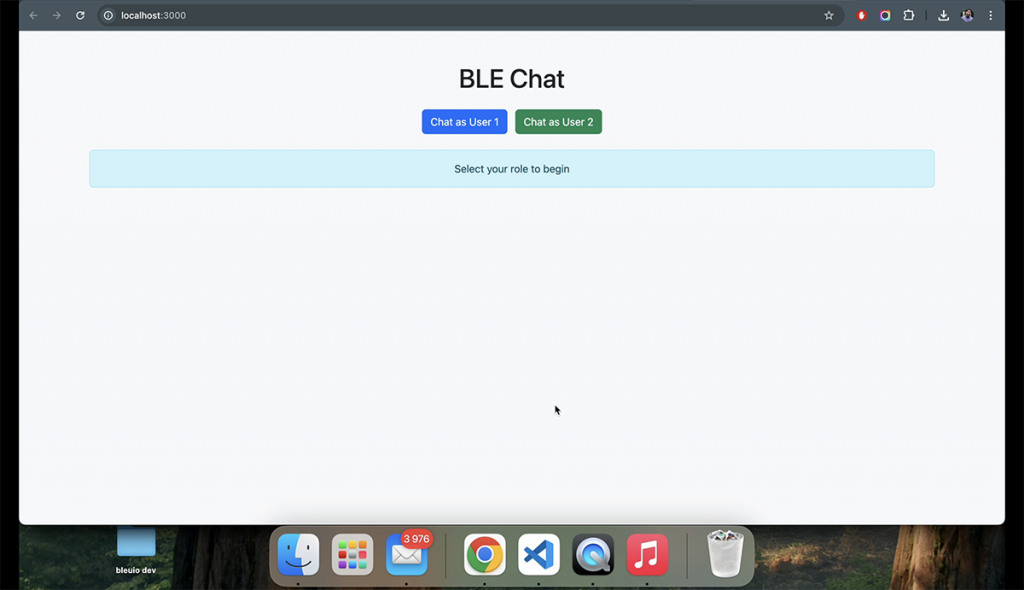
User 1 Setup:
Open the browser and navigate to http://localhost:3000.
Click “Chat as User 1.” This will initialize the BleuIO dongle in dual role mode.
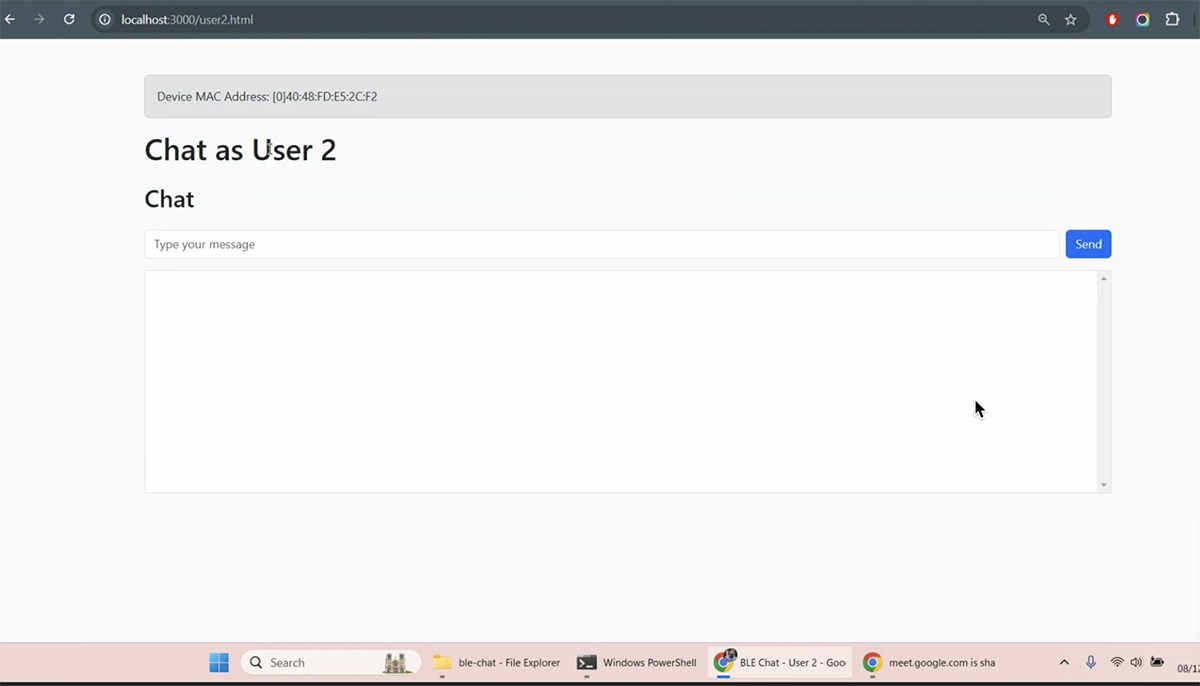
User 2 Setup:
On the second computer, open the browser and navigate to http://localhost:3000.
Click “Chat as User 2.” This will initialize the BleuIO dongle in dual role mode and start advertising. You’ll also see the MAC address of the dongle displayed on the screen.
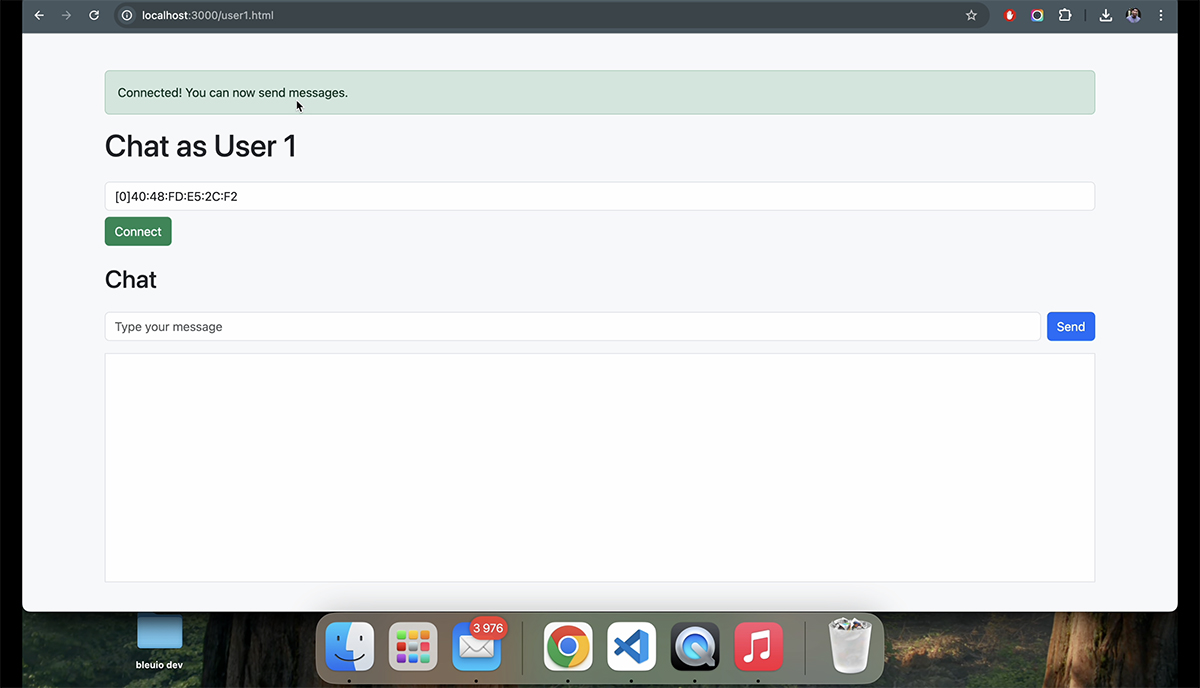
Connecting the Devices:
Copy the MAC address from User 2’s screen and enter it on User 1’s screen in the provided input field.
Click “Connect” on User 1. Once the connection is established, you’ll see a confirmation message.
Start Chatting:
Use the chat interface on both devices to send messages back and forth. Messages sent from one device will instantly appear on the other device’s screen.
Output
In the video below, we demonstrate how this project works with two BleuIO dongles connected to two different computers. To provide a complete view, we are sharing the screen of the second computer to showcase how the chat functions in real-time.
Use Cases for BLE Chat
The BLE chat prototype we’ve created can inspire real-world applications. Here are some potential use cases:
Secure Local Communication: BLE chat can be used for private messaging within offices, factories, or homes without the need for internet connectivity.
Education Projects: BLE chat can be a great project for students learning about BLE technology and its applications.
Why Choose BleuIO for Your BLE Projects?
The BleuIO USB dongle makes BLE application development accessible for everyone, from beginners to advanced developers. Its built-in AT commands allow you to quickly prototype applications without diving into complex BLE stacks or SDKs. Whether you’re working on a small hobby project or an enterprise-level IoT solution, BleuIO provides the tools you need.
Here are some standout features of BleuIO:
Cross-Platform Compatibility: Works seamlessly on Windows, macOS, and Linux.
Simple AT Commands: No need for extensive coding; just use the built-in commands to control the dongle.
Lightweight and Portable: Easy to carry and set up for on-the-go development.
This BLE chat application demonstrates the power and simplicity of BLE communication using the BleuIO USB dongle. While it’s a prototype, it showcases how BLE can enable private, secure, and efficient messaging without relying on external networks.
If you’re interested in exploring this further, the source code for the project is available. You can modify and extend it to fit your specific needs. With BleuIO, the possibilities are endless.
Order Your BleuIO USB Dongle Today! Ready to create your own BLE applications? Visit BleuIO’s to learn more and order your dongle today.