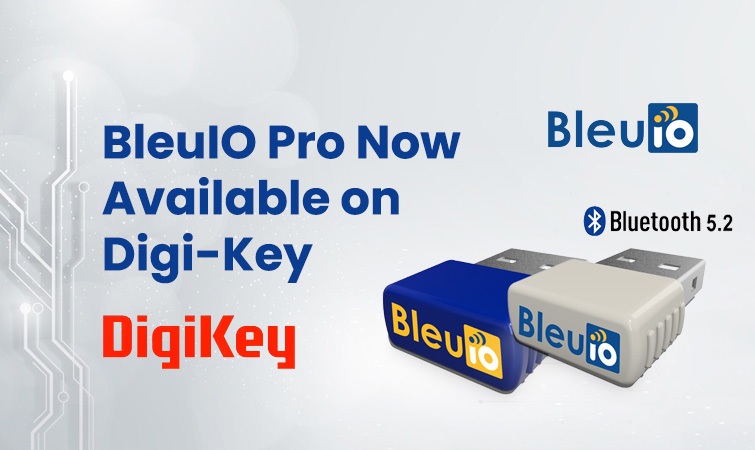
Stockholm, Sweden – Smart Sensor Devices, a leading innovator in IOT and Bluetooth Low Energy (BLE) solutions, is thrilled to announce the availability of its flagship product, BleuIO Pro, on Digi-Key, one of the world’s largest distributors of electronic components. This strategic move will provide global access to the BleuIO Pro, enabling developers worldwide to effortlessly enhance their BLE applications using Bluetooth 5.2 technology.
The BleuIO Pro is the latest addition to the BleuIO product line, designed specifically for developers working on advanced BLE applications. With support for Bluetooth 5.2, the BleuIO Pro offers improved data transfer speeds, extended range, and enhanced performance, making it the ideal tool for complex IoT, smart home, healthcare, and industrial BLE projects.
“Making the BleuIO Pro available on Digi-Key expands our reach and provides developers across the globe with easy access to the latest in Bluetooth Low Energy technology,” said Axel Hammar, CEO of Smart Sensor Devices. “We are committed to supporting innovation in BLE development, and the BleuIO Pro is a key part of that mission, offering the performance and flexibility needed to bring solutions to life.”
A Commitment to Global Innovation
By partnering with Digi-Key, Smart Sensor Devices ensures that the BleuIO Pro is readily accessible to developers in every corner of the world. With Digi-Key’s established distribution network, the BleuIO Pro can now be purchased quickly and easily, with dependable international shipping and top-tier customer support.
Availability
The BleuIO Pro is now available for purchase through Digi-Key and can also be found on the BleuIO website at www.bleuio.com. With this launch, developers now have an even more convenient way to access one of the most advanced BLE dongles on the market.
About Smart Sensor Devices
Smart Sensor Devices is a leading solution provider of IOT and Bluetooth Low Energy (BLE), specializing in providing powerful, easy-to-use tools for BLE application development. The company’s products, including HibouAir and BleuIO series, help developers create innovative and efficient solutions across various industries, including IoT, healthcare, automotive, and smart home technologies. The company was founded by Axel Hammar, who serves as the CEO.
For more information on the BleuIO Pro and other products, visit www.bleuio.com.
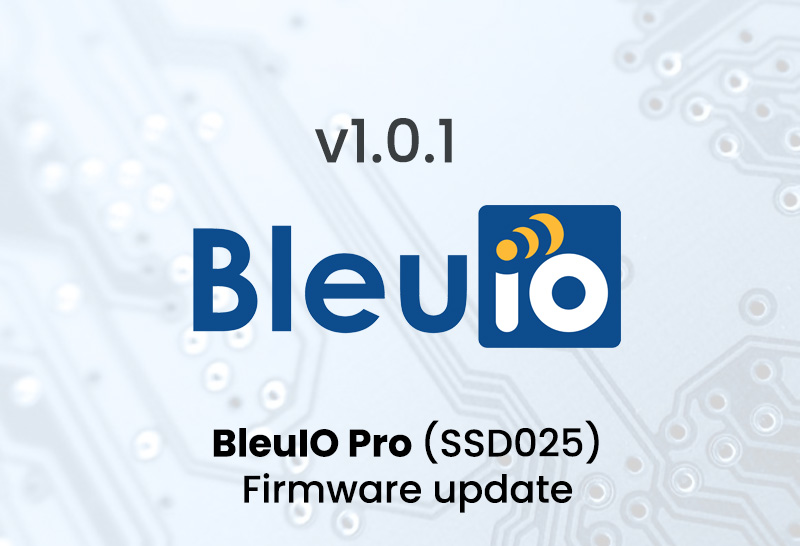
We are excited to announce the release of BleuIO Pro (SSD005) Firmware v1.0.1. This latest update brings several new features, enhancements, and bug fixes, ensuring a more stable and flexible experience for developers using the BleuIO Pro (SSD025) device. Below, we’ll explore the key highlights of this update and how it will improve your BLE application development.
Key Features in Firmware v1.0.1
1. Integration of Commands from BleuIO Versions 2.7.5 and 2.7.6
One of the most significant additions to BleuIO Pro firmware v1.0.1 is the inclusion of commands from BleuIO versions 2.7.5 and 2.7.6. This means BleuIO Pro is now fully up to date with the latest functionality available in the BleuIO series, while also maintaining exclusive commands that are specific to the Pro model.
2. Unique Organization ID (UOI) Support
With this update, BleuIO Pro introduces the ability to set a Unique Organization ID (UOI). This ID will be stored in the device’s flash memory, ensuring it persists even after power cycles. The Unique Organization ID can be displayed in the ATI command response if it is set, providing a simple and effective way for developers to manage and identify their devices across larger projects or multiple devices.
3. Extended ASCII Character Support
As part of our continued effort to enhance the functionality and versatility of BleuIO Pro, this firmware update includes support for Extended ASCII characters. This change allows for the handling of a broader range of characters, expanding the potential use cases for your BLE applications.
4. Device Address Type Command (ATSAT)
Firmware v1.0.1 introduces a new command, ATSAT, which allows developers to toggle the visibility of the device’s address type in the advertising data/scan responses. This feature applies to the AT+FINDSCANDATA and AT+SCANTARGET commands, as well as the AT+GAPSCAN command, which will always show the device address type. This added flexibility allows developers to easily track whether devices are using a Private or Public address type, making it easier to manage multiple devices in your BLE applications.
5. Enhanced Bonded Device Storage
One of the significant improvements in this update is the increased storage capacity for bonded devices. Previously, BleuIO Pro could store information for up to 8 bonded devices. With the v1.0.1 update, this number has been expanded to 16 devices. When the number of bonded devices exceeds 16, the firmware will automatically remove the first device in the list that is not currently connected, ensuring that bonding can continue seamlessly. This improvement ensures that BleuIO Pro can handle larger device networks, especially in scenarios with multiple connections.
New Commands in Firmware v1.0.1
Along with the new features, firmware v1.0.1 introduces several important commands:
AT+SETUOI – Set the Unique Organization ID, which will be stored in flash memory and persist through power cycles.
AT+CLRUOI – Clear any set Unique Organization ID.
ATSAT – Toggle the visibility of the device address type in scan results for AT+FINDSCANDATA and AT+SCANTARGET.
These commands offer greater control over device management, especially in environments with many BLE devices.
Bug Fixes in v1.0.1
Firmware updates aren’t just about adding new features – they also address known issues to improve the overall stability and performance of the device. In v1.0.1, we’ve resolved several bugs that impacted the performance of BleuIO Pro:
Device Reset During Scanning: A bug has been fixed where BleuIO Pro would reset when scanning and connecting to two or more devices, especially during a disconnection event.
Command Handling Improvements: Several fixes have been implemented for commands that require parameters. Previously, some commands would cause BleuIO Pro to reset if parameters were not provided, especially immediately after boot. This issue has now been resolved.
Error Handling for String Parameters: We’ve fixed a bug that caused errors when certain commands with string parameters, such as AT+DEVICENAME, AT+SCANPARAM=NAME, and AT+SETUOI, included an equal sign (=) within the string.
AT+AUTOEXEC Command Fix: The AT+AUTOEXEC command, which failed to execute in certain cases, is now fully operational.
How to Update Your BleuIO Pro
To take advantage of the new features and bug fixes in firmware v1.0.1, simplydownload the latest firmwarefrom our website and follow the provided update instructions. We recommend upgrading to the latest version to ensure your device is running optimally and to access the newest functionality available.
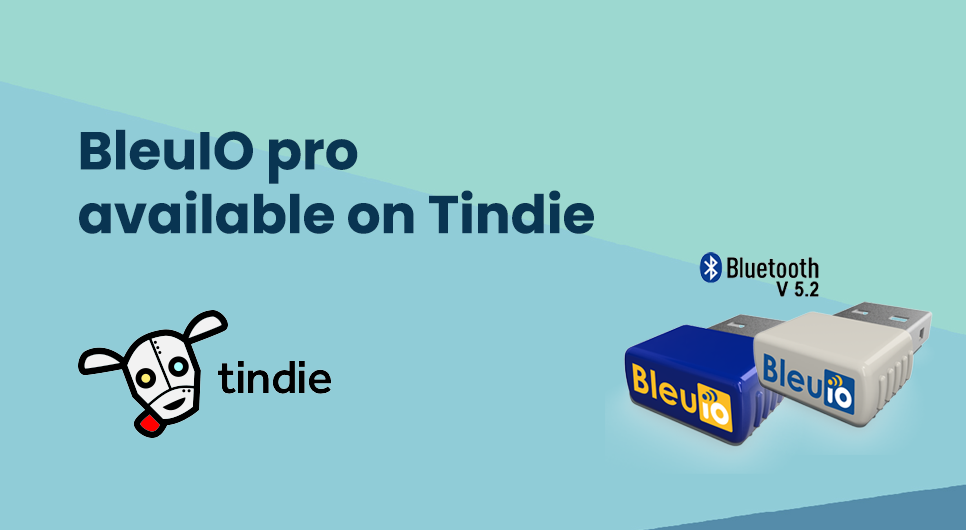
We are excited to announce that our BleuIO Pro (SSD025) is now available for purchase on Tindie, the premier marketplace for innovative electronic products. This marks a significant milestone as it expands accessibility for developers seeking easy-to-use solutions for Bluetooth Low Energy (BLE) application development.
In addition to the BleuIO Pro, our standard BleuIO (SSD005), which was listed earlier, is also available on Tindie. Both products aim to simplify BLE application development by providing an efficient and developer-friendly experience with the help of built-in AT commands.
Introducing BleuIO Pro (SSD025)
The BleuIO Pro builds on the capabilities of BleuIO by introducing enhanced features tailored for advanced development projects. With improved performance and additional support for demanding BLE applications, BleuIO Pro is perfect for developers looking to create robust and scalable BLE solutions.
Whether you’re working on IoT projects, industrial automation, or custom BLE devices, the BleuIO Pro provides the tools and flexibility required to bring your ideas to life.
Why Tindie?
Tindie is a trusted marketplace for unique electronic products and development tools. By listing both BleuIO and BleuIO Pro on Tindie, we aim to make these tools more accessible to developers worldwide. With Tindie’s shopping experience, finding the right BLE development dongle for your project has never been easier.
Visit the BleuIO store today on Tindie to order your desired BleuIO product.
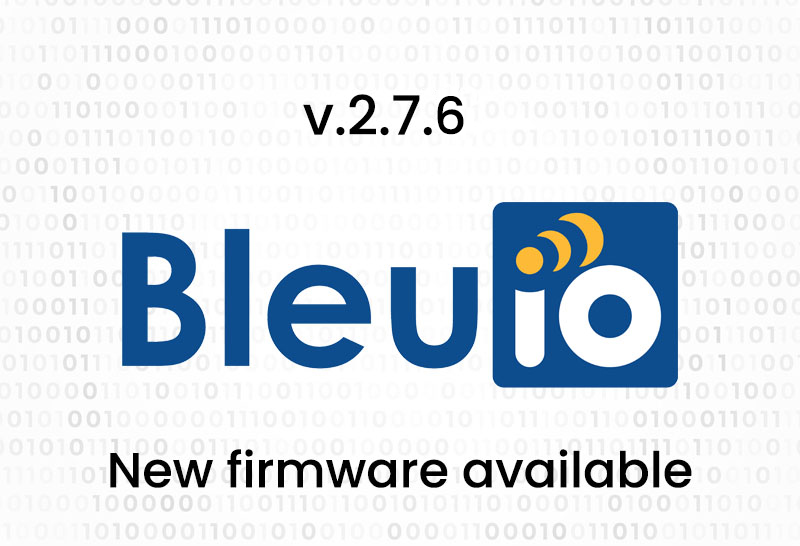
We are excited to announce the release of BleuIO firmware version 2.7.6!
This update brings important new features, bug fixes, and enhanced functionality that will make BLE application development even smoother. Here’s a breakdown of what’s included in this latest release:
New Features in v2.7.6
Unique Organization ID A key new feature in this update is the ability to set a Unique Organization ID (UOI). This ID will be stored in the device’s flash memory, allowing it to persist through power cycles. If the Unique Organization ID is set, it will be displayed in the response to the ATI command. This is particularly useful for users managing multiple BLE devices, as it helps uniquely identify each device by the organization. The Unique Organization ID can also be cleared as needed.
Support for Extended ASCII Characters BleuIO now handles Extended ASCII characters, broadening the range of compatible inputs for developers. This improvement enhances the device’s ability to handle more complex data and increases flexibility when working with BLE communication.
New Commands
With this firmware update, two new commands have been introduced to set and clear the Unique Organization ID:
AT+SETUOI – Set Unique Organization ID This command allows you to set a Unique Organization ID, which will be saved in flash memory and persist through power cycles. When set, the Unique Organization ID will be displayed in the response to the ATI command. You can set a Unique Organization ID up to 100 characters in length.
AT+CLRUOI – Clear Unique Organization ID If you need to clear the Unique Organization ID that was previously set, this command will allow you to do so. It removes the ID and resets the field to its default state.
Bug Fixes
Fixed Stability Issue During Device Connections A bug has been fixed in this update where BleuIO would reset when connected to two or more devices while scanning, especially when a disconnection event occurred. This issue could cause instability and interrupts during device connections. With the release of v2.7.6, this problem has been resolved, ensuring smoother operation when connecting to multiple BLE devices.
How to Update
Visit our firmware download page to access the latest firmware and ensure your BleuIO device benefits from these enhanced capabilities. Be sure to select the correct firmware version for your device model—BleuIO or BleuIO Pro—before downloading.
This update makes BleuIO more powerful, with improved stability and added flexibility for developers. The new Unique Organization ID feature and Extended ASCII support will certainly enhance the way you can use BleuIO in your projects. If you haven’t already, be sure to download the latest firmware and take advantage of these exciting new features!
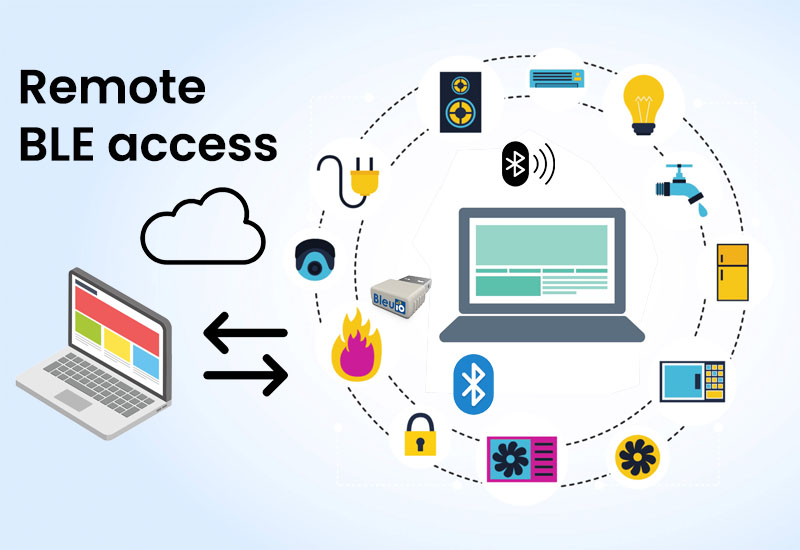
This article will discuss about accessing a Bluetooth Low Energy (BLE) device—specifically the BleuIO BLE USB dongle—from a cloud-based computer. This setup is invaluable for developers, researchers, and organizations that need to control or monitor BLE devices located in remote or hard-to-reach locations. We will explain how to set up both local and cloud servers, and how to establish a secure connection between them, allowing you to send commands and receive data from a remote BLE device with ease.
Why Do We Need Remote Access to BLE Devices?
Remote access to BLE devices opens up new possibilities in IoT, distributed applications, and various remote monitoring and management scenarios. Here are a few key use cases where this approach can be especially beneficial:
Remote Device Monitoring: In scenarios where BLE devices like sensors or trackers are deployed in different physical locations—such as environmental monitoring stations, healthcare devices in hospitals, or industrial sensors in manufacturing facilities—remote access allows centralized monitoring and control. For example, an environmental monitoring company could deploy BLE sensors in different regions and access data from all devices from a single central hub.
Distributed Development and Testing: Developers and QA engineers can use remote access for testing and debugging BLE applications from any location, without needing to be physically near the BLE devices. This is particularly useful for teams working on IoT applications who want to test BLE functionality across different device types or networks. For instance, a developer could work on BLE application features from home, while the test device is connected to a machine in the office.
Centralized Management of BLE Devices: Organizations that manage multiple BLE devices across various locations, such as in retail stores, hospitals, or warehouses, can benefit from a centralized server setup to communicate with and manage all devices remotely. A central server could send updates, retrieve data, or manage configurations for multiple BLE devices, providing an efficient and scalable solution for distributed IoT applications.
Remote Troubleshooting and Maintenance: For businesses that deploy BLE devices at customer sites or in field locations, remote access allows technical support teams to troubleshoot issues without requiring on-site visits. This can reduce downtime and improve customer satisfaction. For example, a support technician could diagnose issues with a BLE-enabled device at a remote client site, identifying and resolving problems directly from the company’s central office.
By using BleuIO with AT commands, we make BLE application development much simpler and more accessible. The BleuIO dongle is compatible with Windows, macOS, and Linux, allowing consistent development across platforms.
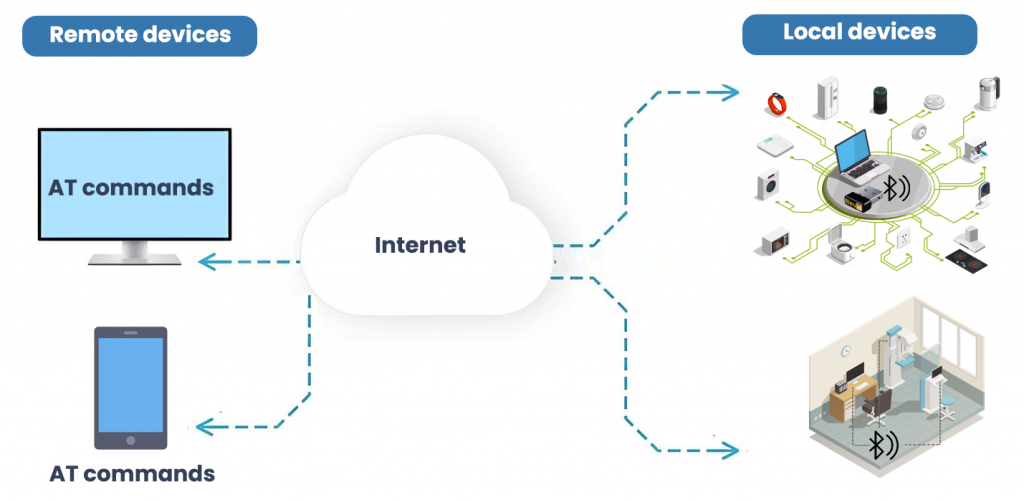
Project Structure and Components
In this project, we’ll use the following components to remotely access and control BLE devices:
Device with BleuIO Connected (Local Device): This is the device with the BleuIO dongle physically attached, acting as the local interface for sending and receiving BLE commands. It will run a small server to manage communication with the BLE dongle over a serial connection.
Remote Access Server (Cloud Server): This is the server that provides remote access to the local device. By connecting to the local server, it enables us to send commands and receive data from the BLE dongle remotely.
LocalTunnel: We’ll use LocalTunnel to generate a secure public URL, allowing the cloud server to communicate with the local device without needing complex router configurations. This URL acts as a bridge, making the local device accessible from anywhere with internet access.
Node.js: Both the local device and the cloud server will use Node.js to run simple server scripts that facilitate communication between the cloud server and the BLE dongle.
Step-by-Step Guide
Step 1: Setting Up the Local Server with BleuIO dongle connected to it
Local device is where the BleuIO dongle is physically connected. We’ll set up a Node.js server that communicates with the dongle through the serial port. This server will accept commands from the cloud server and send them to the BLE dongle, then return the response.
Install Node.js (if not already installed) on Local device.
Create a project folder and initialize a Node.js project: mkdir local_serial_server cd local_serial_server npm init -y
Install Dependencies:
Install serialport to handle serial communication with the BLE dongle.Install socket.io to manage WebSocket connections.
npm install serialport socket.io
Create the Local Serial Server Script:
Create a file named local_serial_server.js. This script will:
Listen for WebSocket connections from the cloud server.Accept commands, pass them to the BleuIO dongle, and send back responses.
const server = http.createServer(); const io = socketIo(server);
// Define the serial port path and baud rate const portPath = 'COM592'; // Replace 'COM3' with your dongle's port const serialPort = new SerialPort({ path: portPath, baudRate: 9600 });
// Listen for incoming connections from the cloud server io.on('connection', (socket) => { console.log('Connected to cloud server');
// Receive command from cloud and send to serial port socket.on('sendCommand', (command) => { const formattedCommand = `${command}\r\n`; console.log(`Sending command to serial port: ${formattedCommand}`); serialPort.write(formattedCommand); });
// Send serial responses to cloud server serialPort.on('data', (data) => { console.log(`Data received from serial port: ${data}`); socket.emit('serialResponse', data.toString()); }); });
// Start the server on a specified port const LOCAL_PORT = 4000; // Choose any port, ensure firewall allows it server.listen(LOCAL_PORT, () => { console.log(`Local Serial Server running on http://localhost:${LOCAL_PORT}`); });
Find and Set the Serial Port Path:
In your local_serial_server.js, specify the correct serial port path for your BLE dongle (e.g., COM3 on Windows or /dev/ttyUSB0 on Linux).
Run the Local Serial Server:
Start the server by running: node local_serial_server.js
At this point, the local server is ready, but it’s only accessible to itself. Next, we’ll use LocalTunnel to make it accessible to the cloud server.
Step 2: Exposing the Local Server to the Internet Using LocalTunnel
Since local device 1 and cloud device are on different networks, we’ll need to create a public URL for the local server. There are several options to make a local server accessible publicly, including tools like ngrok, Pagekite, and LocalTunnel. For this tutorial, we’ll be using LocalTunnel as it’s free and easy to set up, but feel free to explore other solutions if they better meet your needs.
Install LocalTunnel:
On local device, install LocalTunnel globally npm install -g localtunnel
Start LocalTunnel:
Open a new terminal window on local device and run lt --port 4000
LocalTunnel will generate a public URL (e.g., https://five-sides-live.loca.lt). This URL will allow cloud device to access the local server running on port 4000 of Local device.
Save the LocalTunnel URL:
Copy the URL provided by LocalTunnel. This URL will be used in the cloud server configuration on Cloud device.
Step 3: Setting Up the Cloud Server on Cloud device
In this setup, Cloud device will act as the cloud server that connects to local device’s LocalTunnel URL, allowing remote access to the BLE dongle. Cloud device can be any machine with Node.js installed—located anywhere, such as a remote computer in New York. You could also deploy this server on a cloud platform like Heroku, Replit, or Vercel for persistent access.
For simplicity, in this example, we’ll demonstrate how to set up the cloud server on another computer running Node.js, not connected to the same network as local device.
Create a Project Folder on cloud device and Initialize Node.js:
Open a terminal or command prompt on cloud device and create a folder for the cloud server mkdir cloud_serial_server cd cloud_serial_server npm init -y
Install Dependencies:
You’ll need express to serve the front-end pages and socket.io to manage WebSocket communication.
Install socket.io-client to allow the cloud server to connect to the LocalTunnel URL created on Local device npm install express socket.io socket.io-client
Create the Cloud Server Script: In the cloud_serial_server folder, create a file named cloud_server.js. This script will Connect to the LocalTunnel URL (generated by Local device) and forward BLE commands to the local server.Serve the front-end pages (index.html and page2.html) for interacting with the BLE device remotely.
const express = require('express');
const http = require('http');
const socketIo = require('socket.io');
const ioClient = require('socket.io-client'); // Client for local serial server

const app = express();
const server = http.createServer(app);
const io = socketIo(server);

// Connect to the local serial server via WebSocket
const LOCAL_SERVER_URL = 'https://real-poets-count.loca.lt';
const localSocket = ioClient(LOCAL_SERVER_URL);

// Serve static files (frontend files for Page 1 and Page 2)
app.use(express.static('public'));

// Handle messages from Page 2 and forward to local serial server
io.on('connection', (socket) => {
  console.log('Client connected to cloud server');

  // Receive command from Page 2 and forward to local serial server
  socket.on('sendCommand', (command) => {
    console.log(`Forwarding command to local server: ${command}`);
    localSocket.emit('sendCommand', command); // Send to local serial server
  });

  socket.on('disconnect', () => {
    console.log('Client disconnected from cloud server');
  });
});

// Receive data from local serial server and forward to clients
localSocket.on('serialResponse', (data) => {
  console.log(`Received data from local serial server: ${data}`);
  io.emit('serialResponse', data); // Broadcast to connected clients
});

const PORT = process.env.PORT || 3000;
server.listen(PORT, () => {
  console.log(`Cloud server is running on http://localhost:${PORT}`);
});
Update the LocalTunnel URL in Cloud Server:
Replace the LOCAL_SERVER_URL in cloud_server.js with the LocalTunnel URL you generated on Local device (e.g., https://five-sides-live.loca.lt).
Run the Cloud Server:
Start the cloud server by running:bashCopy codenode cloud_server.js
This will start a server that listens for connections on Cloud device. You can open a web browser on Cloud device and go to http://localhost:3000 to access the front-end pages.
Access the Front-End Pages:
Open a browser and navigate to http://localhost:3000/index.html (for displaying BLE responses) and http://localhost:3000/page2.html (for sending commands).
Note: If you decide to deploy this server to a cloud platform (e.g., Heroku, Replit, or Vercel), replace localhost with the appropriate URL provided by the platform.
With this setup, Cloud device can be anywhere in the world, allowing you to control and receive data from the BLE dongle on Local device (in Stockholm) remotely.
This tutorial demonstrates the potential of combining Node.js, BLE technology, and tunneling services for remote BLE access. The BleuIO dongle’s compatibility and simplicity make it an excellent choice for developers interested in building BLE applications across various operating systems.
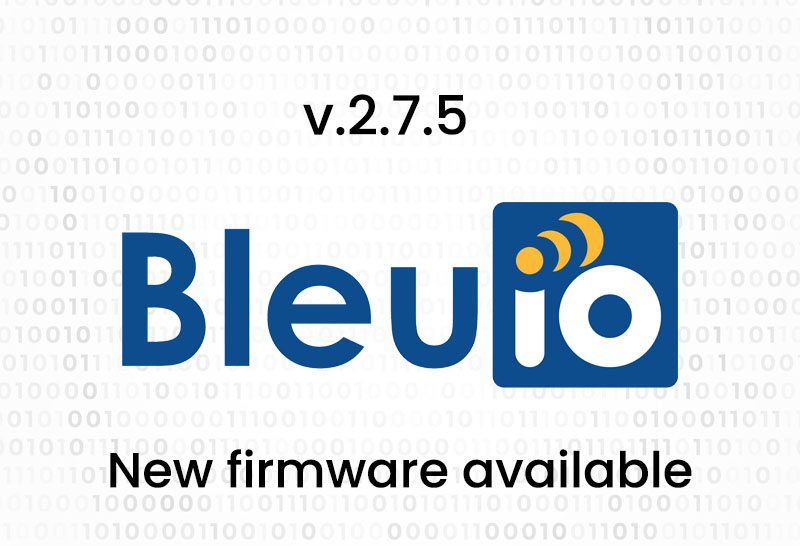
We’re excited to announce the latest firmware update for the BleuIO Bluetooth Low Energy USB dongle: Firmware Version 2.7.5. This update introduces valuable new features and optimizations designed to improve usability and functionality. Here’s an in-depth look at what’s new and improved with this release.
Key Features and Improvements in v2.7.5
New Command: ATSAT
With version 2.7.5, BleuIO introduces a new command, ATSAT, which allows users to view the device address type—indicating whether the address is public or private—within scan results. This functionality is particularly useful for users looking to distinguish between public and private address types during Bluetooth scanning. When enabled, ATSAT will display:
[1] for private addresses
[0] for public addresses The ATSAT command works seamlessly with the AT+FINDSCANDATA and AT+SCANTARGET commands, which display the address type in scan results. Additionally, AT+GAPSCAN now always shows the device address type, ensuring that users have visibility into the address type for more effective management of scanned devices.
Expanded Bonded Device Capacity
In a significant enhancement to the device’s bonding functionality, this update expands the number of bonded devices that BleuIO can store from 8 to 16. Previously, when the bonding capacity reached the limit of 8 devices, new bonding was not possible until the user manually removed one or all existing bonded devices using the AT+GAPUNPAIR command. With the updated firmware, BleuIO can now store bonding information for up to 16 devices, simplifying the management of Bluetooth connections.
Automatic Removal of Oldest Bonded Devices:
When the 16-device limit is reached, BleuIO will now automatically remove the oldest bonded device that is not currently connected. Given that BleuIO supports a maximum of 8 simultaneous connections, there will always be at least 8 devices in the list that are not actively connected. This new functionality ensures users can always establish a new bond without the need to manually manage bonded devices, thereby improving convenience and user experience.
How to Update
Visit our firmware download page to access the latest firmware and ensure your BleuIO device benefits from these enhanced capabilities. Be sure to select the correct firmware version for your device model—BleuIO or BleuIO Pro—before downloading.
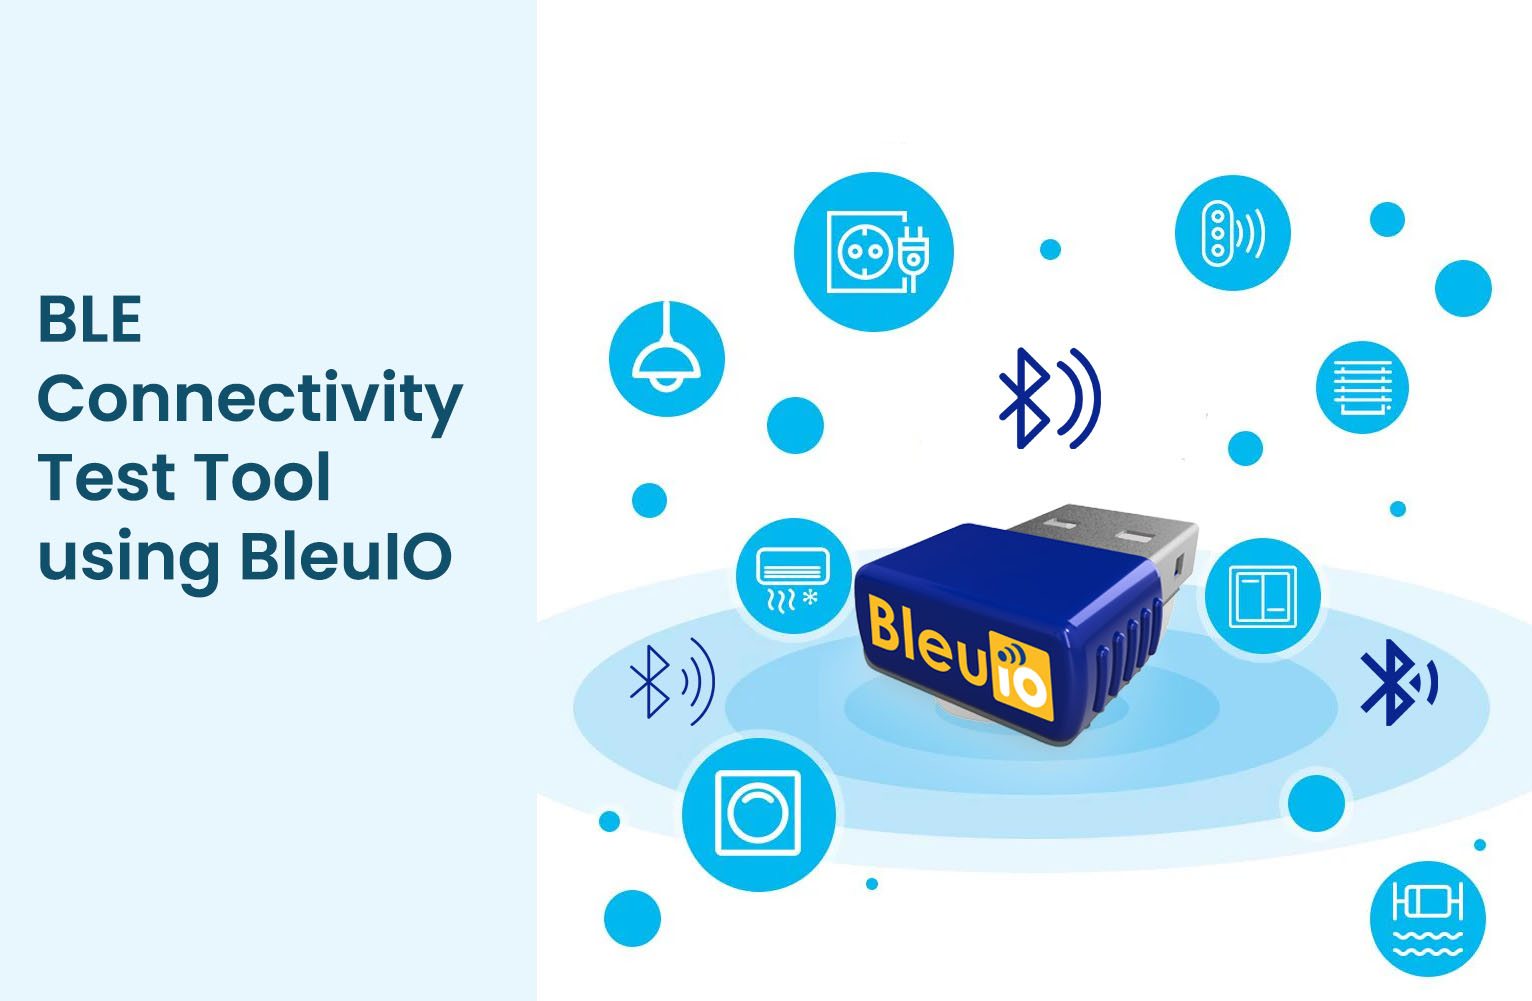
This article takes a deep dive into the capabilities of BleuIO, exploring how it can simplify BLE application testing, especially in complex environments like IoT, health, automotive, and smart home applications. Whether you are a seasoned developer or a newcomer, BleuIO provides a reliable, versatile tool to jumpstart your BLE projects. We’ll also cover an example project, the BLE Connectivity Test Tool, to illustrate BleuIO’s ease of use and the possibilities it opens up for developers.
Example Project: Building a BLE Connectivity Test Tool
To demonstrate the practicality and ease of using BleuIO, let’s look at a sample project: a BLE Connectivity Test Tool. This tool allows developers to test the connection stability of a BLE device, such as the HibouAir air quality monitor, by performing repeated connection and disconnection attempts. This example showcases how easy it is to set up a real-world testing scenario with BleuIO, perfect for those looking to explore connectivity applications.
This BLE Connectivity Test Tool will:
Scan for the HibouAir Device: Use BleuIO to locate the device based on its BLE address.
Initiate Connections: Repeatedly connect and disconnect from the HibouAir device, tracking the success and failure of each attempt.
Log Results: Display a summary at the end, indicating successful connections and any errors encountered.
Code Overview
The Python script below uses the official BleuIO Python library, which simplifies interaction with BLE devices. It uses AT commands to set the dongle in central mode, initiate connections, and disconnect after a set duration.
import time
from datetime import datetime
from bleuio_lib.bleuio_funcs import BleuIO
# Initialize the BleuIO dongle
dongle = BleuIO()
# Device address of HibouAir (replace with your actual address if different)
device_address = "[1]D1:79:29:DB:CB:CC"
# Number of connection attempts
test_count = 5
# Duration to stay connected in seconds
connect_duration = 2
# Delay between connection attempts
delay_between_tests = 5
# Counters for tracking connection results
successful_connections = 0
successful_disconnections = 0
connection_failures = 0
# Register scan callback to handle scanned device responses
def my_scan_callback(scan_input):
print("\n\nScan Result: " + str(scan_input))
# Register event callback to handle connection events with timestamps
def my_evt_callback(evt_input):
cbTime = datetime.now()
currentTime = cbTime.strftime("%H:%M:%S")
print("\n\n[" + str(currentTime) + "] Event: " + str(evt_input))
# Set up the callback functions
dongle.register_evt_cb(my_evt_callback)
dongle.register_scan_cb(my_scan_callback)
# Set the BLE role to central to initiate connections
dongle.at_central()
# Start the connection test
print("Starting BLE Connectivity Test with HibouAir device...\n")
for i in range(test_count):
print(f"\nAttempt {i+1}/{test_count}")
# Connect to the device
connect_response = dongle.at_gapconnect(device_address)
if connect_response.Ack.get("err") == 0: # Check if the connection was successful
print("Connection successful!")
successful_connections += 1
time.sleep(connect_duration) # Stay connected for the specified duration
# Disconnect
disconnect_response = dongle.at_gapdisconnect()
if disconnect_response.Ack.get("err") == 0:
print("Disconnected successfully.")
successful_disconnections += 1
else:
print("Error during disconnect:", disconnect_response.Ack.get("errMsg"))
connection_failures += 1
else:
print("Connection failed:", connect_response.Ack.get("errMsg"))
connection_failures += 1
# Wait before the next attempt
time.sleep(delay_between_tests)
# Display test results summary
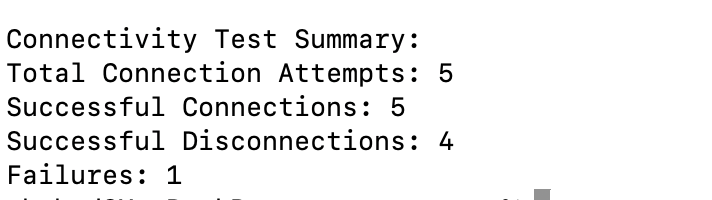
print("\nConnectivity Test Summary:")
print(f"Total Connection Attempts: {test_count}")
print(f"Successful Connections: {successful_connections}")
print(f"Successful Disconnections: {successful_disconnections}")
print(f"Failures: {connection_failures}")
This tool’s simplicity shows how BleuIO can be used in the development and testing process, making it a preferred choice for developers who want to avoid BLE’s traditional complexities.
Output
Real-World Applications of BleuIO
IoT Device Testing: From smart home devices to industrial sensors, BleuIO is invaluable for testing the connectivity and data transmission of IoT devices.
Wearable Tech Development: For developers working on BLE-enabled wearables like fitness trackers or health monitors, BleuIO provides a straightforward way to test device connectivity.
Educational and Prototyping Tool: BleuIO’s ease of use makes it an excellent educational tool for introducing BLE concepts to students and rapid prototyping for startups.
Environmental Monitoring: As demonstrated with the HibouAir air quality monitor, BleuIO facilitates connectivity testing in applications involving environmental data, like CO2 monitoring, temperature, and humidity.
Why BleuIO for BLE Development?
Developing BLE applications often requires specialized hardware and software expertise. Traditional BLE development involves understanding intricate details of Bluetooth stacks, profiles, and data protocols. BleuIO alleviates this by offering a straightforward command structure that abstracts the technical details, allowing developers to quickly build and test applications.
In addition, BleuIO’s compact design makes it suitable for portable applications and rapid prototyping. From sensor connectivity to device tracking and monitoring, BleuIO proves to be a versatile asset for a range of BLE applications.
BleuIO offers an all-in-one solution for BLE development, bridging the gap between beginner-friendly usability and powerful functionality. With support for multiple platforms, easy integration with popular programming languages, and straightforward AT command access, BleuIO empowers developers to quickly and efficiently test, prototype, and deploy BLE applications.
By using tools like the BLE Connectivity Test Tool, developers can focus on creating innovative applications without needing to dive deep into the complexities of BLE. BleuIO enables developers to bring their ideas to life, from IoT to healthcare and beyond. Start your BLE development journey with BleuIO today and see the difference in ease and efficiency it brings to your projects.
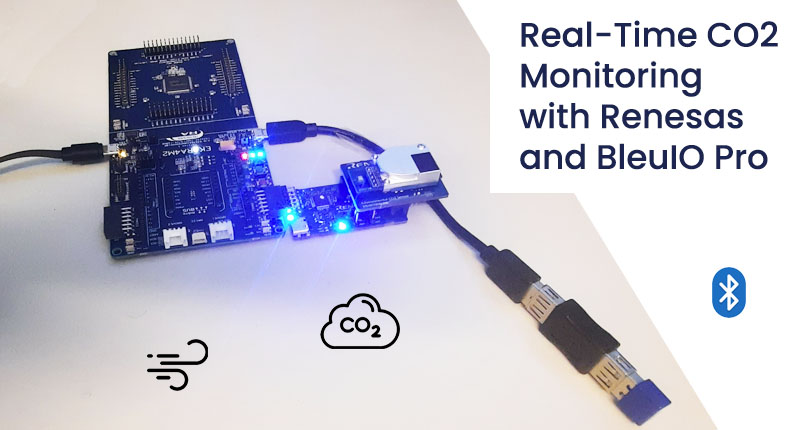
Introduction This project demonstrates how to integrate the Renesas EK-RA4M2 development board with the Renesas CO2 Sensor (RRH47000) and the new BleuIO Pro Dongle (SSD025) by Smart Sensor Devices, built on the Renesas Bluetooth Low Energy SoC DA14695. In this setup, the dongle advertises sensor data from the CO2 sensor, including CO2 concentration, humidity, and temperature.
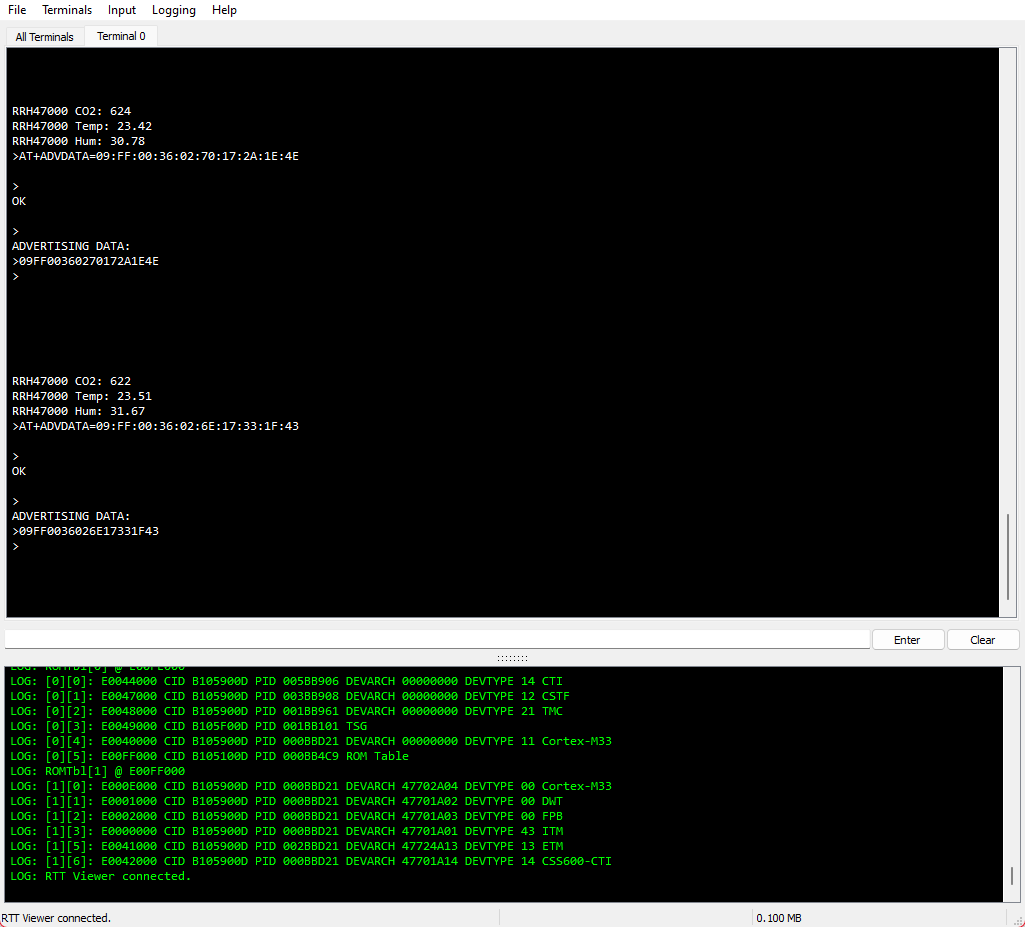
The sensor data is displayed using the RTT Viewer.
Connect a Micro USB device cable (Type-A male to Micro-B male) between J10 (Debug1) on the EK-RA4M2 and a computer’s USB port.
Plug in the BleuIO Dongle using a USB OTG Cable (Type-A female to Micro-B male) and connect it to J11 (USB Full Speed).
Ensure that Jumper J12 is placed on pins 1-2.
Remove Jumper J15 pins.
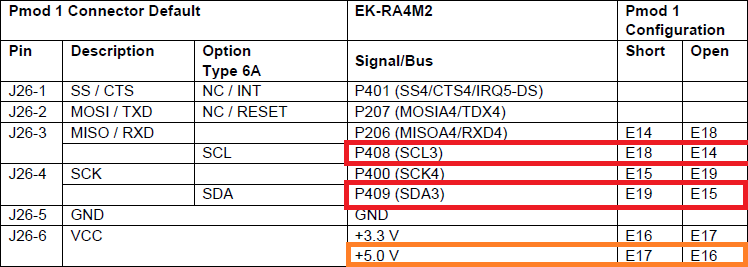
Setting up PMOD1 The RRH47000 sensor connects via PMOD1. Since the sensor requires 5V, and PMOD by default provides 3.3V, some modifications are necessary:
For 5V the PMOD1 Config trace cut jumper E17 must be Short and E16 be Open. For I2C SCL E18 need to be Short and E14 need to be Open. For I2C SDA E19 need to be Short and E15 need to be Open.
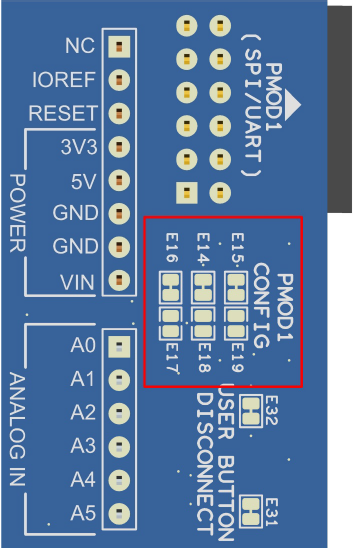
The PMOD1 config can be found on the back of the RA4M2:
Importing the Project
Open e² studio IDE
Choose a workspace and click ‘Launch’
Download or clone the example project. Place the folder ‘bleuio_ra4m2_co2_monitor_example’ in workspace.
Choose Import Project
Select ‘Existing Projects into Workspace’ under the ‘General’ tab:
Click the ‘Browse…’ button and open folder where the ‘bleuio_ra4m2_co2_monitor_example’ project folder is located:
Finally select the project and click ‘Finish’. You have now imported the the project!
Running the Example
Build the project by clicking the building icon:
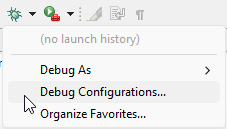
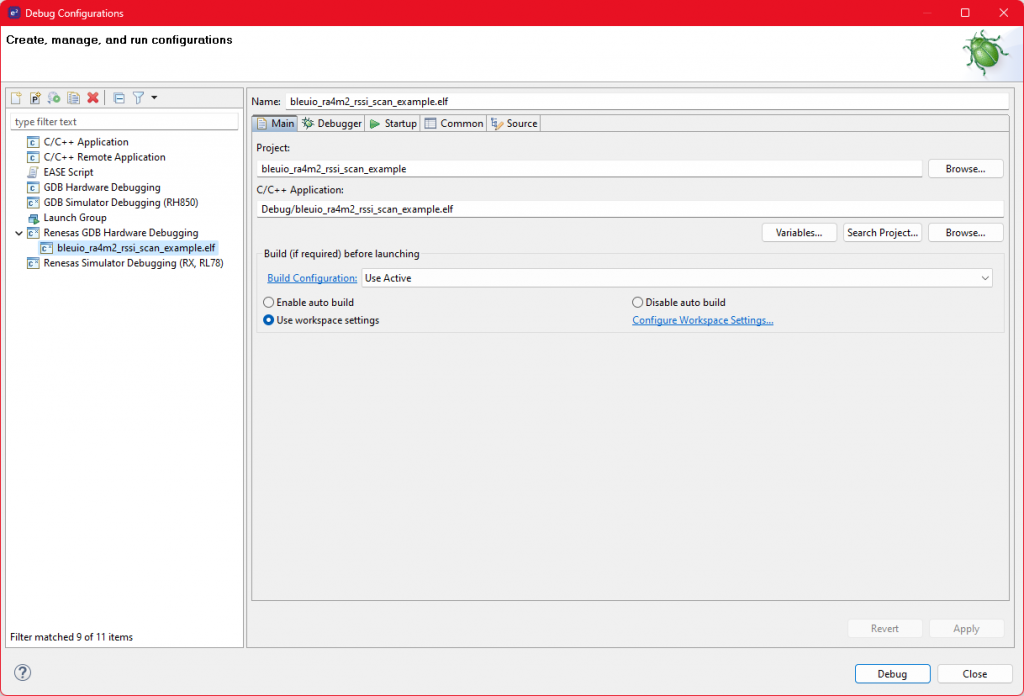
Use Debug to download and run the project. The first time you need to configure the debug settings. Click down arrow to the right of the Debug icon and select ‘Debug Configurations…’
Under ‘Renesas GDB Hardware Debugging’ select ‘bleuio_ra4m2_co2_monitor_example.elf’ and click ‘Debug’.
The debug is now configured and the ‘Debug’ icon can be used next time to run the project.
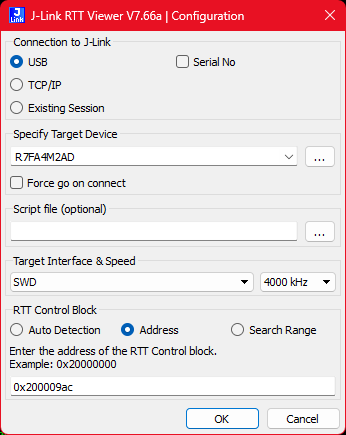
Open RTTViewer. Connect and use these settings:
Connection to J-Link: USB
Specify Target Device: R7FA4M2AD
Target Interface & Speed: SWD 4000kHz
RTT Control Block: Address 0x200009ac
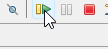
On the debugger screen in e² studio click the ‘Resume’ icon twice to run the project.
The application is now running. When starting up you should notice all LEDs lighting up for one second then only the red LED will be on. It will turn off as soon as the BleuIO is configured and the green LED will turn on when advertising start.
You should now see the output on the RTTViewer.
Scanning the Dongle To view the advertised data, use an app like nRF Connect.
Decoding the Advertising Message The advertising data format is as follows:
020106: Default advertising flag for connectable devices.
09FF3600026E173E1D27: Manufacturer-specific data.
09: Message size.
FF: Manufacturer Specific Data flag.
3600: Renesas Manufacturer ID (little-endian).
026E: CO2 value in hex (622 in decimal).
173E: Temperature value, split into two bytes (23.62°C).
1D27: Humidity value, split into two bytes (29.39%).
This example serves as a foundational guide for integrating the Renesas EK-RA4M2 development board with a CO2 sensor and the BleuIO Pro Dongle for real-time monitoring. With its flexible setup, you can extend this project to suit your specific applications, such as real-time air quality monitoring, smart building systems, or other IoT-based environmental solutions. By leveraging the capabilities of the BleuIO Pro and Renesas platform, you can create robust, scalable solutions for your next Bluetooth Low Energy (BLE) project.
BleuIO BLE USB dongle was designed with developers in mind, offering a simple yet powerful way to create BLE applications using AT commands. Now, we’ve taken this a step further by creating a C++ library that makes it even easier for C++ developers to integrate BleuIO into their BLE projects.
In this article, we’ll introduce the BleuIO C++ library and how it simplifies BLE development for C++ developers. Whether you’re building IoT devices, smart home solutions, or any application requiring BLE communication, our library streamlines the process, allowing you to focus on your application logic.
What is BleuIO?
BleuIO is a Bluetooth Low Energy USB dongle that enables BLE communication through simple AT commands. It acts as a bridge between your application and Bluetooth devices, making it easier to scan, connect, and communicate with other BLE devices. The dongle supports all major operating systems, including Windows, macOS, and Linux, and is compatible with multiple programming languages, including C++.
With its AT command interface, BleuIO abstracts the complexity of BLE communication, making it accessible even to those with limited knowledge of BLE protocols. Developers can send and receive BLE commands without diving deep into low-level BLE stack programming.
Introducing the C++ Library for BleuIO
To further simplify BLE development, we’ve developed a dedicated C++ library that integrates with BleuIO’s AT command interface. This library allows C++ developers to quickly start building BLE applications using BleuIO without needing to manually manage serial communication or handle raw AT commands.
The library takes care of the low-level communication, so you can focus on higher-level logic. With just a few lines of code, you can send commands to the dongle, scan for devices, and establish BLE connections.
Why Use the BleuIO C++ Library?
The BleuIO C++ library provides a number of benefits for developers:
Ease of Use: No need to write low-level serial port communication code. The library handles sending AT commands and reading responses, allowing you to focus on building your BLE application.
Cross-Platform: The library is compatible with all major operating systems, including macOS, Linux, and Windows. C++ developers can seamlessly integrate BleuIO into their projects regardless of the platform.
Faster Development: By using AT commands through the C++ library, you significantly reduce the time required to implement BLE communication in your application. The library enables quick scanning for devices, connecting to peripherals, and exchanging data.
Highly Customizable: While the library handles serial communication and command parsing, you still retain control over how you use the AT commands. You can extend and adapt the library to fit the specific needs of your BLE project.
How to Install the Library
We’ve made the library available on Homebrew (for macOS and Linux) and provided easy installation steps:
Installation via Homebrew
Install Homebrew (if you don’t have it installed):
brew tap smart-sensor-devices-ab/homebrew-bleuio-library
Install the library:
brew install bleuio-library
Example: Scanning for BLE Devices Using BleuIO
Let’s take a look at how you can use the BleuIO C++ library to scan for nearby BLE devices. Below is a simple example that demonstrates how to send the AT+GAPSCAN command to the dongle and retrieve a list of nearby BLE devices.
#include <iostream>
#include "BleuIO.h"

int main() {
    // Initialize BleuIO dongle connected to /dev/ttyUSB0 (adjust the port for your system)
    BleuIO dongle("/dev/ttyUSB0");

    // Put the dongle in central role
    std::string response = dongle.send_command("AT+CENTRAL");
    // Send command to scan for nearby BLE devices for 3 seconds
    response = dongle.send_command("AT+GAPSCAN=3");

    // Print the response from the dongle
    std::cout << "Response: \n" << response << std::endl;

    return 0;
}
Using the Library in Your C++ Project
Once installed, you can include the library in your project and start using it immediately. The typical workflow involves creating an instance of the BleuIO class, sending AT commands, and handling the responses.
To compile your program, you can use the following commands depending on your system:
The BleuIO C++ library makes it easier than ever for C++ developers to integrate BLE communication into their projects using the BleuIO USB dongle. With the power of AT commands and the simplicity of the library, you can quickly prototype and build Bluetooth-enabled applications without the complexity of managing BLE protocols manually.
Whether you’re working on IoT, smart home devices, or any project requiring Bluetooth communication, the BleuIO C++ library helps you get started faster, with fewer lines of code, and more focus on your application logic.
We encourage you to try out the library and join the growing community of developers building BLE applications with BleuIO.
Bluetooth Low Energy (BLE) technology has revolutionized the way we connect devices, making it possible to create innovative applications across various industries. However, developers frequently encounter challenges when utilizing built-in Bluetooth capabilities, as these can vary significantly depending on the vendor and operating system. In this article, we will examine the limitations of built-in Bluetooth and demonstrate how the BleuIO USB dongle simplifies BLE application development, providing a more reliable and consistent solution.
Limitations of Built-in Bluetooth
Vendor-Specific BLE Chips: Different computer manufacturers utilize various BLE chips based on the vendor. This variability can lead to inconsistent performance and capabilities across devices.
Operating System Handling: Each operating system may manage these vendor-specific BLE chips differently, creating additional complexities for developers. This inconsistency can affect how Bluetooth interactions are handled, potentially leading to compatibility issues.
Built-in BLE on Development Boards: Some development boards also come equipped with built-in BLE chips. The chip’s performance and compatibility will depend on the specific vendor’s implementation, adding another layer of variability for developers to navigate.
Introducing BleuIO: Simplifying BLE Development
BleuIO—a Bluetooth Low Energy USB dongle designed to make BLE application development easier and more accessible for developers. Here’s how BleuIO addresses the challenges associated with built-in Bluetooth:
Device Independence: BleuIO is compatible with any device and operating system, including Windows, Mac, and Linux. Its cross-platform support ensures seamless development regardless of the underlying hardware.
Programming Language Flexibility: With BleuIO, developers can work in any programming language, as it communicates via serial port. This flexibility allows you to integrate BLE capabilities into your application without being tied to a specific environment.
Regular Firmware Updates: The BleuIO team is dedicated to continuously improving the dongle. Regular firmware updates add new features while ensuring backward compatibility, so your development efforts remain relevant over time.
User-Friendly AT Commands: For those new to BLE, the AT commands provided by BleuIO make it easier to understand and learn the intricacies of Bluetooth technology. This user-friendly approach reduces the learning curve for beginners.
In conclusion, while built-in Bluetooth poses various challenges due to vendor-specific implementations and inconsistent handling by operating systems, the BleuIO USB dongle offers a reliable solution for developers aiming to create BLE applications effortlessly. With its device independence, cross-platform compatibility, and straightforward integration process, BleuIO allows you to concentrate on what truly matters: developing innovative applications that enhance connectivity and user experiences.