Interfacing BleuIO with Node.js Using Serial Communication
March 23, 2024
In this tutorial, we’ll explore how to utilize BleuIO, a Bluetooth Low Energy (BLE) USB dongle, with Node.js for BLE application development. We’ll use the serialport library to communicate with BleuIO, enabling us to send AT commands and interact with BLE devices.
Prerequisites
Before we begin, ensure you have the following:
- BleuIO Bluetooth Low Energy USB dongle.
- Node.js installed on your system.
Setting Up the Project
- Project Structure: Create a new directory for your project. Inside this directory, create the following files:
index.html: HTML file for the frontend (optional).server.js: Node.js backend server.package.json: Node.js package configuration file.
- Initialize Node.js Project: Initialize a new Node.js project and install necessary dependencies.
mkdir bleuio-node-serial
cd bleuio-node-serial
npm init -y
npm install express serialport
Writing the Code
Let’s write the code for each component:
- Node.js Backend (
server.js): This file sets up an Express server to serve the HTML file and handles BLE interactions using BleuIO andserialport.
// server.js
const express = require('express');
const { SerialPort } = require('serialport');

const app = express();
const port = 3000;

// Serve the HTML file (optional)
app.get('/', (req, res) => {
  res.sendFile(__dirname + '/index.html');
});

// Endpoint to scan for BLE devices using BleuIO
app.get('/scanbledevice', (req, res) => {
  // Replace the following code with your BLE scanning logic
  const bleDevices = ['Device 1', 'Device 2', 'Device 3'];
  res.json(bleDevices);
});

// Start the server
app.listen(port, () => {
  console.log(`Server is running on http://localhost:${port}`);
});
- BLE Scanning Logic: Implement BLE scanning logic using BleuIO and
serialportin the server file (server.js). This module contains the function to scan for BLE devices using BleuIO.
// scanble.js
const { SerialPort } = require('serialport');

function scanBLE() {
  return new Promise((resolve, reject) => {
    // Use SerialPort to list available ports
    SerialPort.list()
      .then((ports) => {
        // Filter ports to find BleuIO device
        const blePorts = ports.filter((port) =>
          port.manufacturer.includes('Smart Sensor Devices')
        );

        if (blePorts.length === 0) {
          reject(new Error('BleuIO device not found'));
        }

        // Connect to the first found BleuIO device
        const blePort = new SerialPort({
          path: blePorts[0].path,
          baudRate: 115200
        });

        // Perform BLE scan
        blePort.write('AT+CENTRAL\r', (err) => {
          if (err) {
            reject(new Error('Error setting central role: ' + err.message));
          } else {
            blePort.write('AT+GAPSCAN=3\r', (err) => {
              if (err) {
                reject(new Error('Error initiating scan: ' + err.message));
              } else {
                setTimeout(() => {
                  // Read and parse scan results
                  const scanResults = blePort.read();
                  resolve(scanResults.split('\n'));
                }, 3500);
              }
            });
          }
        });
      })
      .catch((err) => {
        reject(new Error('Error listing serial ports: ' + err.message));
      });
  });
}

module.exports = { scanBLE };
- HTML Frontend (
index.html): This file provides a user interface (UI) to trigger BLE device scanning and display the results.
<!-- index.html -->
<!DOCTYPE html>
<html lang="en">
  <head>
    <!-- Include necessary meta tags and stylesheets -->
    <title>Scan BLE Device</title>
  </head>
  <body>
    <div class="container">
      <br />
      <br />
      <button class="btn btn-success" id="scanBtn">Scan for Devices</button>
      <div id="listScan"></div>
    </div>

    <!-- Include JavaScript for button click event -->
    <script>
      // JavaScript to handle button click event
    </script>
  </body>
</html>
Running the Application
- Ensure your BleuIO dongle is connected to your computer.
- Run the Node.js server
npm start- Open your web browser and navigate to
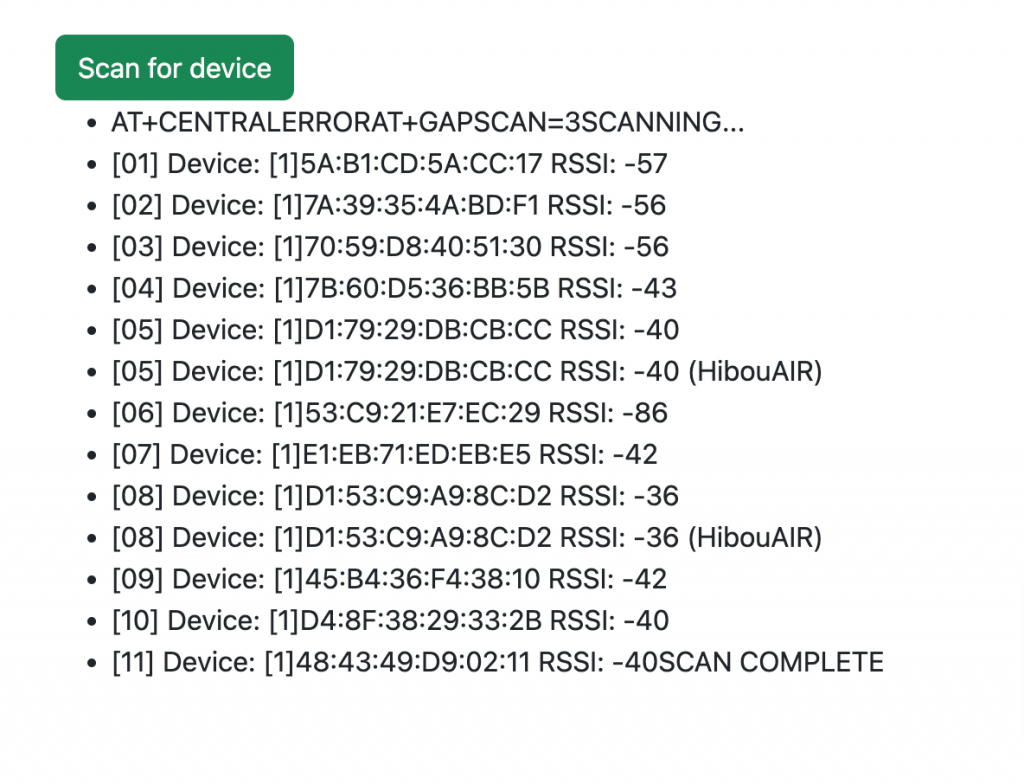
http://localhost:3000. - Click the “Scan for Devices” button.
- The list of nearby BLE devices will be displayed on the web page.
Output
In this tutorial, we’ve explored how to use BleuIO with Node.js via serial communication using the serialport library. You can extend this project by integrating more BLE functionalities and building a robust BLE application.
Feel free to customize and expand upon this project according to your requirements and explore the vast possibilities of BLE application development with Node.js and BleuIO!