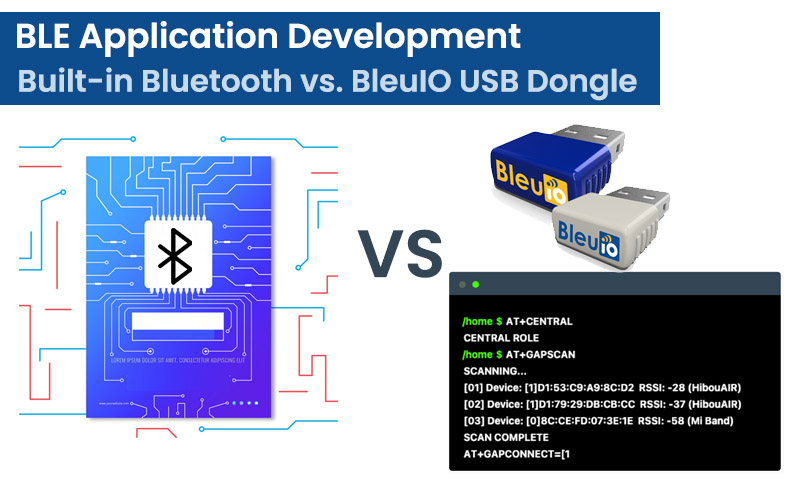
Bluetooth Low Energy (BLE) technology has revolutionized the way we connect devices, making it possible to create innovative applications across various industries. However, developers frequently encounter challenges when utilizing built-in Bluetooth capabilities, as these can vary significantly depending on the vendor and operating system. In this article, we will examine the limitations of built-in Bluetooth and demonstrate how the BleuIO USB dongle simplifies BLE application development, providing a more reliable and consistent solution.
Limitations of Built-in Bluetooth
Vendor-Specific BLE Chips: Different computer manufacturers utilize various BLE chips based on the vendor. This variability can lead to inconsistent performance and capabilities across devices.
Operating System Handling: Each operating system may manage these vendor-specific BLE chips differently, creating additional complexities for developers. This inconsistency can affect how Bluetooth interactions are handled, potentially leading to compatibility issues.
Built-in BLE on Development Boards: Some development boards also come equipped with built-in BLE chips. The chip’s performance and compatibility will depend on the specific vendor’s implementation, adding another layer of variability for developers to navigate.
Introducing BleuIO: Simplifying BLE Development
BleuIO—a Bluetooth Low Energy USB dongle designed to make BLE application development easier and more accessible for developers. Here’s how BleuIO addresses the challenges associated with built-in Bluetooth:
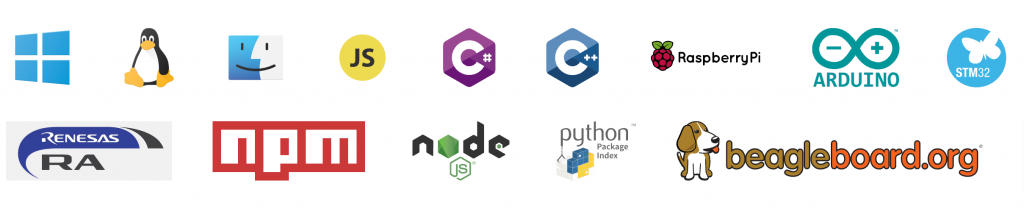
Device Independence: BleuIO is compatible with any device and operating system, including Windows, Mac, and Linux. Its cross-platform support ensures seamless development regardless of the underlying hardware.
Programming Language Flexibility: With BleuIO, developers can work in any programming language, as it communicates via serial port. This flexibility allows you to integrate BLE capabilities into your application without being tied to a specific environment.
Regular Firmware Updates: The BleuIO team is dedicated to continuously improving the dongle. Regular firmware updates add new features while ensuring backward compatibility, so your development efforts remain relevant over time.
User-Friendly AT Commands: For those new to BLE, the AT commands provided by BleuIO make it easier to understand and learn the intricacies of Bluetooth technology. This user-friendly approach reduces the learning curve for beginners.
In conclusion, while built-in Bluetooth poses various challenges due to vendor-specific implementations and inconsistent handling by operating systems, the BleuIO USB dongle offers a reliable solution for developers aiming to create BLE applications effortlessly. With its device independence, cross-platform compatibility, and straightforward integration process, BleuIO allows you to concentrate on what truly matters: developing innovative applications that enhance connectivity and user experiences.
We are excited to announce that our highly anticipated new product, the BleuIO Pro Bluetooth Low Energy USB Dongle, is now officially shipping! After a successful pre-release period, during which we offered our customers the chance to secure the new device at a special price, the BleuIO Pro is ready to reach your hands and ease your Bluetooth application development experience.
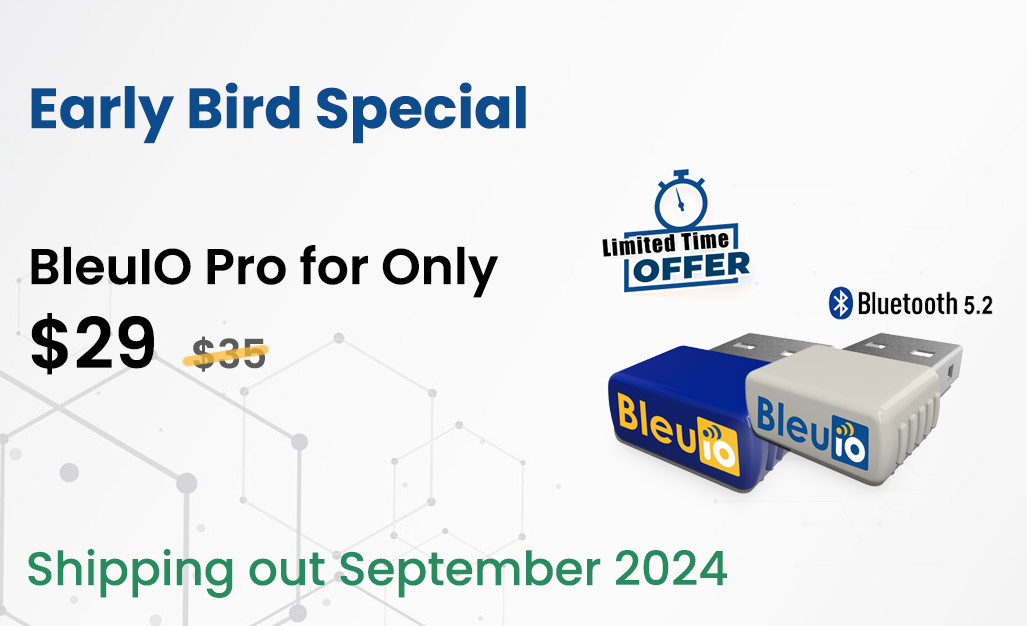
Special Offer: Get BleuIO Pro at Just $29 – Limited time offer until September 30 , 2024!
To celebrate the launch, we are extending our special pre-release offer for just two more weeks. You can still purchase the BleuIO Pro for only $29 (original price $35) until September 30 , 2024. Don’t miss this opportunity to enhance your development toolkit with the latest in Bluetooth technology at an unbeatable price!
Act now to secure your BleuIO Pro at this special price! Visit our website www.bleuio.com to place your order.
What’s New with BleuIO Pro?
The new BleuIO Pro is powered by Renesas’ DA14695 Bluetooth® low energy 5.2 system on chip (SoC). This advanced SoC brings out the full potential of the DA14695, enhancing the capabilities and features you already love about our products.
Key enhancements of the BleuIO Pro include:
Bluetooth® 5.2 connectivity, supporting transfer speeds of up to 2 Mbps and extended advertising packets.
Programmable LED for visual feedback
Extended advertising packets for increased communication reliability.
An integrated antenna, 32Mbit QSPI FLASH, 32MHz, and 32.785kHz crystals.
Full support for the BleuIO software API (AT commands based) that makes development fast and easy.
About BleuIO
BleuIO is dedicated to providing innovative solutions for Bluetooth application development. With our easy-to-use AT commands and support for popular programming languages, and operating systems we help developers to create cutting-edge BLE applications in the fastest and easiest way possible.
In today’s rapidly evolving technological landscape, Bluetooth has emerged as on of the key component of wireless communication, enabling a plethora of devices to connect and interact seamlessly. From our smartphones to smart home devices and even industrial machinery, Bluetooth technology has permeated nearly every aspect of modern life.
Understanding Bluetooth Technology
Bluetooth technology, first introduced in 1994, has undergone significant evolution since its inception. Originally designed for short-range wireless communication, Bluetooth has grown to support a wide range of applications through successive versions, each bringing enhancements in speed, range, and power efficiency.
One of Bluetooth’s most compelling features is its low power consumption. This characteristic makes it particularly well-suited for battery-operated devices, which is crucial as the Internet of Things (IoT) continues to expand. Furthermore, Bluetooth’s interoperability ensures that devices from different manufacturers can connect and communicate effortlessly, enabling a more integrated and user-friendly ecosystem.
The Role of Bluetooth in IoT
As the IoT ecosystem grows, the role of Bluetooth becomes increasingly pivotal. Bluetooth technology facilitates the creation of smart, connected devices that communicate with each other and with central hubs. This connectivity is fundamental to the concept of a smart home, where devices like thermostats, lights, and security systems work together to enhance convenience and efficiency.
Bluetooth’s integration into IoT devices allows for seamless communication and control. For instance, users can manage their home automation systems from a single app, adjust settings remotely, and receive notifications about their home environment. This level of connectivity not only simplifies user interactions but also enhances the functionality and intelligence of IoT devices.
Transformative Use Cases of Bluetooth Integration
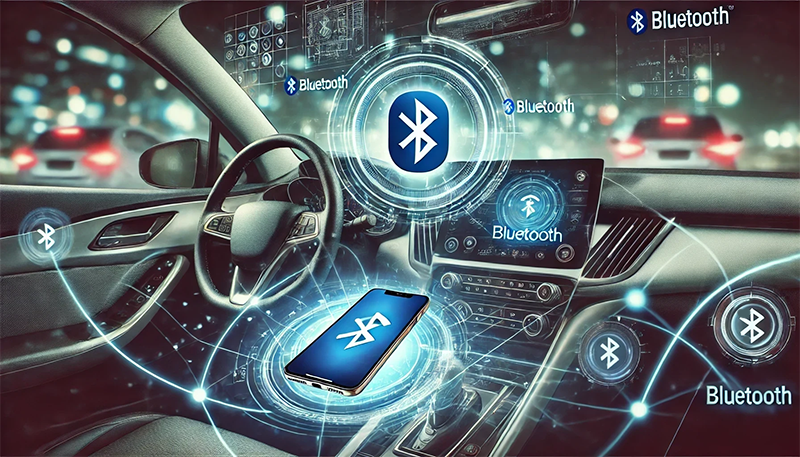
Automotive Integration
In the automotive industry, Bluetooth has revolutionized in-car connectivity. Modern vehicles uses Bluetooth technology for hands-free calling, music streaming, and diagnostics. Bluetooth-enabled systems allow drivers to connect their smartphones to their vehicles effortlessly, providing access to navigation, entertainment, and communication features while keeping their hands on the wheel and eyes on the road.
Moreover, the concept of Vehicle-to-Everything (V2X) communication is on the horizon, promising to further integrate Bluetooth into automotive systems. V2X technology aims to improve road safety and traffic management by enabling vehicles to communicate with each other and with infrastructure components, such as traffic lights and road signs.
Smart Home Devices
Bluetooth technology is a key enabler of the smart home revolution. By integrating Bluetooth into devices such as lighting systems, thermostats, and smart locks, manufacturers have made it possible for homeowners to control their environment with unprecedented ease. For example, a smart thermostat can be adjusted from a smartphone app, while smart lighting systems can be programmed to respond to voice commands or automated schedules.
The interoperability of Bluetooth devices is a significant advantage, as it allows various products from different brands to work together seamlessly. This compatibility enhances the user experience and promotes the adoption of smart home technologies.
Healthcare and Wearables
In the realm of healthcare, Bluetooth has made substantial contributions through the development of wearables and medical devices. Wearable fitness trackers and smartwatches use Bluetooth to monitor health metrics such as heart rate, activity levels, and sleep patterns, providing users with valuable insights into their well-being.
Bluetooth is also integral to medical devices that require data transmission, such as glucose monitors and blood pressure cuffs. These devices can transmit health data to healthcare providers in real-time, facilitating remote monitoring and improving patient care. The ability to connect these devices wirelessly enhances convenience and ensures that critical health information is always accessible.
IoT and Industrial Applications
In industrial settings, Bluetooth technology is transforming operations by enabling smart manufacturing and asset tracking. Bluetooth sensors can monitor equipment performance, detect anomalies, and streamline maintenance processes. This real-time data collection improves efficiency and reduces downtime.
Furthermore, Bluetooth’s role in asset tracking has advanced significantly, allowing businesses to monitor inventory and manage assets with greater accuracy. This capability is particularly valuable in sectors such as logistics and warehousing, where precise tracking and management are crucial.
Retail and Beacon Technology
Bluetooth beacons have introduced innovative ways for retailers to engage with customers. By deploying beacons throughout stores, retailers can deliver personalized promotions, guide customers to specific products, and collect data on shopping behaviors. This level of engagement enhances the shopping experience and provides valuable insights into customer preferences.
Bluetooth technology also plays a role in improving the efficiency of retail operations by streamlining inventory management and enhancing the accuracy of sales data.
Advancements in Bluetooth Security and Power Efficiency
Bluetooth technology continues to evolve, with significant improvements in security and power efficiency. Enhanced encryption standards and secure pairing methods protect data transmission and prevent unauthorized access. These advancements are crucial as Bluetooth becomes more integral to sensitive applications and environments.
In terms of power efficiency, recent developments have focused on reducing energy consumption while maintaining performance. Low Energy Bluetooth (BLE) technology, for example, is designed to extend battery life and support long-term usage in battery-powered devices.
Bluetooth integration with BleuIO
For developers and businesses looking to leverage Bluetooth technology, products like the BleuIO Bluetooth Low Energy USB dongle offer an easy and effective solution for integrating Bluetooth into devices. With cross-platform support and user-friendly features, BleuIO simplifies the development, prototyping, and testing of BLE applications, making it an invaluable tool for anyone working with Bluetooth technology.
Bluetooth Low Energy (BLE) technology has become a cornerstone in the expanding world of the Internet of Things (IoT). Its low power consumption, cost-effectiveness, and ease of integration have made it a popular choice for a wide range of applications, from smart home devices to health monitoring systems. However, developing BLE applications can be complex, particularly for newcomers to the field. This is where BleuIO, a versatile BLE USB dongle, comes into play. In this article, we’ll explore how BleuIO simplifies BLE application development, making it accessible and efficient for developers across different platforms and programming languages.
BLE and IoT: A Growing Trend
The Rise of BLE
Bluetooth Low Energy (BLE) is designed for applications that require low power consumption and intermittent data transmission. Unlike classic Bluetooth, BLE is optimized for devices that need to conserve battery life, making it ideal for IoT applications. With BLE, devices can communicate over short distances with minimal power usage, which is crucial for wearable devices, smart sensors, and other battery-operated gadgets.
Current Trends in BLE Applications
The BLE ecosystem is rapidly evolving. Some notable trends include:
Smart Home Devices: BLE is widely used in smart home products like smart locks, lighting systems, and thermostats, allowing for seamless control and automation.
Healthcare and Fitness: Wearable health monitors and fitness trackers leverage BLE for continuous health monitoring and data synchronization.
Industrial Automation: BLE is increasingly being used in industrial settings for asset tracking, environmental monitoring, and equipment management.
Navigating the Learning Curve for New Developers
Challenges for Beginners
For new developers, the world of BLE can be daunting. Key challenges include understanding BLE’s communication protocols, managing device pairing and connection, and implementing secure data transmission. Additionally, developers need to familiarize themselves with the BLE specifications and the various tools available for development and testing.
How BleuIO Eases the Learning Process
BleuIO provides a user-friendly solution to these challenges. Its intuitive AT commands simplify the process of creating and managing BLE connections, allowing developers to focus on their application logic rather than the underlying complexities. With BleuIO, developers can quickly prototype, test, and iterate on their BLE applications, significantly reducing the learning curve associated with BLE development.
How BleuIO Simplifies BLE Development
Overview of BleuIO
BleuIO is a powerful BLE USB dongle designed to streamline BLE application development. It features:
AT Commands: Simplified command sets for configuring and controlling BLE connections.
Cross-Platform Support: Compatibility with Windows, Mac, and Linux, ensuring a seamless development experience across different operating systems.
Python and JavaScript Libraries: Libraries that facilitate development in popular programming languages, making it easier for developers to integrate BLE functionality into their applications.
Ease of Use
BleuIO’s AT commands allow developers to interact with BLE devices and manage connections without deep technical knowledge. This feature is particularly beneficial for those new to BLE, as it abstracts away much of the complexity involved in BLE communication.
Cross-Platform Compatibility
One of BleuIO’s standout features is its cross-platform support. Whether you’re developing on Windows, Mac, or Linux, BleuIO provides a consistent experience, allowing developers to work in their preferred environment without worrying about compatibility issues. This flexibility is crucial for collaborative projects and development on diverse platforms.
BLE Testing Made Easy with BleuIO
Testing Capabilities
Testing BLE applications can be challenging due to the need to simulate various BLE devices and scenarios. BleuIO simplifies this process by allowing developers to mock BLE devices and create test environments that mimic real-world conditions. This capability is invaluable for verifying the functionality and reliability of BLE applications before deployment.
Real-World Applications
For instance, developers can use BleuIO to simulate a range of BLE devices, test communication protocols, and evaluate how their application handles different scenarios. This approach helps in identifying potential issues early in the development cycle and ensures a smoother testing process.
Development Flexibility with BleuIO
Python and JavaScript Libraries
BleuIO supports development in both Python and JavaScript, two of the most widely used programming languages. The provided libraries offer a range of functions for interacting with BLE devices, making it easier to integrate BLE functionality into applications. Whether you’re working on a web-based application or a Python script, BleuIO’s libraries streamline the development process.
Consistency Across Platforms
Regardless of the operating system or programming language used, BleuIO maintains a consistent development experience. This uniformity is crucial for developers working in teams or switching between different environments, as it ensures that the development and testing processes remain predictable and efficient.
Compatibility with Popular Development Boards
One of the strengths of BleuIO is its versatility in working with a wide range of development boards. Whether you’re using STM32, Arduino, Raspberry Pi, BeagleBone, or other popular boards, BleuIO provides a consistent and seamless experience.
Consistency Across Different Boards and Operating Systems
Different development boards and operating systems have their own methods for handling Bluetooth communication. For instance, STM32 and Arduino boards may require different configurations and libraries compared to Raspberry Pi or BeagleBone. This diversity can create challenges for developers working across multiple platforms.
BleuIO addresses this issue by providing a consistent interface for BLE communication regardless of the underlying hardware or operating system.
Regular Firmware Updates and Backward Compatibility
The technology landscape is ever-changing, and staying current with the latest advancements is crucial for maintaining a competitive edge. The BleuIO team understands this need and is dedicated to providing continuous support through frequent firmware updates. These updates are designed to introduce new features and improvements, ensuring that BleuIO remains at the cutting edge of BLE technology. By incorporating the latest functionalities, the team helps developers access the most advanced tools and capabilities for their projects. Additionally, performance enhancements and bug fixes are integral parts of these updates, leading to better communication efficiency, reduced latency, and an overall improved user experience.
Equally important is the commitment to backward compatibility. The BleuIO team ensures that new firmware versions work seamlessly with existing applications and projects. This approach allows developers to upgrade to the latest firmware without concerns about breaking changes that could disrupt their current work. By maintaining backward compatibility, BleuIO provides a consistent development experience, enabling developers to continue using their existing codebases and tools without extensive modifications. This long-term support ensures that existing applications remain stable while allowing developers to take advantage of new features and enhancements as they become available.
In summary, BleuIO is a valuable tool for developers working with Bluetooth Low Energy technology. Its intuitive AT commands, cross-platform support, and versatile libraries make it an excellent choice for simplifying BLE application development. By reducing the complexity of BLE communication and providing robust testing capabilities, BleuIO empowers developers to create, test, and deploy BLE applications with confidence. If you’re involved in BLE development, consider exploring BleuIO to enhance your development workflow and streamline your projects.
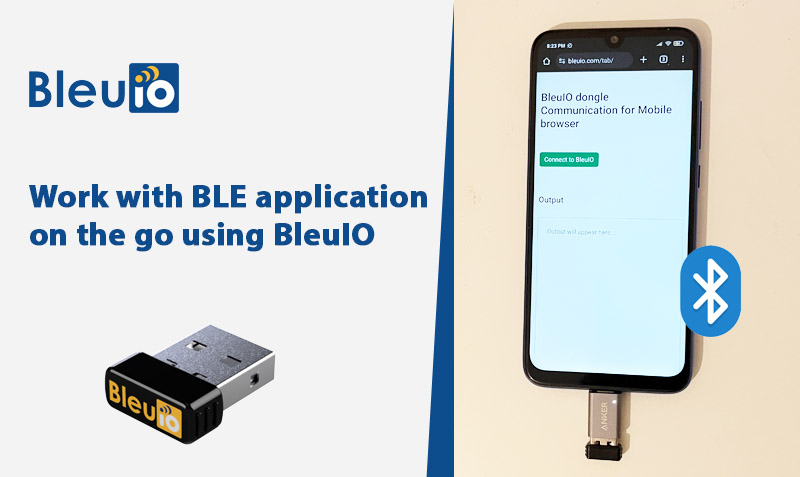
In today’s fast-paced world, flexibility and mobility in development are crucial. Whether you’re on the go or just want the convenience of working from your mobile device, having the ability to connect and interact with your development tools directly from your smartphone or tablet can be a game-changer. This article will guide you through a groundbreaking way to connect the BleuIO USB dongle to your mobile device using the Web Serial API. This tutorial will not only introduce you to the BleuIO dongle’s capabilities but also show you how to harness the power of BLE (Bluetooth Low Energy) on your mobile device with custom AT commands. By the end of this guide, you’ll be ready to run BLE scripts directly from your mobile browser, making BLE development more accessible and portable than ever.
Why This Matters
BleuIO is a versatile USB dongle that allows developers to easily add Bluetooth Low Energy (BLE) capabilities to their projects. Traditionally, connecting BLE devices to a mobile device required specialized apps or programming with platform-specific APIs. However, with the advent of the Web Serial API, it’s now possible to interact with BLE devices directly from a web browser, even on mobile devices. This means you can execute AT commands, scan for nearby BLE devices, and even build custom BLE applications right from your mobile browser.
This article is designed to help you leverage these capabilities, making BleuIO more accessible and useful whether you’re in the office, at home, or on the move. By following this tutorial, you’ll not only learn how to connect and communicate with BleuIO using your mobile device but also gain insight into how to integrate these features into your own BLE applications.
Getting Started: What You’ll Need
BleuIO USB Dongle: The star of this tutorial, a compact USB device that adds BLE functionality to any device with a USB port.
Mobile Device: A smartphone or tablet with a USB OTG (On-The-Go) adapter to connect the BleuIO dongle.
Web Browser: A modern web browser that supports the Web Serial API. For this tutorial, we’ll focus on Google Chrome for Android.
A Simple HTML/JavaScript Setup: We’ll walk through creating a basic web interface to send and receive AT commands from the BleuIO dongle.
Step 1: Setting Up Your Development Environment
Before diving into the code, let’s ensure your mobile device is ready. Here’s a quick checklist:
Connect BleuIO to Your Mobile Device: Use a USB OTG adapter to connect the BleuIO dongle to your smartphone or tablet.
Install a Compatible Browser: Ensure you have Google Chrome installed on your device. As of the time of writing, Chrome is one of the few mobile browsers that support the Web Serial API.
Step 2: Writing the Web Interface
Next, we’ll create a simple web interface that will allow you to connect to the BleuIO dongle, send AT commands, and display the responses. Below is the code we’ll use:
<!DOCTYPE html>
<html lang="en">
  <head>
    <meta charset="UTF-8" />
    <meta name="viewport" content="width=device-width, initial-scale=1.0" />
    <title>Web Serial API with BleuIO</title>
    <link
      href="https://cdn.jsdelivr.net/npm/bootstrap@5.3.3/dist/css/bootstrap.min.css"
      rel="stylesheet"
      integrity="sha384-QWTKZyjpPEjISv5WaRU9OFeRpok6YctnYmDr5pNlyT2bRjXh0JMhjY6hW+ALEwIH"
      crossorigin="anonymous"
    />

    <script type="module">
      import { serial as webSerialPolyfill } from 'web-serial-polyfill@1.0.15';
      // Use webSerialPolyfill as you would navigator.serial.
    </script>
  </head>
  <body>
    <div class="container mt-5">
      <h1>BleuIO dongle Communication for Mobile browser</h1>
      <br /><br />
      <div class="row">
        <div class="col-md-6">
          <button id="connect" class="btn btn-success">
            Connect to BleuIO
          </button>
          <button id="disconnect" class="btn btn-danger" style="display: none">
            Disconnect
          </button>
          <br /><br /><br /><br />
          <div id="command-section" style="display: none">
            Basic command <br />
            <button id="scanBtn" class="btn btn-primary">
              Scan for nearby BLE devices (AT+GAPSCAN=3)
            </button>
            <br />
            <br />
            Write your own AT commands
            <input
              type="text"
              id="inputData"
              class="form-control"
              placeholder="Write AT commands"
            /><br />
            <button id="send" class="btn btn-warning">Send</button>
          </div>
        </div>
        <div class="col-md-6">
          <h4>Output</h4>
          <br />
          <textarea
            id="output"
            style="height: 500px; width: 100%; border: 1px solid grey"
            class="rounded p-4"
            placeholder="Output will appear here..."
            readonly
          ></textarea>
        </div>
      </div>
    </div>

    <script type="module" crossorigin>
      import { serial as webSerialPolyfill } from 'https://cdn.jsdelivr.net/npm/web-serial-polyfill@1.0.15';
      var serial_module = null;
      if ('serial' in navigator) {
        serial_module = navigator.serial;
      } else {
        if ('usb' in navigator) {
          serial_module = webSerialPolyfill;
        }
      }
      let port;
      let reader;
      const connectButton = document.getElementById('connect');
      const disconnectButton = document.getElementById('disconnect');
      const sendButton = document.getElementById('send');
      const outputArea = document.getElementById('output');
      const inputField = document.getElementById('inputData');
      const commandSection = document.getElementById('command-section');

      connectButton.addEventListener('click', async () => {
        try {
          port = await serial_module.requestPort();
          await port.open({ baudRate: 9600 });

          reader = port.readable.getReader();

          // Hide connect button, show disconnect button and command section
          connectButton.style.display = 'none';
          disconnectButton.style.display = 'block';
          commandSection.style.display = 'block';

          while (true) {
            const { value, done } = await reader.read();
            if (done) {
              reader.releaseLock();
              break;
            }
            outputArea.value += new TextDecoder().decode(value);
          }
        } catch (error) {
          console.error('Failed to connect:', error);
          alert(
            'Failed to connect to the device. Please try again.',
            JSON.stringify(error)
          );
        }
      });

      disconnectButton.addEventListener('click', async () => {
        try {
          if (reader) {
            reader.cancel();
            reader = null;
          }
          if (port) {
            await port.close();
            port = null;
          }

          // Show connect button, hide disconnect button and command section
          connectButton.style.display = 'block';
          disconnectButton.style.display = 'none';
          commandSection.style.display = 'none';
        } catch (error) {
          console.error('Failed to disconnect:', error);
          alert('Failed to disconnect from the device. Please try again.');
        }
      });

      sendButton.addEventListener('click', async () => {
        outputArea.value = '';
        const writer = port.writable.getWriter();
        const dataToSend = inputField.value + '\r\n';
        const data = new TextEncoder().encode(dataToSend);
        await writer.write(data);
        writer.releaseLock();
      });
      document.getElementById('scanBtn').addEventListener('click', async () => {
        const writer = port.writable.getWriter();
        let dataToSend = 'AT+CENTRAL' + '\r\n';
        let data = new TextEncoder().encode(dataToSend);
        await writer.write(data);
        dataToSend = 'AT+GAPSCAN=3' + '\r\n';
        data = new TextEncoder().encode(dataToSend);
        await writer.write(data);
        writer.releaseLock();
      });
    </script>
  </body>
</html>
Step 3: Running the Script
Once your HTML file is ready, you can open it in your mobile browser. We have uploaded the script on github to try out.
Connect to BleuIO: Tap the “Connect to BleuIO” button to initiate a connection.
Send Commands: Once connected, you can start sending AT commands or use the built-in “Scan for BLE Devices” button to see nearby BLE devices.
View Output: The responses from the BleuIO dongle will appear in the output section on the right.
Step 4: Customizing and Expanding
This setup provides a solid foundation for more advanced BLE development on mobile devices. You can easily modify the script to add more AT commands or even build a full-fledged BLE application. Whether you want to control BLE devices, gather data, or create interactive applications, this setup offers flexibility and mobility.
Output:
With the BleuIO USB dongle and the Web Serial API, you can now bring BLE development to your mobile device, giving you the freedom to code, test, and interact with BLE devices wherever you are. This capability opens up new possibilities for developers who need to work on the go, providing a powerful toolset right in your pocket.
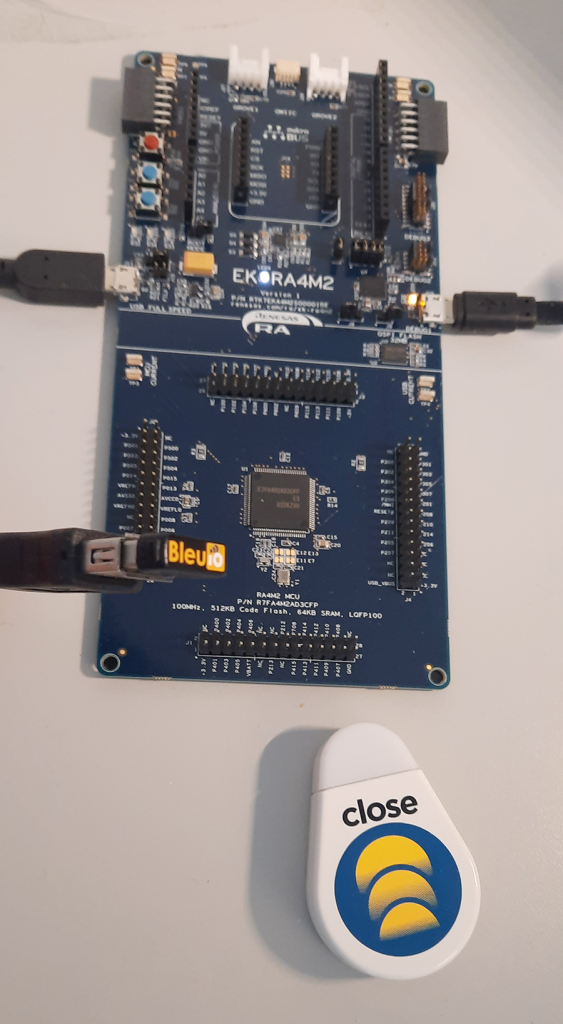
In an age where air quality has become increasingly important, monitoring CO2 levels in various environments is crucial. This project demonstrates how to create a real-time CO2 monitoring system using the Renesas EK-RA4M2 evaluation kit and the BleuIO dongle.
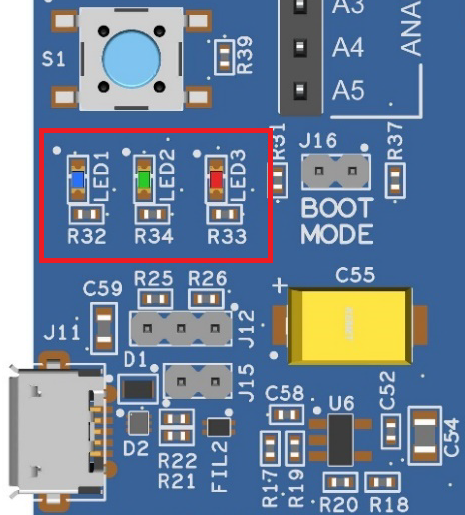
This project walks you through the process of scanning Bluetooth advertising signals from a HibouAir sensor, retrieving CO2 data, and responding to these readings with visual cues through LED indicators on the Renesas board. Blue LED for ‘good’ (<600ppm), green LED for ‘average’ (<1000ppm) and red LED for ‘poor’ (>1000ppm). The board will also print the CO2 values, as they change, on the RTTViewer.
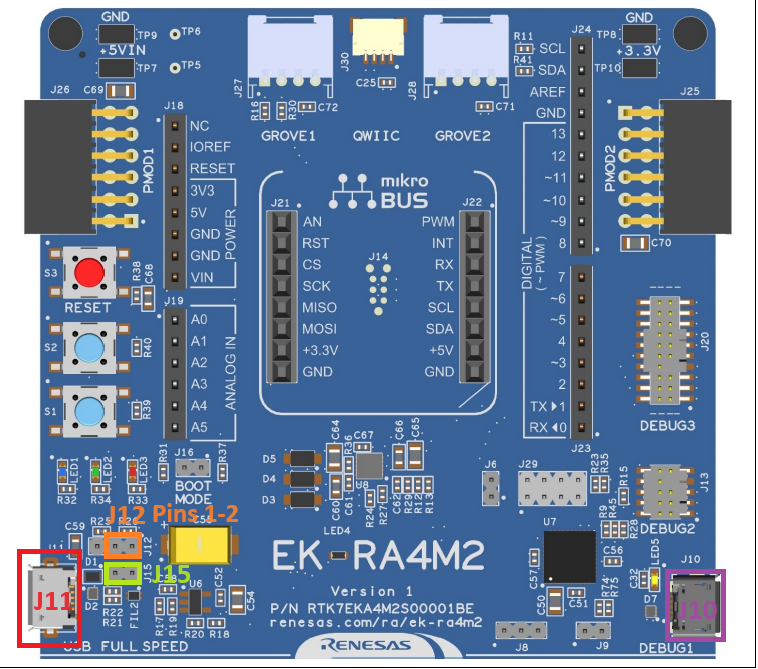
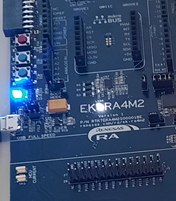
Connect a Micro USB device cable (type-A male to micro-B male) between J10 (Debug1) and a Computer USB port.
Plug in a BleuIO Dongle in the USB OTG Cable (type-A female to micro-B male) and connect it to J11 (USB Full Speed).
Make sure Jumper J12 is placed on pins 1-2
Remove Jumper J15 pins
The example will make us of the on board LEDs R32 (Blue), R34 (Green) and R33 (Red):
Importing project
Open e² studio IDE
Choose a workspace and click ‘Launch’
Download or clone the example project. Place the folder ‘bleuio_ra4m2_co2_monitor_example’ in workspace.
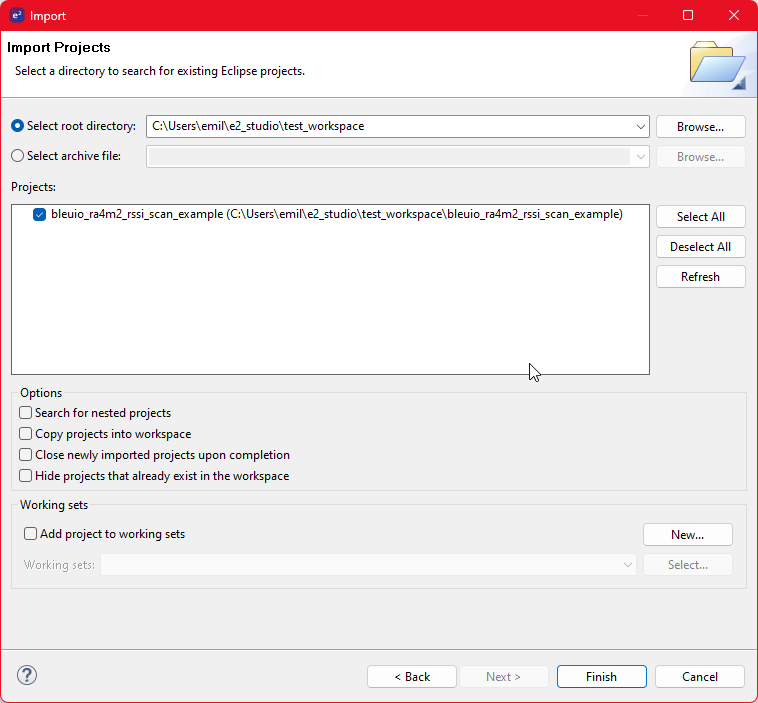
Choose Import Project
Select ‘Existing Projects into Workspace’ under the ‘General’ tab:
Click the ‘Browse…’ button and open folder where the ‘bleuio_ra4m2_co2_monitor_example’ project folder is located:
Finally select the project and click ‘Finish’. You have now imported the the project!
Running the example
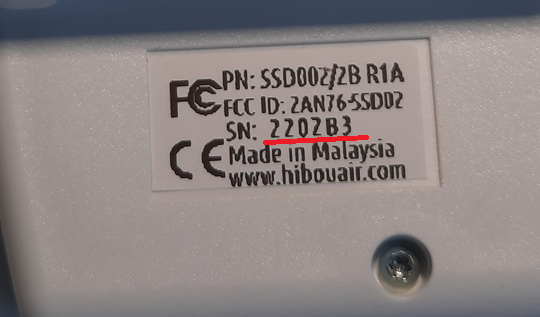
Go to file ‘usb_hcdc_app.c’ under ‘src/’ and edit line 56 to the board ID of the HibouAir Sensor:
#define BOARD_ID_TO_SCAN "2202B3"
The board ID is printed on the back of the HibouAir sensor:
Build the project by clicking the building icon:
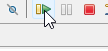
Use Debug to download and run the project. The first time you need to configure the debug settings. Click down arrow to the right of the Debug icon and select ‘Debug Configurations…’
Under ‘Renesas GDB Hardware Debugging’ select ‘bleuio_ra4m2_co2_monitor_example.elf’ and click ‘Debug’.
The debug is now configured and the ‘Debug’ icon can be used next time to run the project.
Open RTTViewer. Connect and use these settings: Connection to J-Link: USB Specify Target Device: R7FA4M2AD Target Interface & Speed: SWD 4000kHz RTT Control Block: Address 0x2000095c
On the debugger screen in e² studio click the ‘Resume’ icon twice to run the project.
The application is now running. When starting up you should notice all LEDs lighting up for one second then only the red LED will be on. It will turn off as soon as the BleuIO is configured.
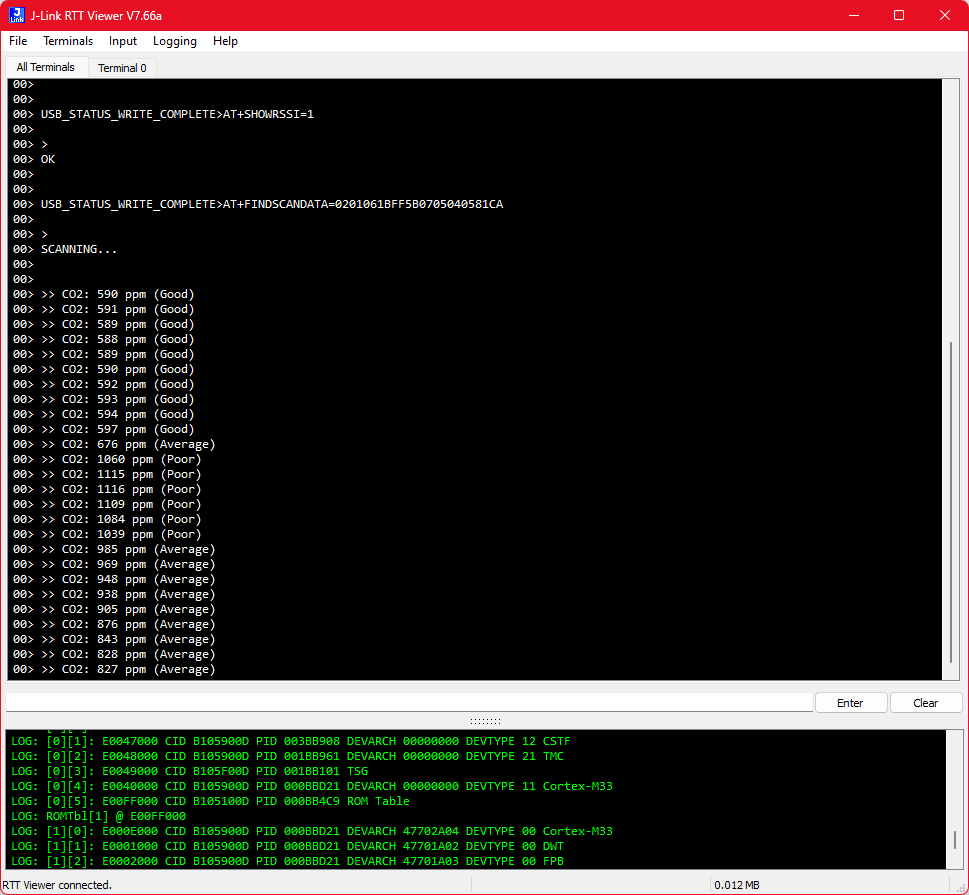
You should now see the output on the RTTViewer.
Output
When the CO2 value is less than 600 ppm only the blue LED will be turned on.
If it’s over 600 ppm but below 1000 ppm then the green LED will be on.
If it’s above 1000 ppm then the red LED will be on.
Practical Use Case
The BleuIO RA4M2 CO2 Monitor is an excellent example of how BLE technology can be harnessed to create practical, real-world applications. This project is particularly relevant for environments where air quality monitoring is essential, such as:
Offices and Workspaces: Monitor indoor air quality to ensure a healthy working environment, which can help in improving employee productivity and well-being.
Schools and Educational Institutions: Keep track of CO2 levels in classrooms to maintain a healthy atmosphere conducive to learning.
Public Buildings: Ensure that places with high foot traffic, like libraries or hospitals, maintain safe air quality levels for visitors.
Smart Homes: Integrate CO2 monitoring into home automation systems, allowing for better air quality control and energy efficiency.
With the BleuIO dongle and this project as a foundation, developers can easily expand on this concept, integrating additional sensors or creating custom applications tailored to specific needs. The combination of Bluetooth Low Energy and the versatile RA4M2 platform opens up a world of possibilities for creating innovative, responsive systems.
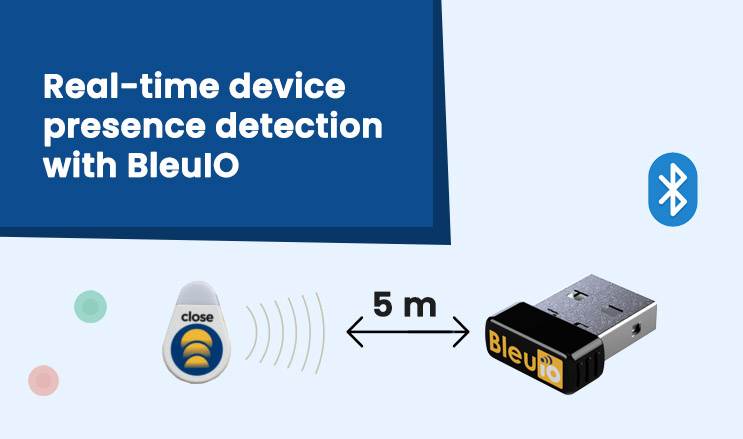
In this tutorial, we’ll guide you through creating a project that scans for nearby Bluetooth Low Energy (BLE) devices, filters them based on RSSI (Received Signal Strength Indicator), and determines if a specific device, the Close Beacon, is within a certain range. We’ll use the BleuIO USB dongle, which simplifies BLE development through its easy-to-use AT commands. By the end of this tutorial, you’ll have a working BLE scanner that can identify when the Close Beacon is within approximately 5 meters.
Overview of the Project
The goal of this project is to continuously scan for nearby BLE devices and check if a particular device, identified by its name (“Close beacon”), is within a defined range. We determine the range by setting an RSSI filter, which allows us to estimate the distance based on signal strength. If the device is found within this range, it is considered “online”; otherwise, it is “offline”.
Hardware Used
BleuIO USB Dongle: A BLE USB dongle that makes it easy to create BLE applications, prototypes, or test devices with AT commands and available libraries for Python and JavaScript.
Close Beacon: A BLE beacon device that broadcasts its presence to nearby BLE scanners. This hardware will be our target device to identify if it’s within a 5-meter range based on its RSSI.
Use Cases
Proximity Detection: Identify if a specific BLE device (e.g., a beacon or wearable) is within a set distance from the scanner.
Asset Tracking: Monitor the presence of assets in a particular area based on their BLE signal strength.
Environment Monitoring: Set up zones where certain devices must be present and get notified if they leave the range.
Getting Started with BleuIO
Before diving into the code, let’s cover the basic setup:
Hardware: You’ll need a BleuIO USB dongle. Plug it into your computer’s USB port.
Software: We’ll use JavaScript for this tutorial, running in a modern web browser that supports the Web Serial API. No additional software is required.
AT Commands Used
ATV1: Ensures verbose mode is enabled, meaning all command responses are returned in a human-readable format.
AT+CENTRAL: Sets the dongle into Central mode, allowing it to scan and connect to other BLE devices.
AT+FRSSI=-70: Filters out devices with an RSSI lower than -70 dBm, which helps to focus on devices within a closer range.
AT+GAPSCAN=3: Initiates a scan for nearby BLE devices.
HTML Setup
The following HTML file provides a simple user interface with a “Scan” button that starts the BLE scanning process.
This script, which is linked in the HTML file, manages the BLE scanning and RSSI filtering.
let port;
let reader;
let writer;
let buffer = '';
let ibeaconFound = false;
let scanIntervalId;
const connectButton = document.getElementById('connect');
const outputElement = document.getElementById('output');
connectButton.addEventListener('click', async () => {
try {
// Request a port and open a connection.
port = await navigator.serial.requestPort();
await port.open({ baudRate: 9600 });
// Start reading from the serial port.
reader = port.readable.getReader();
writer = port.writable.getWriter();
// Send initial setup commands
await writer.write(new TextEncoder().encode('ATV1\r'));
await delay(1000);
await writer.write(new TextEncoder().encode('AT+CENTRAL\r'));
await delay(1000);
await writer.write(new TextEncoder().encode('AT+FRSSI=-70\r'));
await delay(1000);
// Start the scanning process at 15-second intervals
startScanInterval();
// Read data from the device.
readLoop();
} catch (error) {
console.error('There was an error opening the serial port:', error);
}
});
function startScanInterval() {
scanIntervalId = setInterval(async () => {
ibeaconFound = false; // Reset the flag for each scan
await writer.write(new TextEncoder().encode('AT+GAPSCAN=3\r'));
// Wait 3 seconds to check if 'Close beacon' is found
setTimeout(() => {
if (ibeaconFound) {
outputElement.innerHTML =
'<div style="color: green; display: inline-block; margin-right: 8px;">●</div>Close beacon is within the range of 5 meters.<br>';
} else {
outputElement.innerHTML =
'<div style="color: red; display: inline-block; margin-right: 8px;">●</div>Close beacon is not within the range of 5 meters.<br>';
}
}, 3000);
}, 15000); // 15 seconds interval
}
async function readLoop() {
while (true) {
const { value, done } = await reader.read();
if (done) {
// Allow the serial port to be closed later.
reader.releaseLock();
break;
}
// Convert the data to a string and append it to the buffer.
buffer += new TextDecoder().decode(value);
// Split the buffer by line breaks to process each line separately.
let lines = buffer.split('\n');
buffer = lines.pop(); // Save the last incomplete line for the next read.
for (let line of lines) {
line = line.trim(); // Remove any extra whitespace
// Check if the line is a valid JSON string
if (line.startsWith('{') && line.endsWith('}')) {
try {
// Parse the JSON object.
let data = JSON.parse(line);
// Check if the object contains the 'name' property and if it's "Sheikh ibeacon".
if (data.S && data.name === 'Close beacon') {
ibeaconFound = true;
}
} catch (e) {
console.error('Error parsing JSON:', e, line);
}
} else {
// Log non-JSON lines for debugging or just ignore them.
console.log('Non-JSON line received:', line);
}
}
}
}
function delay(ms) {
return new Promise((resolve) => setTimeout(resolve, ms));
}
window.addEventListener('beforeunload', async () => {
// Stop the scanning interval when the window is closed or refreshed.
if (scanIntervalId) {
clearInterval(scanIntervalId);
}
// Close the port when the window is closed or refreshed.
if (reader) {
await reader.cancel();
reader.releaseLock();
}
if (writer) {
writer.releaseLock();
}
if (port) {
await port.close();
}
});
Code Explanation
HTML Interface:
The HTML file provides a simple user interface with a “Scan” button. When clicked, this button triggers the BLE scanning process.
JavaScript Code:
Initialization: We start by requesting access to the serial port and opening a connection to the BLE dongle. After setting up the port, we configure the dongle by sending the ATV1, AT+CENTRAL, and AT+FRSSI=-70 commands. These commands enable verbose mode, set the device to central mode, and filter out weak BLE signals (below -70 dBm), respectively.
Scan Interval: The setInterval function initiates a BLE scan every 15 seconds. The AT+GAPSCAN=3 command scans for nearby BLE devices for 3 seconds.
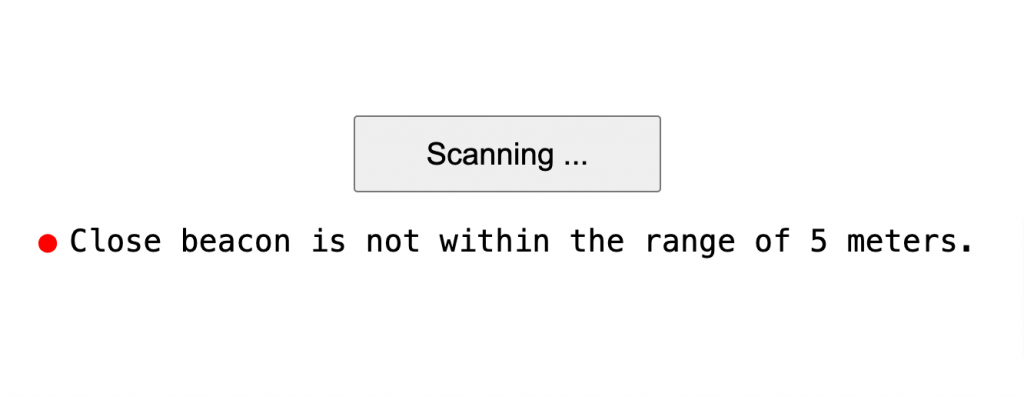
Device Detection: After each scan, we check if the specific BLE device named “Close beacon” is found. If it is, a green dot appears with a message indicating the device is within range. If not, a red dot with a message indicating the device is not within range is shown.
Reading Data: The readLoop function continuously reads data from the serial port. It checks for JSON-formatted responses from the dongle and looks for the device name in the scanned results.
Clean Up: We ensure that the scanning process stops and the serial port is closed when the user leaves the page or closes the window.
Setting Up RSSI Filtering for 5-Meter Range Detection
In this project, the goal was to detect if a specific BLE device, “Close Beacon,” is within approximately 5 meters of our BLE dongle. We achieved this by using the Received Signal Strength Indicator (RSSI), which helps us estimate the distance based on the strength of the received signal.
Understanding RSSI and Distance
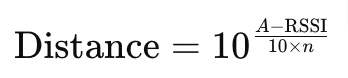
RSSI is a measure of signal strength, with higher (less negative) values indicating a closer proximity to the BLE device. The relationship between RSSI and distance is governed by the following formula:
A: RSSI at 1 meter (typically around -56 dBm for Bluetooth).
n: Path-loss exponent (usually 2 for free space, 3 for indoor environments).
For a 5-meter distance, we calculated that an RSSI of -70 dBm is appropriate. Using the formula:
A = -56 dBm
n = 2 (assuming a free-space environment)
An RSSI of -70 dBm corresponds to approximately 5 meters, which is suitable for detecting if a device is within this range.
Practical Distance Adjustment
While theoretical calculations are useful, it’s also possible to perform a practical distance adjustment by placing the “Close Beacon” 5 meters away from the BLE dongle in a controlled environment, such as a room. You can then read the obtained RSSI value directly from the BleuIO dongle. This approach takes into account the real-world radio performance of both devices, providing a more accurate and practical RSSI value for your specific setup.
Output
The BleuIO USB dongle makes it incredibly easy to develop and prototype BLE applications using AT commands. This project demonstrates how you can set up a BLE scanner with RSSI filtering to monitor the proximity of a specific device. Whether you’re developing a custom IoT solution, monitoring assets, or just exploring BLE technology, BleuIO provides a simple and effective toolset to get your projects up and running quickly.
By following this tutorial, you should now have a good understanding of how to use the BleuIO dongle to create a BLE application that scans for devices and filters them based on their signal strength.
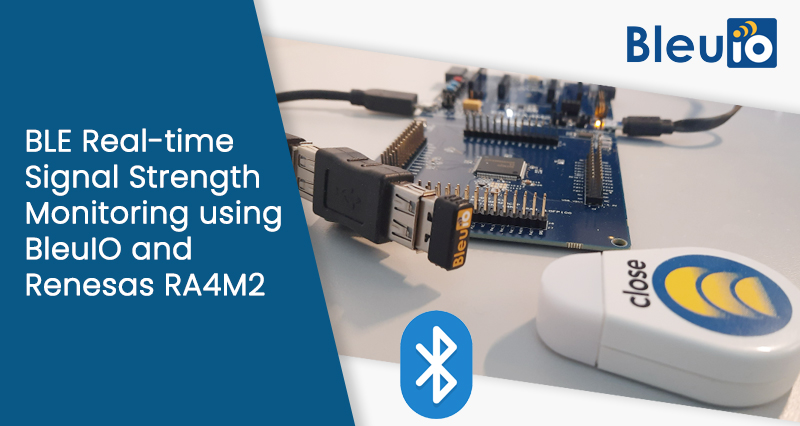
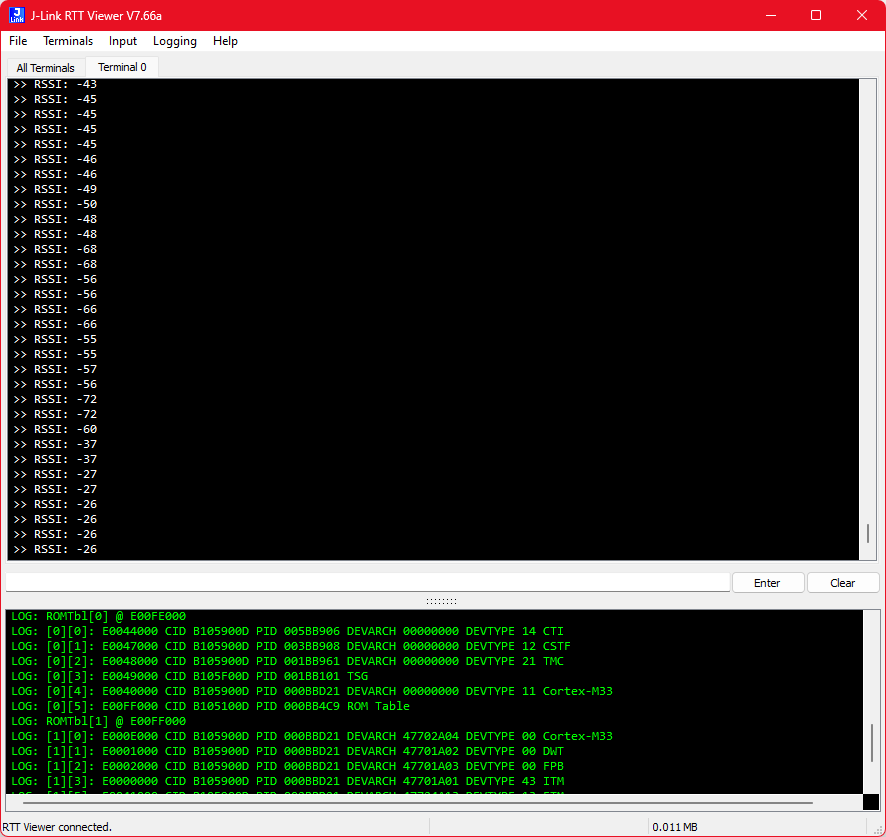
This project demonstrates how to leverage the Renesas RA4M2 microcontroller, combined with the BleuIO Bluetooth Low Energy (BLE) USB dongle, to perform a wireless signal strength scan. It provides a practical example of how to use the USB Host Communication Device Class (HCDC) driver to communicate with a BLE device, highlighting how easy it is to create BLE applications using the BleuIO dongle.
By integrating these technologies, the project enables users to scan for nearby BLE devices, parse the Received Signal Strength Indicator (RSSI) from advertising data, and display it in real-time using the RTTViewer. This setup offers a hands-on approach to understanding BLE communication and signal strength analysis.
Connect a Micro USB device cable (type-A male to micro-B male) between J10 (Debug1) and a Computer USB port.
Plug in a BleuIO Dongle in the USB OTG Cable (type-A female to micro-B male) and connect it to J11 (USB Full Speed).
Make sure Jumper J12 is placed on pins 1-2
Remove Jumper J15 pins
Importing project
Open e² studio IDE
Choose a workspace and click ‘Launch’
Download or clone the example project. Place the folder ‘bleuio_ra4m2_rssi_scan_example’ in workspace.
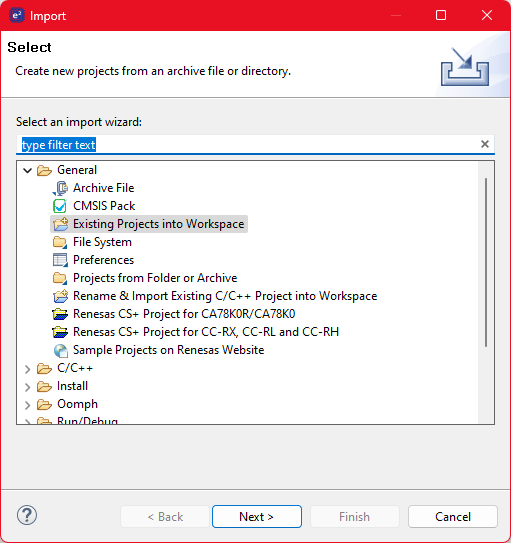
Choose Import Project
Select ‘Existing Projects into Workspace’ under the ‘General’ tab:
Click the ‘Browse…’ button and open folder where the ‘bleuio_ra4m2_rssi_scan_example’ project folder is located:
Finally select the project and click ‘Finish’. You have now imported the the project!
Running the example
Go to file ‘usb_hcdc_app.c’ under ‘src/’ and edit line 54 to the mac address of the desired:
#define ADDR_TO_SCAN "[0]D0:76:50:80:01:75"
[0] = public address
[1] = private address
On a closebeacon the mac address is printed on the back of the box (it will need to be converted to Hex):
For example: 208-118-080-128-001-117 in Hex is: D0-76-50-80-01-75
Build the project by clicking the building icon:
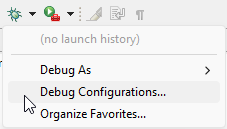
Use Debug to download and run the project. The first time you need to configure the debug settings. Click down arrow to the right of the Debug icon and select ‘Debug Configurations…’
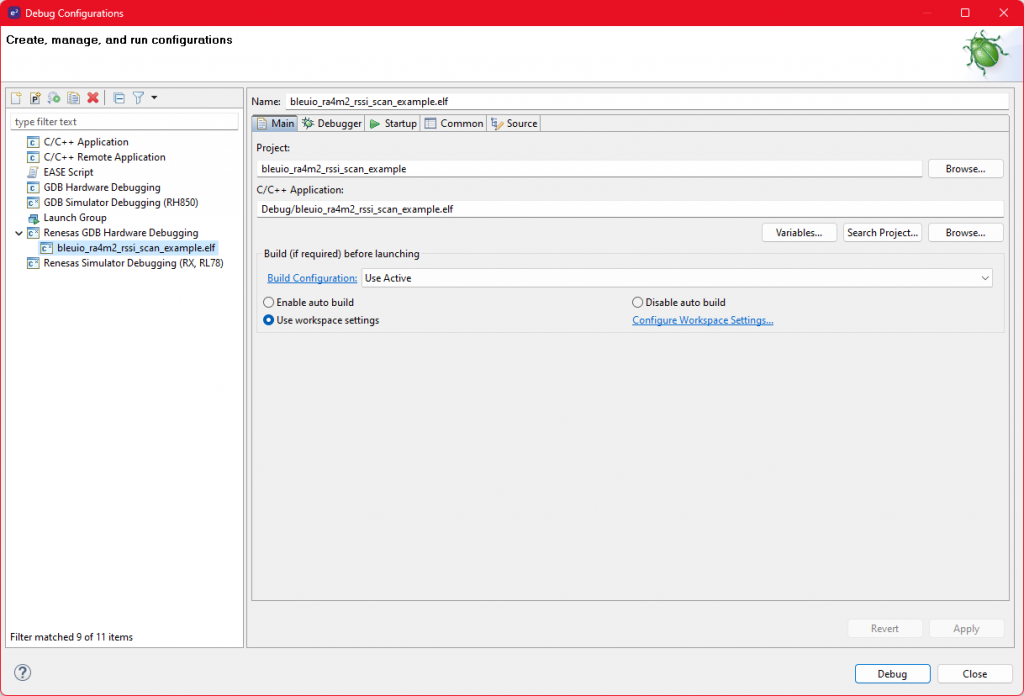
Under ‘Renesas GDB Hardware Debugging’ select ‘bleuio_ra4m2_rssi_scan_example.elf’ and click ‘Debug’. The debug is now configured and the ‘Debug’ icon can be used next time to run the project.
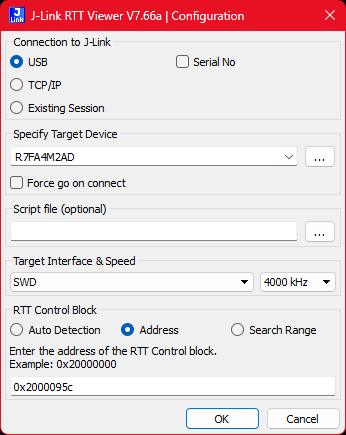
Open RTTViewer. Connect and use these settings:
Connection to J-Link: USB Specify Target Device: R7FA4M2AD Target Interface & Speed: SWD 4000kHz RTT Control Block: Address 0x2000095c
On the debugger screen in e² studio click the ‘Resume’ icon twice to run the project.
You should now see the output on the RTTViewer. Notice that when you move the scanned device closer to the BleuIO the RSSI value will increase.
Output
Below is the output screen that displays the RSSI values in real-time as the BleuIO dongle scans for nearby BLE devices:
Practical Use Cases
The BleuIO RA4M2 RSSI Scan Project can be applied in various scenarios where monitoring BLE signal strength is critical:
Proximity-Based Applications: By tracking RSSI values, developers can create proximity-based applications where actions are triggered based on the distance between BLE devices, such as automated check-ins, asset tracking, or location-based services.
Signal Strength Mapping: The project can be used to map signal strength in different environments, helping to optimize the placement of BLE devices like beacons in smart homes, retail stores, or industrial settings.
Device Tracking and Monitoring: In IoT applications, RSSI can be used to monitor the presence and movement of devices within a specific range, useful in security systems, inventory management, or environmental monitoring.
This project not only showcases the capabilities of the BleuIO dongle but also serves as a foundation for developing more complex BLE applications. Whether you’re a hobbyist, developer, or engineer, this project provides valuable insights into BLE communication and its practical applications.
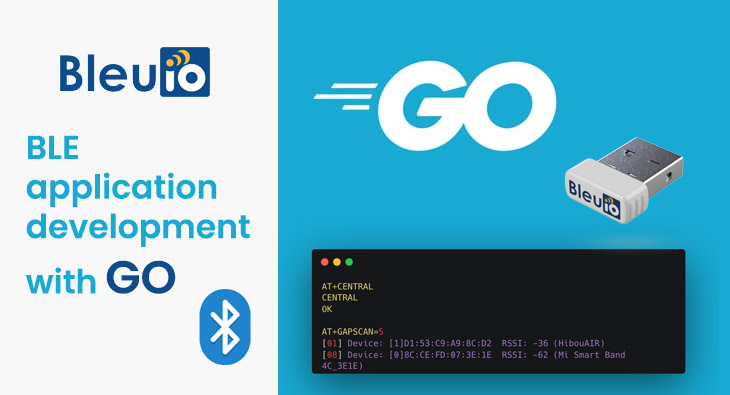
In this tutorial, we will walk you through the steps to get started with Bluetooth Low Energy (BLE) development using the BleuIO USB dongle and the Go programming language. BleuIO is a versatile and user-friendly BLE USB dongle that simplifies BLE application development with its easy-to-use AT Commands. We will show you how to set up your environment, write a simple Go program to interact with the BLE dongle, and explore some of the key features of BleuIO.
Introduction to Go
Go, also known as Golang, is an open-source programming language developed by Google. It is designed for simplicity, efficiency, and reliability, making it an excellent choice for system programming and large-scale software development. Go’s strong concurrency support, fast compilation, and robust standard library make it a popular language for network programming, cloud services, and, of course, BLE applications.
Introduction to BleuIO
BleuIO is a Bluetooth Low Energy USB dongle that can be used to create new BLE applications quickly and easily. With its built-in AT Commands, developers can interact with the BLE dongle without needing deep knowledge of BLE protocols or complex configurations. BleuIO supports various operating systems, making it a versatile tool for any development environment.
Key features of BleuIO include:
Easy-to-use AT Commands for faster development
Compatibility with any programming language
Support for Windows, macOS, and Linux
Setting Up Your Development Environment
Step 1: Install Go
First, ensure that you have Go installed on your system. You can download the latest version of Go from the official website: https://golang.org/dl/. Follow the installation instructions for your operating system.
Step 2: Initialize a New Go Module
Create a directory and open a terminal . Run the following command to initialize a new Go module:
go mod init bleuio-example
Step 3: Install the Serial Package
Install the go.bug.st/serial package, which provides a simple API for serial communication in Go:
go get go.bug.st/serial
Writing Your First Go Program with BleuIO
Step 4: Write the Program
Create a new file named main.go in your project directory and add the following code:
package main
import ( "fmt" "log" "time"
"go.bug.st/serial" )
func main() { // Open the serial port mode := &serial.Mode{ BaudRate: 9600, } port, err := serial.Open("/dev/cu.usbmodem4048FDE52CF21", mode) if err != nil { log.Fatalf("Failed to open port: %v", err) } defer port.Close()
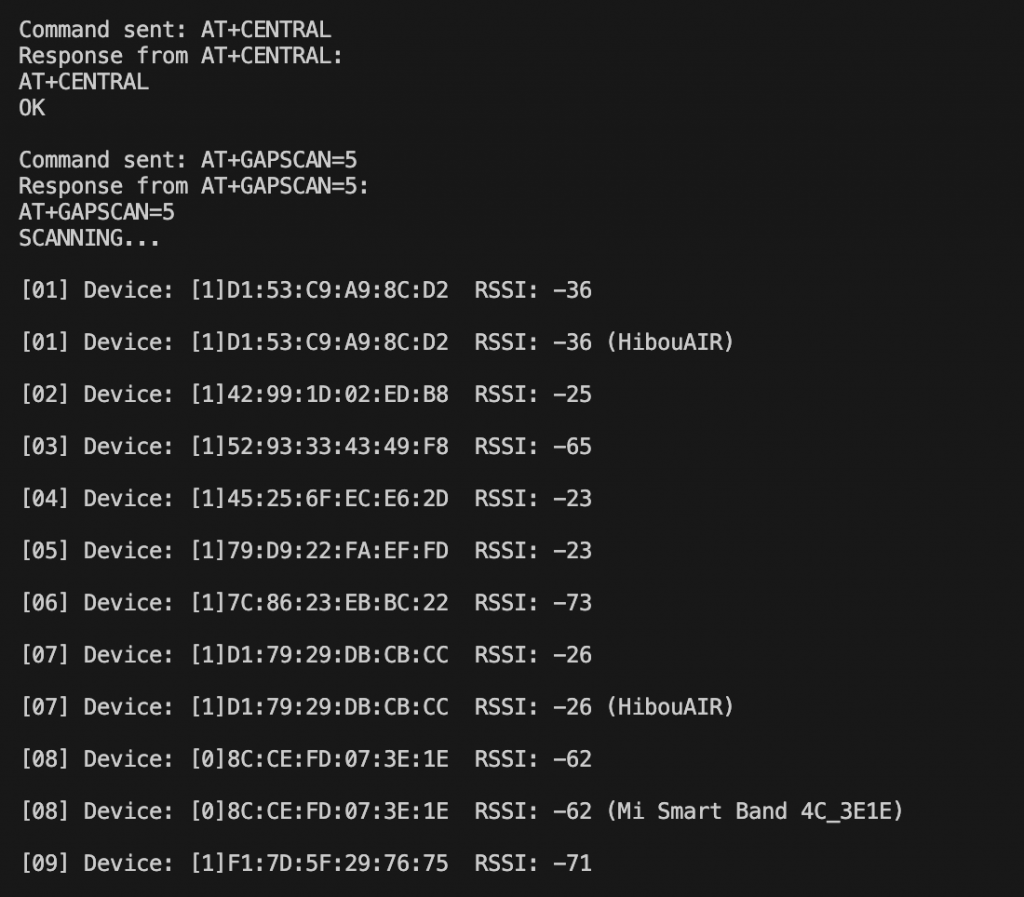
// Write "AT+CENTRAL" to the serial port _, err = port.Write([]byte("AT+CENTRAL\r")) if err != nil { log.Fatalf("Failed to write AT+CENTRAL to port: %v", err) } fmt.Println("Command sent: AT+CENTRAL")
// Wait for a short moment to ensure the command is processed time.Sleep(2 * time.Second)
// Read the response for the AT+CENTRAL command buf := make([]byte, 100) n, err := port.Read(buf) if err != nil { log.Fatalf("Failed to read from port: %v", err) } fmt.Printf("Response from AT+CENTRAL:\n%s\n", string(buf[:n]))
// Write "AT+GAPSCAN=5" to the serial port _, err = port.Write([]byte("AT+GAPSCAN=5\r")) if err != nil { log.Fatalf("Failed to write AT+GAPSCAN=5 to port: %v", err) } fmt.Println("Command sent: AT+GAPSCAN=5")
// Wait for the scan to complete (5 seconds in this case) time.Sleep(6 * time.Second) // Adding a bit more time to ensure the response is received
// Read the response for the AT+GAPSCAN=5 command buf = make([]byte, 1000) n, err = port.Read(buf) if err != nil { log.Fatalf("Failed to read from port: %v", err) }
// Print the response fmt.Printf("Response from AT+GAPSCAN=5:\n%s\n", string(buf[:n])) }
Step 5: Run the Program
Ensure your BleuIO USB dongle is connected and configured correctly. Then, run the program using the following command in the terminal:
go run main.go
Explanation of the Program
Opening the Serial Port: The program opens the serial port where the BleuIO dongle is connected. Adjust the serial port path (/dev/cu.usbmodem4048FDE52CF21) according to your system (e.g., COM3 on Windows). To get the location of connected BleuIO on macOS, run this command on terminal ls /dev/cu.*
Setting the Central Role: The program sends the AT+CENTRAL command to set the BLE dongle in central role mode. Similarly we can try sending AT+FINDSCANDATA=5B07=3 which will look for advertised data from BLE devices whose manufacturing id is 5B07.
Reading the Response: It waits for 2 seconds to ensure the command is processed and reads the response from the serial port.
Scanning for BLE Devices: The program sends the AT+GAPSCAN=5 command to scan for nearby BLE devices for 5 seconds.
Printing the Scan Results: After waiting for the scan to complete, the program reads and prints the response from the serial port.
Output
This tutorial demonstrated how to get started with BLE development using the BleuIO USB dongle and the Go programming language. BleuIO simplifies BLE application development with its straightforward AT Commands, making it accessible for developers using any programming language. With Go’s efficiency and robust standard library, you can quickly develop powerful BLE applications.
We are thrilled to announce the release of the BleuIO Pro, the latest and most advanced addition to our range of Bluetooth Low Energy (BLE) USB dongles. Designed for the developers looking to create advance BLE 5.2 applications, the BleuIO Pro offers unmatched features, speed, and versatility.
Special Launch Offer: Save Big on BleuIO Pro
To celebrate the launch of the BleuIO Pro, we are offering an exclusive limited-time discount. Order now and get the BleuIO Pro for just $29, a significant saving off the regular price of $35. This offer is only available until September 2024, so don’t miss out on this opportunity to enhance your BLE projects with the most advanced BLE USB dongle on the market.
The BleuIO Pro builds upon the solid foundation of our original BleuIO, including all its amazing features while introducing significant enhancements to meet the demands of advanced BLE applications. Here’s what makes the BleuIO Pro a game-changer:
Renesas SmartBond DA14695 SoC: At the heart of the BleuIO Pro is the powerful Renesas SmartBond DA14695 System-on-Chip (SoC), ensuring robust performance and reliability.
Bluetooth® Low Energy 5.2: Experience the latest in BLE technology with BLE 5.2, offering improved connection stability, extended range, and higher data throughput.
32Mbit QSPI FLASH: With 32Mbit of Quad SPI Flash memory, the BleuIO Pro provides ample space for complex applications and data storage.
Transfer Speeds up to 2Mbps: Enjoy faster data transfer speeds, ideal for time-sensitive applications and large data exchanges.
Extended Advertising Packets: Utilize extended advertising packets to broadcast more data and improve the efficiency of your BLE communications.
Programmable LED: Customize the integrated LED for status indicators, notifications, or any application-specific functions.
Ideal for Advanced BLE Applications
The BleuIO Pro is perfect for developers looking to push the boundaries of BLE technology. Whether you’re working on IoT projects, wearable tech, smart home devices, or industrial automation, the BleuIO Pro provides the advanced capabilities you need.
Easy Development with AT Commands and Libraries
As with the original BleuIO, the BleuIO Pro can be easily programmed using AT Commands, making it accessible even for those new to BLE development. For faster and more sophisticated development, our Python and Javascript libraries offer extensive support and flexibility.
Don’t miss out on this opportunity to upgrade your toolkit and take your projects to the next level with the BleuIO Pro.