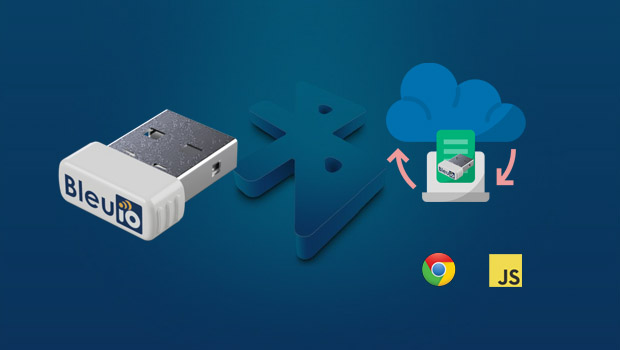
In this article, we will see how to send BLE data to the cloud. Together with the BleuIO javascript library and BleuIO USB dongle, we will get BLE data from HibouAir. After getting the advertised data, we will pass it to a simple function that will give us an object with meaningful air quality data numbers. Then we will send the data to the firebase cloud.
For this project, we will need
- BleuIO USB dongle.
- HibouAir – Air Quality Monitor
- Firebase account.
Step 1:
Clone the GitHub repository using git clone https://github.com/smart-sensor-devices-ab/hbiouAirToFirebase.git
Step 2:
- Create a firebase account from https://firebase.google.com/.
- After creating a firebase account, create a project and an app under this project. Make sure its a web app.
- Once the app is ready, collect your app information API key, apiKey etc.
- Add a real time database
Also, make sure your firebase realtime database read-write rules are true.
{ “rules”: { “.read”: true, “.write”: true } }
Now open firebaseconfig.js file from the root folder and paste your information collected.
Note : if the database information is not on the list, please update it manually by getting the realtime database url
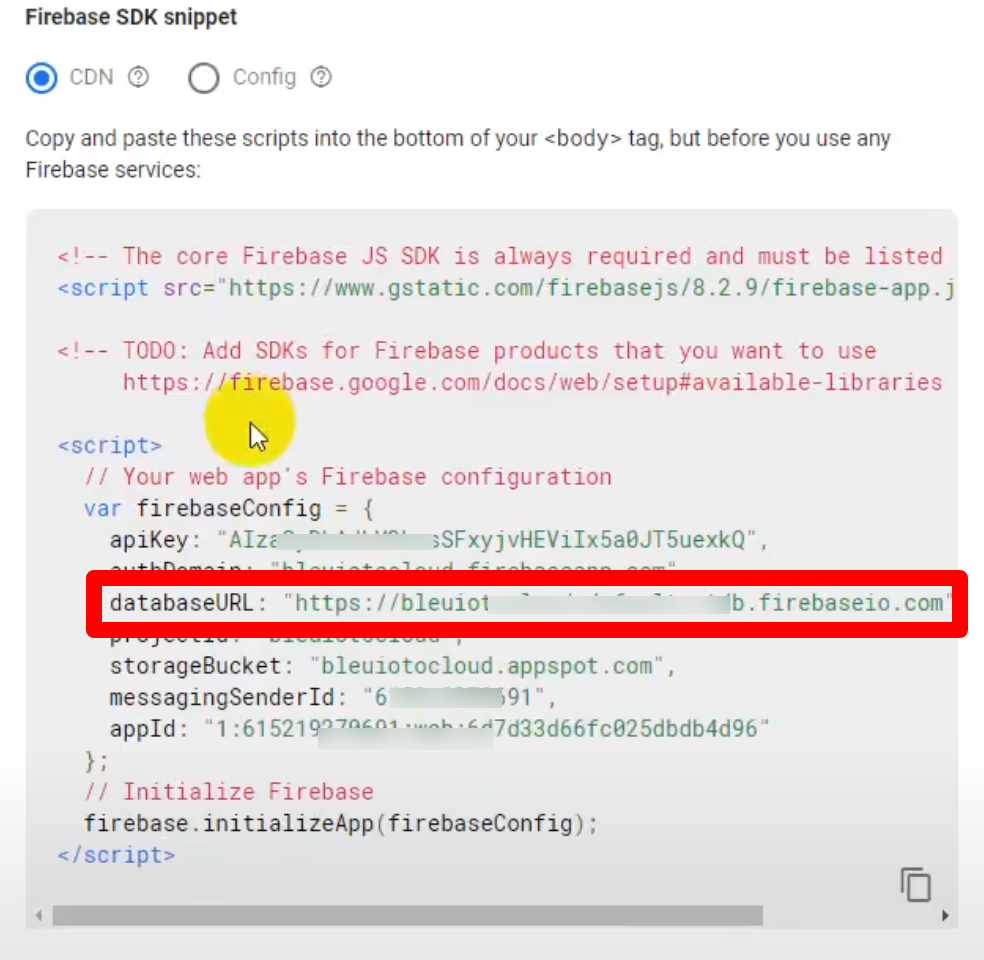
Follow the detailed guideline to setup firebase for this script.
https://hibouair.com/cloud-storage/firebase-api-instructions.pdf
Step 3:
Let’s start the app. To run the app, we need to have a website bundler. We can use parceljs. Install parceljs from https://parceljs.org/getting-started/webapp/
Once it’s installed, go to the app folder and type parcel index.html
You will have your app running on the browser.
Step 4:
- Connect your dongle to your pc.
- Open the app on your browser and click connect.
- Click on the device information. If you see the device is in peripheral mode than you have to make it central.
- Click on the central button. And recheck device information.
Step 4:
- Lets scan for nearby devices.
- Click on the scan button and look at the list of the scanned device on your console log. Pick any HibouAir devices and copy the device information.
- Open the index.js file and go to line 95
- replace the scan target information with the one you copied.
- Update firebaseconfig.js with
Now save the page and click on send data to the cloud. If your firebase configuration is correct, you should see data showing on your cloud database.
Here is the code for index.html file
<!DOCTYPE html>
<html lang="en">
  <head>
    <meta charset="UTF-8" />
    <meta http-equiv="X-UA-Compatible" content="IE=edge" />
    <link
      href="https://cdn.jsdelivr.net/npm/bootstrap@5.0.0-beta2/dist/css/bootstrap.min.css"
      rel="stylesheet"
      integrity="sha384-BmbxuPwQa2lc/FVzBcNJ7UAyJxM6wuqIj61tLrc4wSX0szH/Ev+nYRRuWlolflfl"
      crossorigin="anonymous"
    />

    <meta name="viewport" content="width=device-width, initial-scale=1.0" />
    <script src="https://www.gstatic.com/firebasejs/8.2.9/firebase-app.js"></script>
    <script src="https://www.gstatic.com/firebasejs/8.2.9/firebase-database.js"></script>
    <title>BLE data to google firebase</title>
  </head>
  <body>
    <div class="container">
      <h2>Send BLE data to cloud</h2>
      <p>
        This script helps you to connect to BleuIO and sends data to Firebase
        cloud.
      </p>
      <p>
        Learn more about BleuIO.
        <a href="https://www.bleuio.com/">https://www.bleuio.com/</a>
      </p>
      <br />
      <button class="btn btn-success" id="connect">Connect</button>
      <button class="btn btn-success" id="deviceinfo">Device Info</button>
      <!-- To get Ble data from HibouAir (Peripheral device), BleuIO has to be on central mode -->
      <button class="btn btn-success" id="central">Central Mode</button>

      <button class="btn btn-success" id="scan">Scan for devices</button>

      <button class="btn btn-success" id="sendDataTCloudBtn">
        Send data to cloud Data
      </button>

      <button class="btn btn-success" id="stopSendingData">
        Stop Sending Data
      </button>
      <br /><br />
      <h5><div id="log"></div></h5>
    </div>

    <script src="./firebaseconfig.js"></script>
    <script src="./index.js"></script>
  </body>
</html>
Here is the code for index.js file
import * as my_dongle from 'bleuio'
document.getElementById('connect').addEventListener('click', function(){
  my_dongle.at_connect()
})
document.getElementById('deviceinfo').addEventListener('click', function(){
  my_dongle.ati().then((data)=>console.log(data))
})
document.getElementById('central').addEventListener('click', function(){
    my_dongle.at_central().then((data)=>console.log(data))
})
document.getElementById('scan').addEventListener('click', function(){
my_dongle.at_gapscan(2).then((data)=>console.log(data))
})
const parseSensorData = ((input) =>{
    let counter = 13;
    if (input.includes("5B070503")) {
      counter = 17;
    }
    let sensorData = {
      sensorid:
        input[counter + 1] +
        input[counter + 2] +
        input[counter + 3] +
        input[counter + 4] +
        input[counter + 5] +
        input[counter + 6],
      pressure:
        parseInt(
          input[counter + 13] +
            input[counter + 14] +
            input[counter + 11] +
            input[counter + 12],
          16
        ) / 10,
      temperature:
        parseInt(
          input[counter + 17] +
            input[counter + 18] +
            input[counter + 15] +
            input[counter + 16],
          16
        ) / 10,
      humidity:
        parseInt(
          input[counter + 21] +
            input[counter + 22] +
            input[counter + 19] +
            input[counter + 20],
          16
        ) / 10,
        voc:
        parseInt(
          input[counter + 25] +
            input[counter + 26] +
            input[counter + 23] +
            input[counter + 24],
          16
        ) / 10,
      als: parseInt(
        input[counter + 9] +
          input[counter + 10] +
          input[counter + 7] +
          input[counter + 8],
        16
      ),
      pm1:
        parseInt(
          input[counter + 29] +
            input[counter + 30] +
            input[counter + 27] +
            input[counter + 28],
          16
        ) / 10,
      pm25:
        parseInt(
          input[counter + 33] +
            input[counter + 34] +
            input[counter + 31] +
            input[counter + 32],
          16
        ) / 10,
      pm10:
        parseInt(
          input[counter + 37] +
            input[counter + 38] +
            input[counter + 35] +
            input[counter + 36],
          16
        ) / 10}
    return sensorData
  })

const sendDataToCloud = (()=>{
    //get the scan target device id by scanning for device.
    my_dongle.at_scantarget('[1]F9:0D:35:E7:72:65',2).then((data)=>{
        let theAdvData = data.filter(element => element.includes("ADV"));
        if(theAdvData && theAdvData.length>0){
            console.log(theAdvData)
            let advData = theAdvData[0].split("[ADV]: ")
            // converting advertising string to meaningfull numbers
            //and pass it to an array of objects
            let airQualityData = parseSensorData(advData[1])
            console.log(airQualityData)
            // save the data to database
            let database = firebase.database(); // which gets the database
            let ref = database.ref("records");
            //pushing the object to the reference
            ref.push(airQualityData)
        }
    })
})
var intervalId
document.getElementById('sendDataTCloudBtn').addEventListener('click', function(){
    sendDataToCloud()
    if (intervalId) {
        clearInterval(intervalId);
    }
    intervalId = setInterval(sendDataToCloud ,5000);
    document.getElementById("log").innerHTML="Sending data to cloud. Click stop sending data to stop the process.";

})
document.getElementById('stopSendingData').addEventListener('click', function(){
    clearInterval(intervalId)
    document.getElementById("log").innerHTML="Sending data stopped.";
 })
document.getElementById('stopProcess').addEventListener('click', function(){
   console.log(my_dongle.stop())
})
Right now, its sending data every 5 seconds.
You can stop the process by clicking stop sending data.
Have a look at the following video for a better understanding.