BleuIO

BleuIO

  • Get Started
  • Buy Now
  • Manual
  • AT Commands
  • Help

›Raspberry PI Pico

Manual

  • How it works
  • How to use
  • Verbose Mode
  • Known Issues
  • Troubleshooting

Firmware Updates

    BleuIO Pro (SSD025)

    • Firmware Updates
    • Release History

    BleuIO (SSD005)

    • Firmware Updates
    • Release History of BleuIO (SSD005)

AT-Commands

  • List of AT Commands

BleuIO Libraries

  • JavaScript Library
  • Python Library

Scripts & Tutorials

  • Python: iBeacon
  • Python: Eddystone Beacon
  • Python: Scan
  • Python: Scan and Store
  • Python: SPS Script
  • Python: File transfer Script
  • Python: Repeater Script
  • Javascript: Google chrome.serial Beacon
  • C# Console App Example
  • C# WFA Example

Script using libraries

    Python library > v1.2.0

    • Custom Services example using Python library
    • Eddystone example using Python library
    • IBeacon example using Python library
    • Scan example using Python library
    • Scan and store example using Python library

    Python library < v1.2.0

    • Eddystone example using Python library
    • IBeacon example using Python library
    • Scan example using Python library
    • Scan and store example using Python library
    • SPS example using Python library
    • Security Example using Python library

    JS library

    • Eddystone example using Javascript library
    • IBeacon example using Javascript library
    • Scan example using Javascript library
    • Security Example using Javascript library
    • Get Device Distance

Projects

    Arduino

    • Arduino Example

    Beaglebone

    • Beaglebone Example

    Raspberry Pi

    • Raspberry PI into Beacon
    • Raspberry PI home automation

    Raspberry PI Pico

    • BleuIO integration (Part1)
    • BleuIO integration (Part2)
    • BleuIO integration (Part3)

    Renesas RA4M2

    • Signal Strength Monitoring
    • Real-Time CO2 monitor
    • Monitoring Air Quality

    STM32 Nucleo-144

    • Nucleo-144 board example
    • Smart Bulb Example

    M5Stack's CoreMP135

    • M5Stack's CoreMP135 board example

Build Your Own Firmware

  • Build Your Own Firmware
  • Advertising Example

More

  • Links
Order Now

BleuIO

$19.99

Buy Now

BleuIO integration (Part2)

Integrating BleuIO with Adafruit Feather RP2040 for Seamless BLE Applications Part 2

Introduction

After following the steps in our previous post Integrating BleuIO with Adafruit Feather RP2040 for Seamless BLE Applications and trying out the Adafruit TinyUSB Library Example serial_host_bridge it is now time for a more practical example. This example is going to show you how to connect real sensors to the Feather, read the values and have it command the BleuIO to advertise them.

Basically you could say that you are going to create a autonomous BLE beacon that advertise the current temperature, humidity etc.

For this example we are using a Gas sensor BME680 and a OPT3002 Light-to-Digital Sensor.

Requirements

  • Adafruit Feather RP2040 Board
  • BleuIO – Bluetooth Low Energy USB Dongle
  • Arduino IDE
  • A Gas sensor BME680
  • A OPT3002 Light-to-Digital Sensor
  • Our example project [Download from GitHub]

Arduino Libraries

  • Adafruit BME680 Library
  • ClosedCube OPT3002

The libraries can easily be installed through the Arduino IDE:

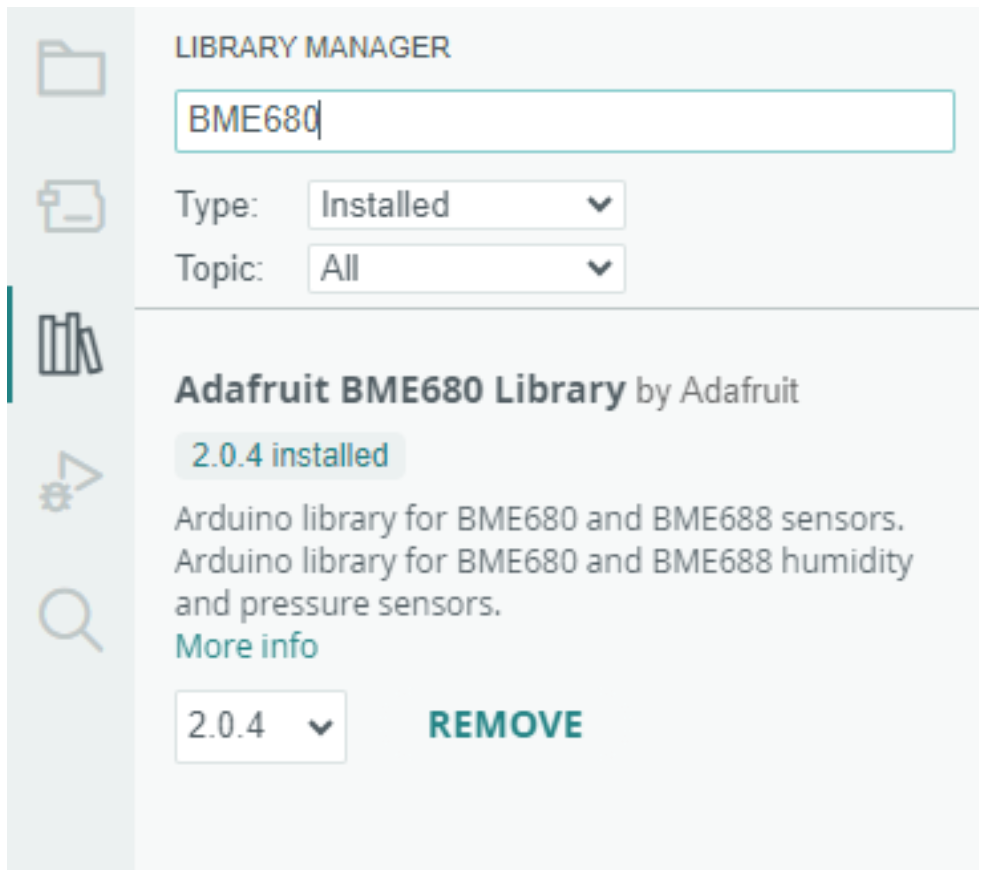
  • Open Library Manager by clicking the Library Manager icon to the left or go through menu: Sketch>Include Libraries>Manage Libraries…

  • Search for Adafruit_BME680, and install the Adafruit_BME680 Library
  • Search for ClosedCube OPT3002, and install the ClosedCube OPT3002 library

Connecting I2C sensors

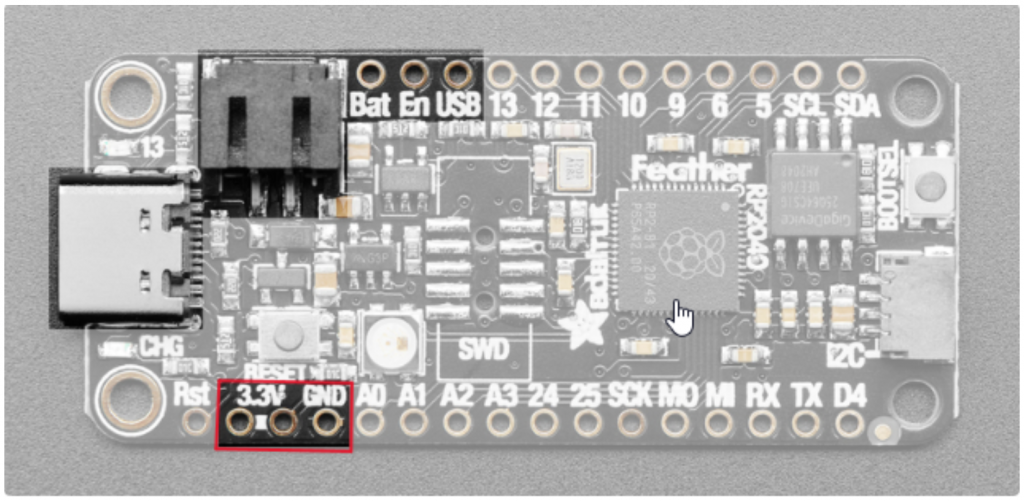
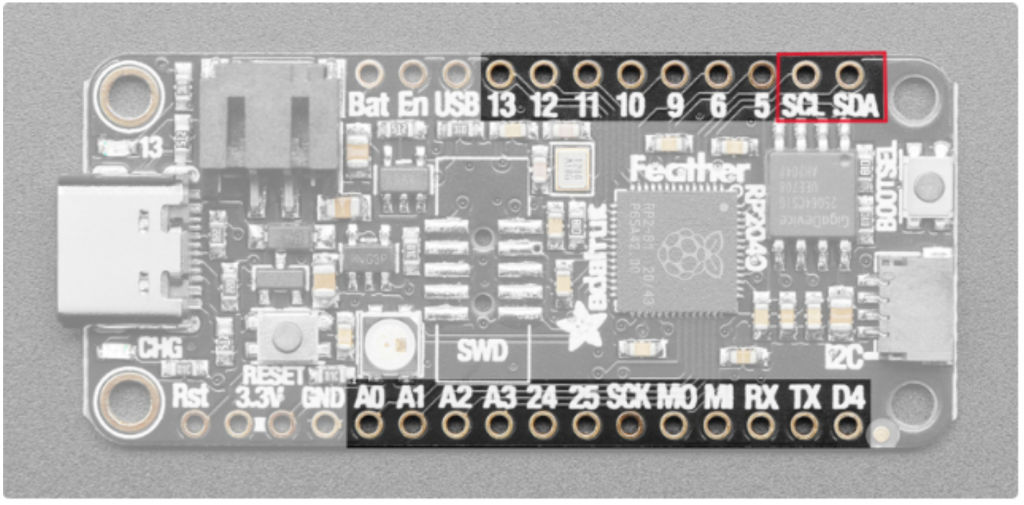
  • Connect four wires (at a minimum) for each I2C device.
  • Power the device with 3.3V, then a ground wire.
  • And a SCL clock wire, and and a SDA data wire.
Running the example

  • Make sure the BleuIO Dongle is connected to the Feather RP2040 Board.
  • Connect the Feather RP2040 Board to your computer using the USB cable.
  • Make sure the Feather RP2040 Board is selected aswell as the correct COM port in the dropdown menu.

  • (Optional) Change the frequency the sensors are read and advertising data updated, in the code
// How often we read the sensors and update the advertings message
(in seconds)
#define READ_UPDATE_FREQUENCY   5
  • Click the Upload button.

Done! The dongle should now be advertising the sensor values. (If you just plugged in the Feather it may take about 10 seconds before advertising starts as the BleuIO bootloader opens and closes)

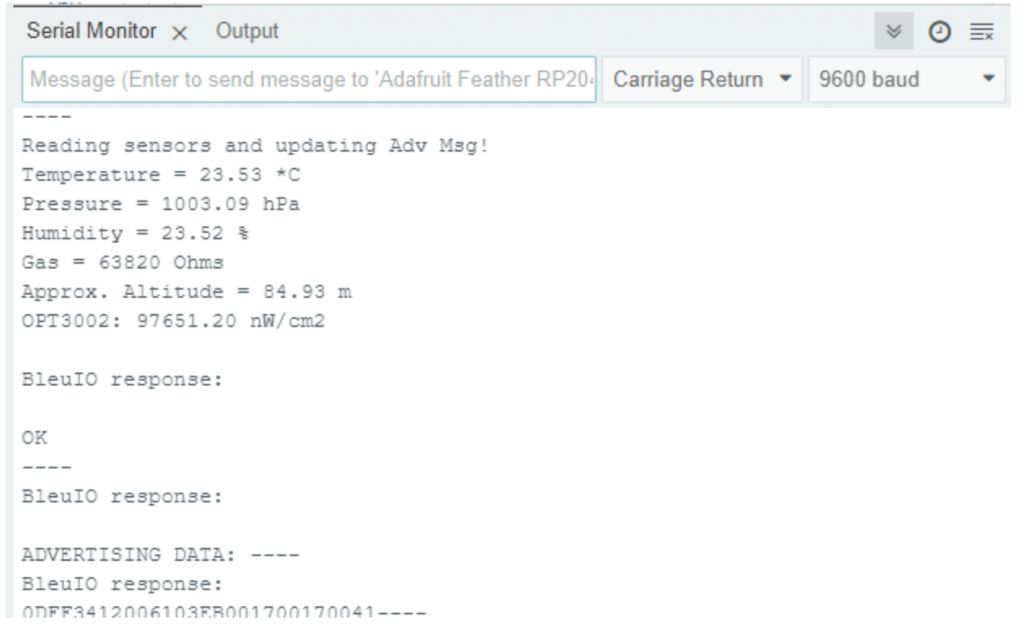
  • (Optional) Open Serial Monitor. You can open the Serial Monitor from the menu: Tools>Serial Monitor

You should now see the output from the project.
Scanning the results

To see the results you can use any BLE scanner app.

Here we use nRF Connect:
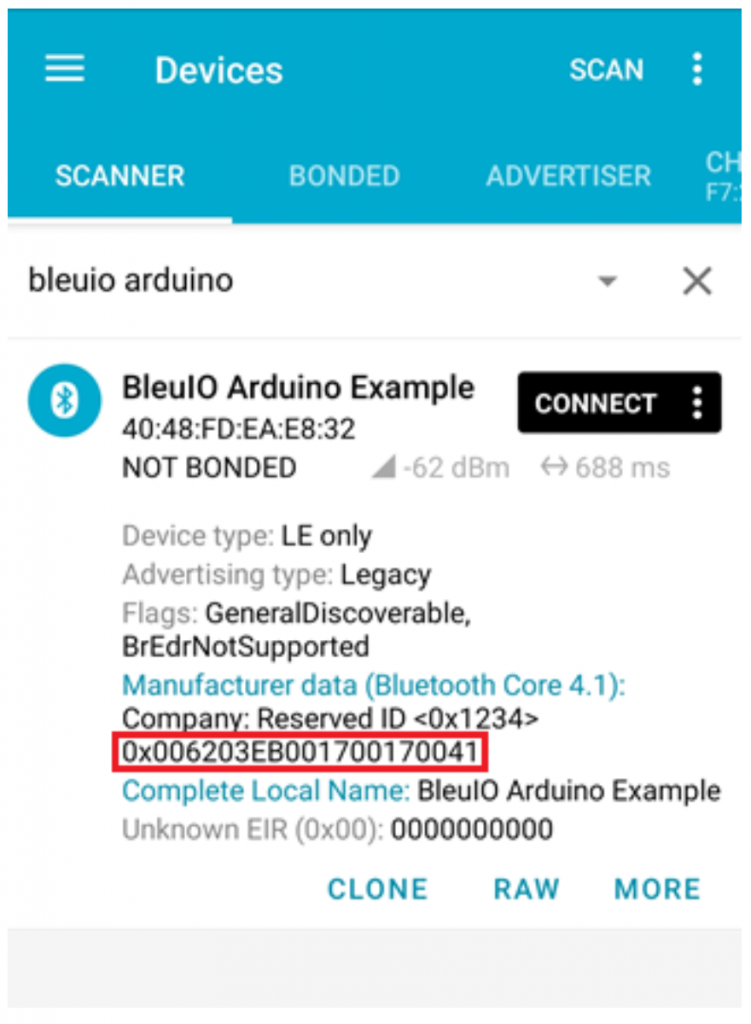
The data in the red box is our sensor values:

0x006203EB001700170041

When we parse the hex into decimal values we get:

Light: 0x0062 = 98 uW/cm2
Pressure: 0x03EB = 1003 hPa
Temperature: 0x0017 = 23 Celcius
Humidity: 0x0017 = 23 %Rh
Gas Resistance: 0x0041 = 65 KOhms

← BleuIO integration (Part1)BleuIO integration (Part3) →
  • Introduction
  • Requirements
    • Arduino Libraries
  • Connecting I2C sensors
  • Running the example
  • Scanning the results

Support Request

If you have any queries or technical questions, please don't hesitate to send us a message. We will reply within 24 hours.

Message Sent!

Docs
ManualAT CommandsHelp
Community
YouTubeLinkedInFacebook
More
BleuIOSmart Sensor DevicesGitHub
Sales & Support
support@bleuio.comsales@bleuio.com
Copyright © 2025 BleuIO. A product of Smart Sensor Devices