Running BleuIO on M5Stack’s CoreMP135

At BleuIO, we aim to provide versatile, easy-to-use Bluetooth Low Energy (BLE) solutions that can run across a wide range of platforms.
Today, we’re excited to showcase a new environment where BleuIO works perfectly: the CoreMP135 from M5Stack Technology Co., Ltd.

We tested running our BLE sniffer script on this compact Linux industrial controller — and it worked seamlessly.

You can find the BleuIO Pro USB Dongle available for purchase here on DigiKey.

About CoreMP135

The CoreMP135 is a highly integrated Linux-based industrial control host powered by the STM32MP135DAE7 chip. It features a single-core ARM Cortex-A7 processor running at up to 1 GHz and is equipped with 4Gb (512MB) of DDR3L SDRAM.

Key highlights include:

  • Dual Gigabit Ethernet interfaces
  • USB 2.0-A and USB-C ports
  • CAN FD, RS485, and Grove I2C/UART connectivity
  • 2.0-inch IPS capacitive touchscreen
  • 1W speaker for audio output
  • Low-power design with a built-in RTC and rechargeable battery support
  • Pre-installed Debian Linux system on MicroSD — ready for development right out of the box
  • DIN rail mounting support for industrial installations

You can find the CoreMP135 available for purchase here on DigiKey.

Running BleuIO on CoreMP135

Using one of the CoreMP135’s USB ports, we connected the BleuIO dongle.
After installing Python and the required libraries, the device immediately recognized BleuIO as a USB serial device.

We ran our BLE sniffer script without any issues.

Steps to Setup:

  1. Plug the BleuIO dongle into one of the USB-A ports.
  2. Install required Python libraries:
    sudo apt update
    sudo apt install python3 python3-pip
    pip3 install pyserial
    pip3 install bluetooth-numbers
  3. Verify the dongle’s connection: ls /dev/ttyACM*
  4. Download the BLE sniffer script from GitHub: git clone https://github.com/smart-sensor-devices-ab/ble_sniffer_bleuio.git cd ble_sniffer_bleuio
  5. Run the script: python3 ble_sniffer.py

The sniffer script successfully captured BLE advertisements and displayed them on the CoreMP135’s Linux terminal.

BLE Sniffer Script

Our BLE sniffer script is available open-source on GitHub:
https://github.com/smart-sensor-devices-ab/ble_sniffer_bleuio

The script allows you to easily:

  • Scan for nearby BLE devices
  • Capture advertisement packets
  • Analyze BLE data in real-time

It’s lightweight, fast, and ideal for quick deployments or prototyping BLE-based solutions.

Output

Use Cases: Why Run BleuIO on CoreMP135?

Pairing BleuIO with the CoreMP135 opens up a range of practical applications across industries. In industrial environments, the setup can be used for continuous BLE monitoring, where devices like temperature or air quality sensors broadcast data that can be captured and logged locally. With its dual Gigabit Ethernet ports and USB connectivity, CoreMP135 serves well as a lightweight BLE-to-cloud gateway, collecting data from nearby BLE devices and forwarding it to cloud platforms for further analysis or real-time dashboards.

This setup also proves valuable for conducting Bluetooth security audits, allowing developers and testers to passively capture BLE advertisements and analyze potential vulnerabilities in connected devices such as wearables, beacons, or smart home equipment. For IoT developers, it provides a rapid prototyping platform where BLE applications can be built and tested without needing bulky workstations or cloud servers. And in the smart home space, CoreMP135 can act as a local BLE hub that listens for sensor data—such as motion, humidity, or presence—then triggers automation workflows through integrated edge logic.

The CoreMP135 from M5Stack is a powerful, compact Linux host, perfect for running BleuIO-based applications.
This platform proves that BleuIO can operate smoothly not just on desktops or laptops, but also on rugged, embedded, and industrial devices.

Whether you’re building a smart factory solution, a BLE gateway, or simply experimenting with Bluetooth technology, the combination of BleuIO and CoreMP135 provides flexibility, reliability, and ease of deployment.

Share this post on :

Control Your Windows Computer Over BLE Using BleuIO

Controlling your computer wirelessly might sound complex — but with the power of Bluetooth Low Energy (BLE) and the BleuIO dongle, it’s surprisingly simple. In this guide, we’ll walk through a creative example where you can control the brightness of your Windows PC using BLE commands sent from your mobile phone using BLE app.

What This Project Does

Using a BleuIO dongle connected to a Windows PC, we enable BLE communication using the Serial Port Service (SPS). When a BLE-enabled phone connects to the dongle and sends a value (from 1 to 10), the PC receives this data and adjusts its screen brightness accordingly — all in real-time.

It’s a simple and powerful demonstration of BLE-to-system integration, and it’s only the beginning of what’s possible with BleuIO.

Tools & Requirements

Install both with:

python -m pip install --user pyserial screen-brightness-control

How It Works

This project uses the BleuIO dongle in SPS Server mode, which allows it to receive data over Bluetooth Low Energy (BLE) from a connected device — in our case, a smartphone using the nRF Connect app.

Here’s a breakdown of how everything works together:

Initialize the Dongle on the PC ( SPS)

When you run the Python script on Windows, it sends the following commands to the BleuIO dongle via serial:

  • AT+ADVSTART → Starts advertising the dongle so it becomes discoverable over BLE.

Connect to BleuIO from Your Phone (Using nRF Connect)

On your mobile device, open the nRF Connect app:

  • Tap “Scan” and look for a device named “BleuIO”
  • Tap “Connect” to establish a BLE connection

Once connected, you’ll see a list of services and characteristics provided by the BleuIO dongle.

Identify the Correct BLE Characteristic to Send Data

In the attribute table:

  • Look for a writable characteristic under one of the unknown services.
  • You’ll often see one with the following properties:
    • Write Without Response
    • (Optionally also Notify)
  • The UUID will look like: 0783B03E-8535-B5A0-7140-A304D2495CBA

Send the SPS Command from the App

Now that you’re connected and have found the correct characteristic:

  1. Tap the write icon (↥) on that characteristic
  2. Choose “UTF-8 string” as the format (not hex!)
  3. In the message field, enter something like: AT+SPSSEND=5
  4. Tap “Send”

This sends a Bluetooth message to the BleuIO dongle, which forwards it via the SPS protocol to the Python script on your PC.

Python Script Reads and Acts on the Message

On the PC, the Python script reads the incoming SPS message and extracts the number from the AT+SPSSEND= command. It then adjusts your screen brightness using the screen-brightness-control library.

For example:

  • Sending AT+SPSSEND=1 → brightness set to 10%
  • Sending AT+SPSSEND=5 → brightness set to 50%
  • Sending AT+SPSSEND=10 → brightness set to 100%

Repeating

You can send new values anytime while connected — and your computer will respond instantly by updating the brightness accordingly.

Full Python Script

Here’s the script used in the project:

import serial
import time
import screen_brightness_control as sbc

BLEU_IO_PORT = "COM4"  # Update this to match your BleuIO COM port
BAUD_RATE = 9600

def set_brightness(level):
    brightness = int(max(10, min(100, level * 10)))
    try:
        sbc.set_brightness(brightness)
        print(f"Brightness set to {brightness}%")
    except Exception as e:
        print(f"Failed to set brightness: {e}")

def setup_bleuio(ser):
    commands = [
        b'AT+SPS=1\r\n',
        b'AT+ADVSTART\r\n'
    ]
    for cmd in commands:
        ser.write(cmd)
        time.sleep(0.5)
    print("BleuIO is in Peripheral + SPS mode, now advertising...")

def read_message(ser):
    buffer = ""
    while True:
        if ser.in_waiting:
            data = ser.read(ser.in_waiting).decode("utf-8", errors="ignore")
            buffer += data
            while "\r\n" in buffer:
                line, buffer = buffer.split("\r\n", 1)
                yield line.strip()
        else:
            time.sleep(0.1)

def process_message(msg):
    if not msg or msg.startswith("AT+") or "Invalid" in msg or "CONNECTED" in msg or "ADVERTISING" in msg:
        return

    print(f"Received message: '{msg}'")
    try:
        if "=" in msg:
            _, value = msg.split("=", 1)
        else:
            value = msg
        val = int(value.strip())
        if 1 <= val <= 10:
            set_brightness(val)
        else:
            print("Value out of range (1–10)")
    except ValueError:
        print("Invalid message format")

def main():
    try:
        with serial.Serial(BLEU_IO_PORT, BAUD_RATE, timeout=1) as ser:
            setup_bleuio(ser)
            print("Waiting for BLE messages via SPS from your phone...")
            for msg in read_message(ser):
                process_message(msg)
    except serial.SerialException as e:
        print(f"Serial error: {e}")
    except KeyboardInterrupt:
        print("Exiting...")

if __name__ == "__main__":
    main()

What is SPS on BleuIO?

SPS stands for Serial Port Service, a custom BLE profile supported by BleuIO to send and receive data like a UART over BLE.

Key SPS AT Commands:

  • AT+SPSSEND=message → Sends data via BLE from client to host or vice versa

In our case, the mobile phone is the BLE client sending data to BleuIO, which is the peripheral/server.

Use Cases & Future Ideas

This project is just the beginning! Here are more ways to expand on it:

  • Control volume using BLE
  • Send commands to launch apps or toggle Wi-Fi
  • Build a BLE-based authentication system for login or locking/unlocking the screen
  • Lock/sleep windows computer

Controlling your computer via Bluetooth from a phone is now as easy as a few lines of Python and a BLE dongle like BleuIO. This project is a great foundation for building more interactive, wireless automation solutions — from IoT control panels to personal smart systems.

Share this post on :

How to Build Your Own Bluetooth Scriptable Sniffer for Under $30

Bluetooth is commonly used in many products — from smartwatches and fitness trackers to wireless speakers, beacons, air quality sensors, and beyond. As developers, engineers, or even curious tech enthusiasts, we often would like to analyze what is being transmitted in the air interface between devices.

That’s where a Bluetooth sniffer comes into play.

What is a Bluetooth Sniffer?

A Bluetooth sniffer is a hardware or software tool that captures and monitors Bluetooth communication between devices. Think of it as a network traffic analyzer, but for Bluetooth instead of Wi-Fi or Ethernet.

It works by listening to Bluetooth advertisement packets or data exchanges, decoding them, and presenting the raw data in a human-readable format. These sniffers can help you:

  • Discover nearby Bluetooth Low Energy (BLE) devices
  • Monitor BLE advertisement packets
  • Analyze signal strength (RSSI)
  • Debug BLE applications
  • Reverse engineer custom BLE services

There are high-end Bluetooth sniffers on the market — like those from Ellisys or Teledyne LeCroy — which are powerful but often cost hundreds or thousands of dollars.

But what if you could build your own for under $30?

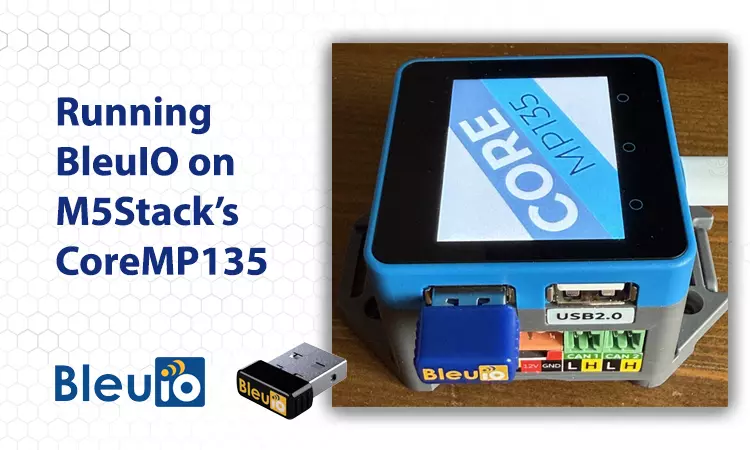
BleuIO – BLE USB Dongle

BleuIO is a compact USB dongle that turns your computer into a Bluetooth Low Energy sniffer and data communication tool. It’s built on Dialog Semiconductor’s DA14683 chip and supports AT command communication over a virtual COM port.

You can plug it into any USB port and control it using a terminal or a script.

Price: $24.99
Platform support: Windows, macOS, Linux
Protocols supported: Bluetooth Low Energy (BLE)
Programming Language Support: Supports almost all major programming languages including C++, C#, Python, Javascript etc

Build Your Own Scriptable BLE Sniffer with BleuIO

What You’ll Need

  • 1x BleuIO USB Dongle
  • A computer (Windows/macOS/Linux)
  • Python installed (3.x recommended)
  • The pyserial library
  • The bluetooth_numbers library

Step 1: Install Required Python Package

Open your terminal or command prompt and run:

pip install pyserial
pip install bluetooth-numbers

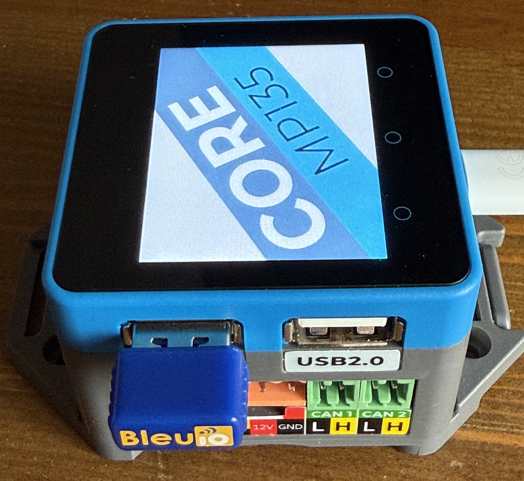
Step 2: Connect the BleuIO Dongle

Plug the dongle into a USB port. On Windows, it’ll appear as something like COM3. On macOS/Linux, it will show up as /dev/tty.usbmodemXXXX or /dev/ttyACM0.

Step 3: Write the BLE Sniffer Script

import serial
import time
import re
from bluetooth_numbers import company
import binascii

# Replace with your actual serial port
#SERIAL_PORT = 'COM3'      # Windows
SERIAL_PORT = '/dev/cu.usbmodem4048FDE52DAF1'  # For Linux/macOS
BAUD_RATE = 9600

def scan_devices(duration=3):
    device_list = []  

    try:
        with serial.Serial(SERIAL_PORT, BAUD_RATE, timeout=1) as ser:
            ser.write(f'AT+DUAL\r\n'.encode())
            print(f"\nStarting BLE scan for {duration} seconds...\n")
            ser.write(f'AT+GAPSCAN={duration}\r\n'.encode())
            time.sleep(duration + 1)

            print("Discovered Devices:\n" + "-"*50)
            while ser.in_waiting:
                line = ser.readline().decode('utf-8', errors='ignore').strip()
                print(">>", line)

                match = re.match(r"\[\d+\] Device: \[(\d)\]([0-9A-F:]{17})\s+RSSI:\s*-?\d+(?:\s+\((.+?)\))?", line)
                if match:
                    addr_type = int(match.group(1))
                    mac = match.group(2)
                    name = match.group(3) if match.group(3) else ""
                    device_list.append((addr_type, mac, name))

        return device_list

    except serial.SerialException as e:
        print("Serial error:", e)
        return []


def scan_target_device(mac_address, address_type=1, duration=3):
    try:
        with serial.Serial(SERIAL_PORT, BAUD_RATE, timeout=1) as ser:
            print(f"\nScanning target device {mac_address} (Type: {address_type}) for {duration} seconds...\n")
            cmd = f'AT+SCANTARGET=[{address_type}]{mac_address}={duration}\r\n'
            ser.write(cmd.encode())
            time.sleep(duration + 1)

            print("Advertisement Data:\n" + "-"*50)
            adv_data = None

            while ser.in_waiting:
                line = ser.readline().decode('utf-8', errors='ignore').strip()
                print(">>", line)

                if "Device Data [ADV]:" in line and adv_data is None:
                    parts = line.split("Device Data [ADV]:")
                    if len(parts) == 2:
                        adv_data = parts[1].strip()

            if adv_data:
                print("\nDecoding Advertisement Payload...\n")
                decode_ble_adv(adv_data)
            else:
                print("No ADV data found to decode.")

    except serial.SerialException as e:
        print("Serial error:", e)


AD_TYPE_NAMES = {
    0x01: "Flags",
    0x02: "Incomplete 16-bit UUIDs",
    0x03: "Complete 16-bit UUIDs",
    0x08: "Shortened Local Name",
    0x09: "Complete Local Name",
    0x0A: "TX Power Level",
    0x16: "Service Data",
    0xFF: "Manufacturer Specific Data"
}

# Flag bit definitions
FLAGS_MAP = {
    0x01: "LE Limited Discoverable Mode",
    0x02: "LE General Discoverable Mode",
    0x04: "BR/EDR Not Supported",
    0x08: "Simultaneous LE and BR/EDR (Controller)",
    0x10: "Simultaneous LE and BR/EDR (Host)"
}

def decode_ble_adv(hex_str):
    data = bytearray.fromhex(hex_str)
    index = 0
    object_count = 1

    print(f"Decoding ADV Data: {hex_str}\n{'-'*50}")

    while index < len(data):
        length = data[index]
        if length == 0 or (index + length >= len(data)):
            break

        ad_type = data[index + 1]
        ad_data = data[index + 2: index + 1 + length]
        type_name = AD_TYPE_NAMES.get(ad_type, f"UNKNOWN")

        print(f"\nData Object {object_count}:")
        print(f"Length: {length}")
        print(f"Type: 0x{ad_type:02X} ({type_name})")

        if ad_type == 0x01:  # Flags
            flags = ad_data[0]
            print("Flags:")
            for bit, label in FLAGS_MAP.items():
                if flags & bit:
                    print(f"   - {label}")
            print("Device Type Inferred:", end=" ")
            if flags & 0x04:
                print("LE Only")
            elif flags & (0x08 | 0x10):
                print("Dual Mode (LE + BR/EDR)")
            else:
                print("BR/EDR Only or Unknown")

        elif ad_type == 0xFF:  # Manufacturer Specific Data
            if len(ad_data) >= 2:
                company_id = ad_data[0] | (ad_data[1] << 8)
                company_name = company.get(company_id, "Unknown")
                print(f"Company Identifier: 0x{company_id:04X} ({company_name})")
                manufacturer_data = ad_data[2:]
                if manufacturer_data:
                    print("Manufacturer Data:", binascii.hexlify(manufacturer_data).decode())
            else:
                print("Malformed Manufacturer Specific Data")

        elif type_name == "UNKNOWN":
            print(f"This script is currently unable to decode this type.")
            print("Raw Data:", "0x" + binascii.hexlify(ad_data).decode())

        else:
            print("Raw Data:", "0x" + binascii.hexlify(ad_data).decode())

        index += length + 1
        object_count += 1


if __name__ == "__main__":
    devices = scan_devices()

    if devices:
        print("\nSelect a device to scan further:")
        for idx, (addr_type, mac, name) in enumerate(devices):
            label = f"{mac} ({name})" if name else mac
            print(f"[{idx}] {label} ")

        choice = input("Enter device number (e.g. 0): ").strip()

        try:
            selected = devices[int(choice)]
            scan_target_device(selected[1], selected[0])  
        except (IndexError, ValueError):
            print("Invalid selection. Exiting.")
    else:
        print("No devices found.")

Note: Make sure to update the SERIAL_PORT variable in the script to match your system’s COM port — for example, COM3 on Windows or /dev/tty.usbmodemXXXX on macOS/Linux.

How It Works

  • Step 1: Sends the AT+GAPSCAN command to BleuIO, which returns a list of nearby BLE devices with MAC addresses and signal strength.
  • Step 2: Parses the output and allows the user to select one device.
  • Step 3: Sends the AT+SCANTARGET=[address_type]MAC=3 command to scan the selected device and retrieve its advertisement payload.
  • Step 4: Displays the detailed advertising data broadcasted by the device — which can include device name, UUIDs, manufacturer data, and sensor readings.
  • Step 5: Attempts to decode all fields in the BLE advertisement payload, showing both known fields (like Flags, Manufacturer Data) and unknown ones with raw data formatting

Decoding Advertisement Data

Every BLE advertisement is made up of TLV (Type-Length-Value) structures. This script extracts each one and attempts to decode:

  • Flags (Type 0x01): e.g., LE Only, Dual Mode
  • Manufacturer Specific Data (Type 0xFF): Extracts company ID and raw payload
  • Unknown types: Clearly marked and printed as raw hex for future analysis

Even if the script can’t interpret a block, you’ll still see it listed with length, type, and raw content — helping with reverse engineering or debugging unknown BLE devices.

Sample Output

Starting BLE scan for 3 seconds...

Discovered Devices:
>> AT+DUAL
>> AT+GAPSCAN=3
>> SCANNING...
>> [01] Device: [1]D1:53:C9:A9:8C:D2  RSSI: -56 (HibouAIR)
>> [02] Device: [1]C4:AD:CB:84:A5:73  RSSI: -83
>> [03] Device: [1]D1:79:29:DB:CB:CC  RSSI: -52 (HibouAIR)
>> [04] Device: [1]C0:8C:23:2E:1A:E5  RSSI: -59
>> SCAN COMPLETE

Select a device to scan further:
[0] D1:53:C9:A9:8C:D2 (HibouAIR) 
[02] C4:AD:CB:84:A5:73 
[03] D1:79:29:DB:CB:CC (HibouAIR) 
[104] C0:8C:23:2E:1A:E5 
Enter device number (e.g. 0): 03      

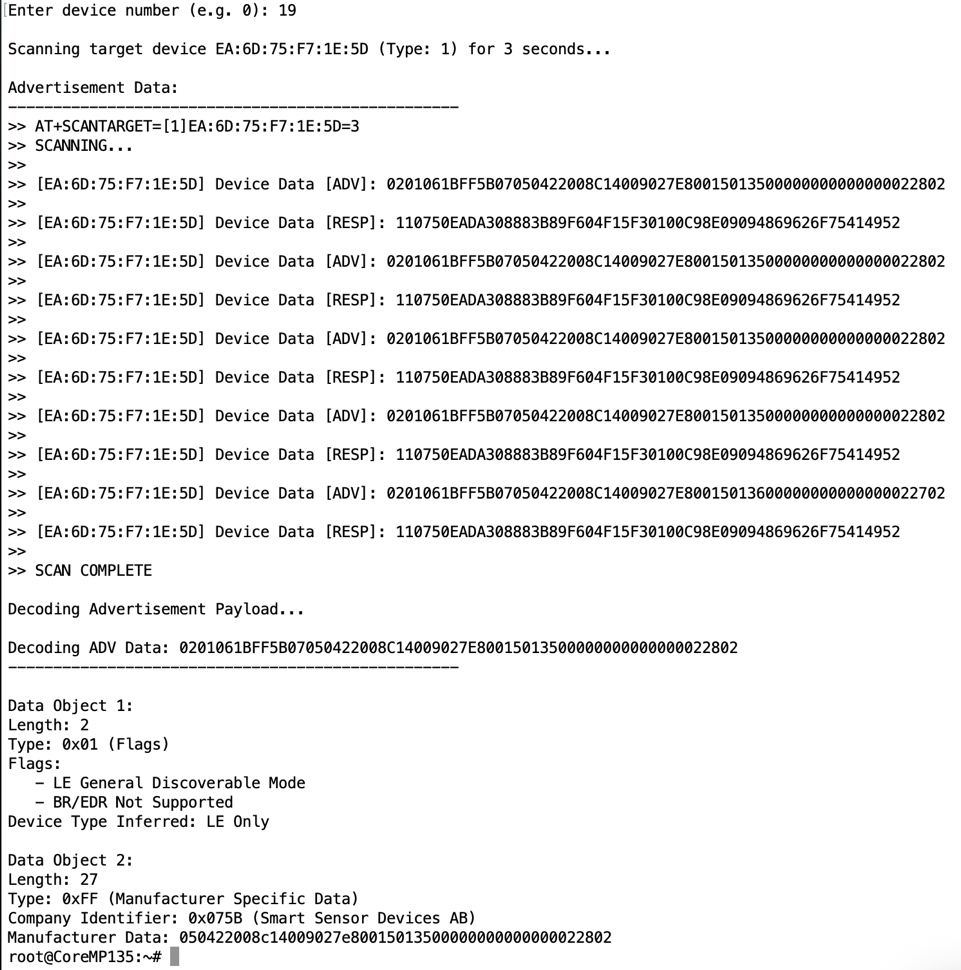
Scanning target device D1:79:29:DB:CB:CC (Type: 1) for 3 seconds...

Advertisement Data:
--------------------------------------------------
>> AT+SCANTARGET=[1]D1:79:29:DB:CB:CC=3
>> SCANNING TARGET DEVICE...
>> [D1:79:29:DB:CB:CC] Device Data [ADV]: 0201061BFF5B0705042200696D009F26B60082023D00000000000000024C02
>> [D1:79:29:DB:CB:CC] Device Data [RESP]: 110750EADA308883B89F604F15F30100C98E09094869626F75414952
>> SCAN COMPLETE

Decoding Advertisement Payload...

Decoding ADV Data: 0201061BFF5B0705042200696D009F26B60082023D00000000000000024C02
--------------------------------------------------

Data Object 1:
Length: 2
Type: 0x01 (Flags)
Flags:
   - LE General Discoverable Mode
   - BR/EDR Not Supported
Device Type Inferred: LE Only

Data Object 2:
Length: 27
Type: 0xFF (Manufacturer Specific Data)
Company Identifier: 0x075B (Smart Sensor Devices AB)
Manufacturer Data: 05042200696d009f26b60082023d00000000000000024c02

Source Code on GitHub

You can find the full, open-source implementation of this BLE sniffer — including the Python script and all improvements — on GitHub:

https://github.com/smart-sensor-devices-ab/ble_sniffer_bleuio

Now we have a working BLE sniffer that not only scans for nearby devices but also lets you interactively select a target and read its detailed advertisement data.

Here are some cool extensions we can build from here:

  • Display air quality sensor data from BLE beacons like HibouAir
  • Export scan logs to CSV for analysis
  • Build a desktop or web UI using Electron or Flask
  • Trigger alerts based on proximity or signal strength
  • Improve decoding support for more AD types (TX Power, Local Name, Services)
  • Show scan response (RESP) data alongside advertisement (ADV)
  • Display or log RSSI values for signal analysis

Bluetooth sniffers don’t have to be complicated or expensive. With BleuIO, a bit of Python, and a USB port, you can begin exploring the hidden world of BLE devices all around you — right from your own machine.

This setup is perfect for developers working on BLE apps, IoT product engineers, or tech enthusiasts who want to learn how devices communicate wirelessly.

Share this post on :