LUA parser for Apple Homekit using BleuIO

This project demonstrates how to turn a BLE advertisement-based air quality sensor—in this case, the HibouAir—into a fully integrated Apple Home accessory. By combining the flexibility of the BleuIO USB BLE dongle and the simplicity of Lua scripting, we’ve created a bridge that reads raw BLE advertisement packets, decodes the environmental data, and makes it available to the Apple Home app through Homebridge.

Unlike most HomeKit integrations that rely on cloud APIs or native HomeKit devices, this setup is completely offline and works on any platform. The use of BleuIO allows BLE communication to be handled reliably across macOS, Linux, or Windows—something most native BLE libraries struggle to achieve consistently across platforms. Lua adds a lightweight, embeddable scripting engine perfect for decoding raw advertisement data in real time. Together, they make a fast, minimalist, and cross-platform solution for BLE-to-HomeKit integration.

What This Project Does

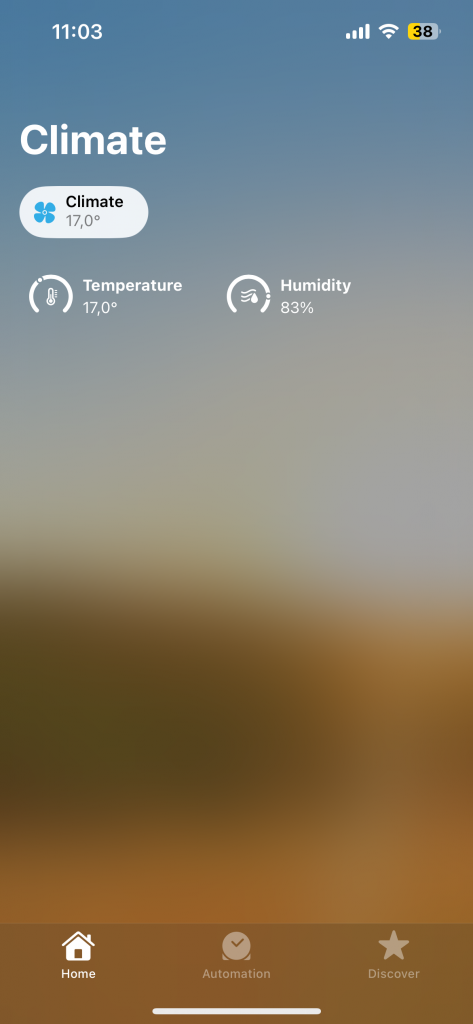
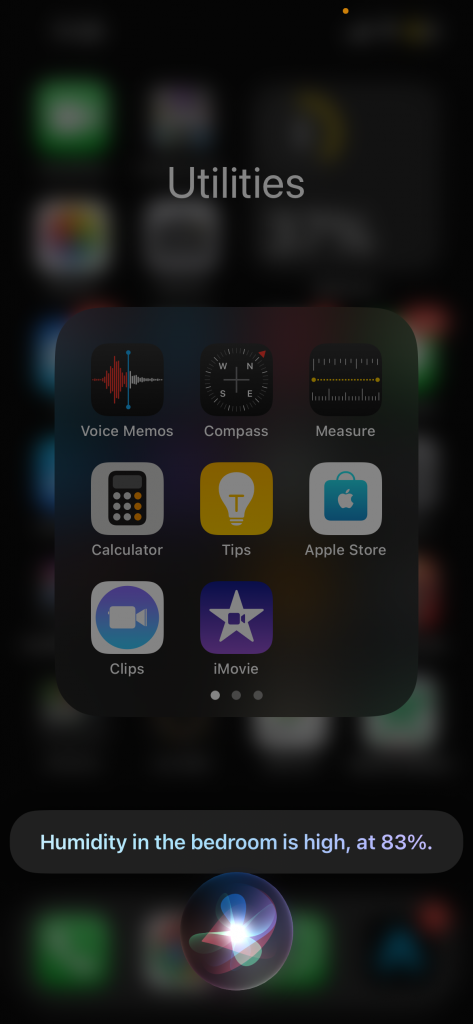
At a high level, the system continuously scans BLE advertisements from the HibouAir sensor using BleuIO. The data is decoded using Lua, which extracts temperature and humidity values. These values are then served via a local HTTP server, and finally read by Homebridge using the homebridge-http-temperature-humidity plugin. This enables you to view real-time air quality data directly in the Apple Home app on your iPhone, iPad, or Mac.

Project Components and Tools Used

Step-by-Step Setup

1. Connect and Configure BleuIO

Start by plugging in your BleuIO USB dongle. On macOS or Linux, find its serial port using:

ls /dev/tty.usb*

Once you’ve identified the port (e.g., /dev/tty.usbmodemXXXXXX), update the Python script accordingly.

2. Create bleuio_scan.py

This script will initiate a BLE scan using BleuIO’s AT command interface and capture the raw advertisement data from the HibouAir sensor. It filters for packets containing a specific manufacturer ID and writes the first match to a file.

import serial
import time
import re

# Update this with your actual port
port = "/dev/tty.usbmodem4048FDE52DAF1"

ser = serial.Serial(port, 9600, timeout=1)
ser.write(b"AT+FINDSCANDATA=5B07050=2\r\n")
time.sleep(4)

data = ser.read_all().decode()
ser.close()

print("RAW OUTPUT:\n", data)

# Extract first adv line
matches = re.findall(r"Device Data \[ADV\]: ([0-9A-F]+)", data)
if matches:
    with open("adv_data.txt", "w") as f:
        f.write(matches[0])
    print("✅ Wrote ADV data:", matches[0])
else:
    print("❌ No HibouAir data found.")

3. Parse the BLE Data Using Lua

Lua is ideal for embedded processing due to its speed and small footprint. We use it here to decode the hex-formatted BLE advertisement string into readable sensor values.

Create a file named parse_ble_adv.lua with the following:

local http = require("socket.http")
local ltn12 = require("ltn12")
local json = require("dkjson")

-- Reverse byte order (e.g., "1234" -> "3412")
local function reverse_bytes(hexstr)
    local bytes = {}
    for i = 1, #hexstr, 2 do
        table.insert(bytes, 1, hexstr:sub(i, i+1))
    end
    return table.concat(bytes)
end

-- Parse HibouAir BLE advertisement data
local function parse_adv_data(adv)
    local pos = string.find(adv, "5B070504")
    if not pos then return nil end
    pos = pos - 1 -- Lua is 1-indexed

    local function read_val(start, len, divide_by, signed)
        local hex = reverse_bytes(adv:sub(start, start+len-1))
        local val = tonumber(hex, 16)
        if signed and val > 0x7FFF then
            val = val - 0x10000
        end
        return divide_by and val / divide_by or val
    end

    return {
        temp = read_val(pos+23, 4, 10, true),
        hum = read_val(pos+27, 4, 10),
        pressure = read_val(pos+19, 4, 10), 
        voc = read_val(pos+31, 4),
        pm1 = read_val(pos+35, 4, 10),
        pm25 = read_val(pos+39, 4, 10),
        pm10 = read_val(pos+43, 4, 10),
        co2 = tonumber(adv:sub(pos+47, pos+50), 16),
        vocType = tonumber(adv:sub(pos+51, pos+52), 16),
        ts = os.date("%Y-%m-%d %H:%M:%S")
    }
end

-- Example BLE advertisement data (replace with real data from BleuIO scan)
-- local adv_data = "0201061BFF5B070504220069130010273A0160017E0000000000000001B703"
local file = io.open("adv_data.txt", "r")
local adv_data = file:read("*a")
file:close()

local data = parse_adv_data(adv_data)
-- Write latest data to file
print("DEBUG: Writing this to latest_data.json")
print("Temperature:", data.temp)
print("Humidity:", data.hum)

local file = io.open("latest_data.json", "w")
file:write(json.encode({
    temperature = data.temp,
    humidity = data.hum,
}))

file:close()


if not data then
    print("Failed to parse advertisement data")
    return
end

print("Parsed BLE Data:")
for k, v in pairs(data) do
    print(k, v)
end

4. Automate Scanning and Parsing

To keep your data fresh, use a simple shell script to run both the scanner and parser every 10 seconds.

Create run_everything.sh:

#!/bin/bash
while true; do
  echo "Scanning and updating Homebridge..."
  python3 bleuio_scan.py && lua parse_ble_adv.lua
  sleep 10
done

Make it executable with:

chmod +x run_everything.sh

Run it in the background or with tmux to keep it alive.

5. Create the HTTP Server in Lua

This server reads from the JSON file and exposes it via an HTTP endpoint (/temp) that Homebridge can read.

local copas = require("copas")
local socket = require("socket")
local json = require("dkjson")

-- Start TCP server on port 8081
local server = socket.bind("*", 8081)
copas.addserver(server, function(c)
    c = copas.wrap(c)
    local request = c:receive("*l")

    if request and request:match("GET /temp") then
        -- Read latest temp/hum from file
        local file = io.open("latest_data.json", "r")
        local temp_hum = { temperature = 0, humidity = 0 }

        if file then
            local contents = file:read("*a")
            file:close()
            local decoded, _, err = json.decode(contents)
            if decoded then
                temp_hum = decoded
            end
        end

        local body = json.encode(temp_hum)

        local response = {
            "HTTP/1.1 200 OK",
            "Content-Type: application/json",
            "Content-Length: " .. #body,
            "",
            body
        }
        c:send(table.concat(response, "\r\n"))
    else
        c:send("HTTP/1.1 404 Not Found\r\n\r\n")
    end
end)

print("Lua HTTP server running on http://localhost:8081")
copas.loop()

You’ll need LuaSocket and dkjson:

luarocks install luasocket
luarocks install dkjson
luarocks install copas

Run the server:

lua server.lua

It will listen on http://localhost:8081/temp and serve the current temperature and humidity.

Setting Up Homebridge and Home App Integration

Install Homebridge globally:

sudo npm install -g homebridge

Install the UI plugin for web-based setup:

sudo npm install -g homebridge-config-ui-x

Then install the required accessory plugin:

sudo npm install -g homebridge-http-temperature-humidity

Create or update your Homebridge config.json (usually located in ~/.homebridge/):

{
  "bridge": {
    "name": "Homebridge",
    "username": "0E:4E:20:2F:2E:BC",
    "port": 51826,
    "pin": "031-45-154"
  },
  "description": "Homebridge setup",
  "accessories": [
    {
      "accessory": "HttpTemphum",
      "name": "HibouAir Sensor",
      "url": "http://localhost:8081/temp",
      "http_method": "GET",
      "sendimmediately": "",
      "timeout": 3000
    }
  ],
  "platforms": [
    {
      "platform": "config",
      "name": "Config"
    }
  ]
}

Start Homebridge with:

homebridge -I

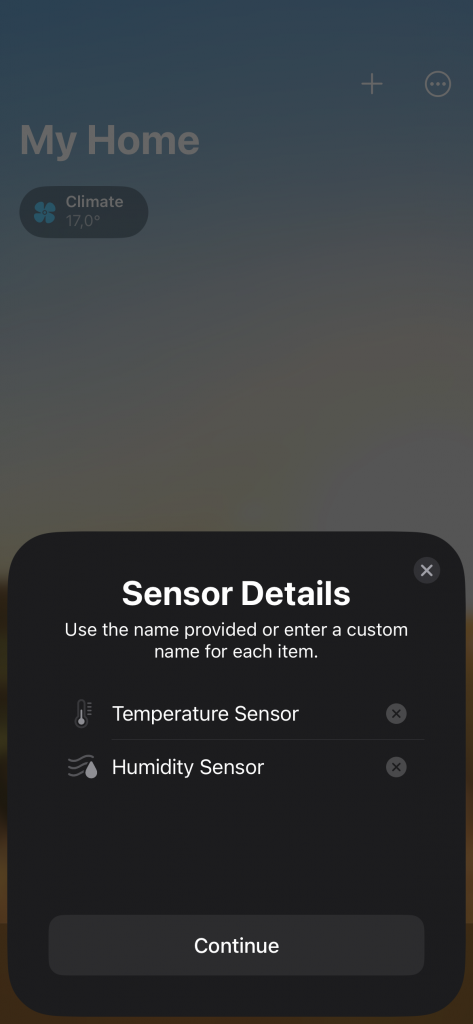
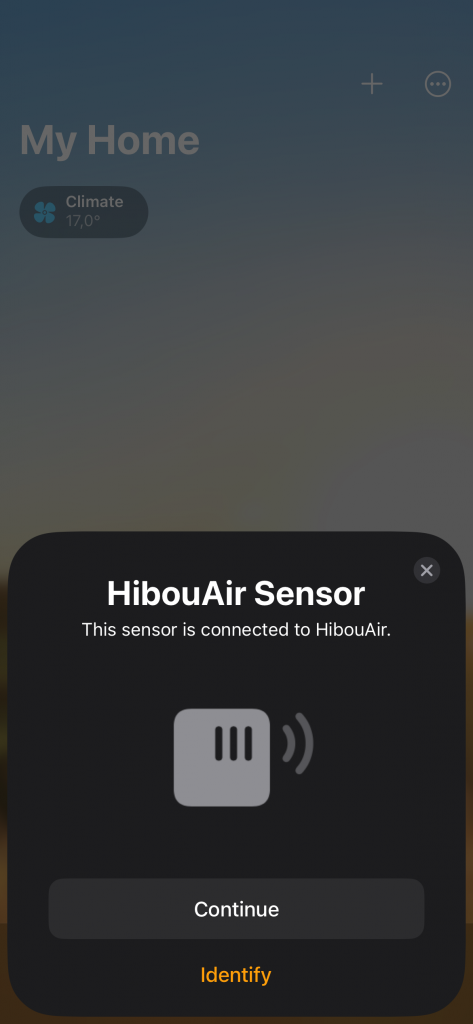
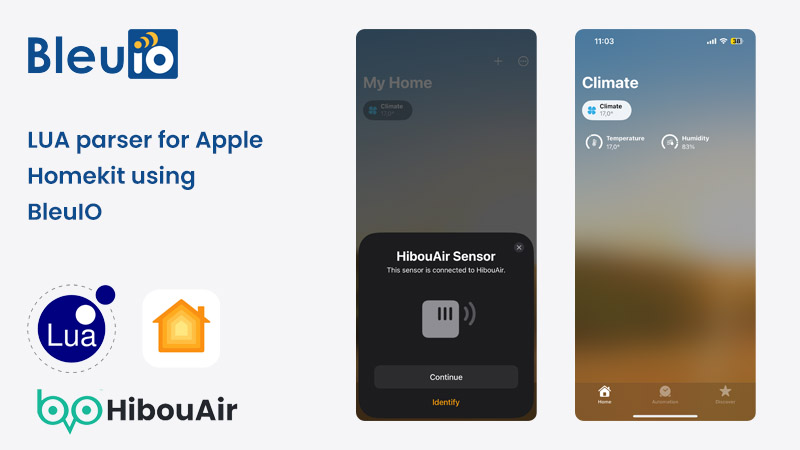
Use the Homebridge UI (usually on http://localhost:8081) to add the bridge to your Apple Home app by scanning the QR code. Once added, you’ll see temperature and humidity from your HibouAir sensor as real HomeKit accessories.
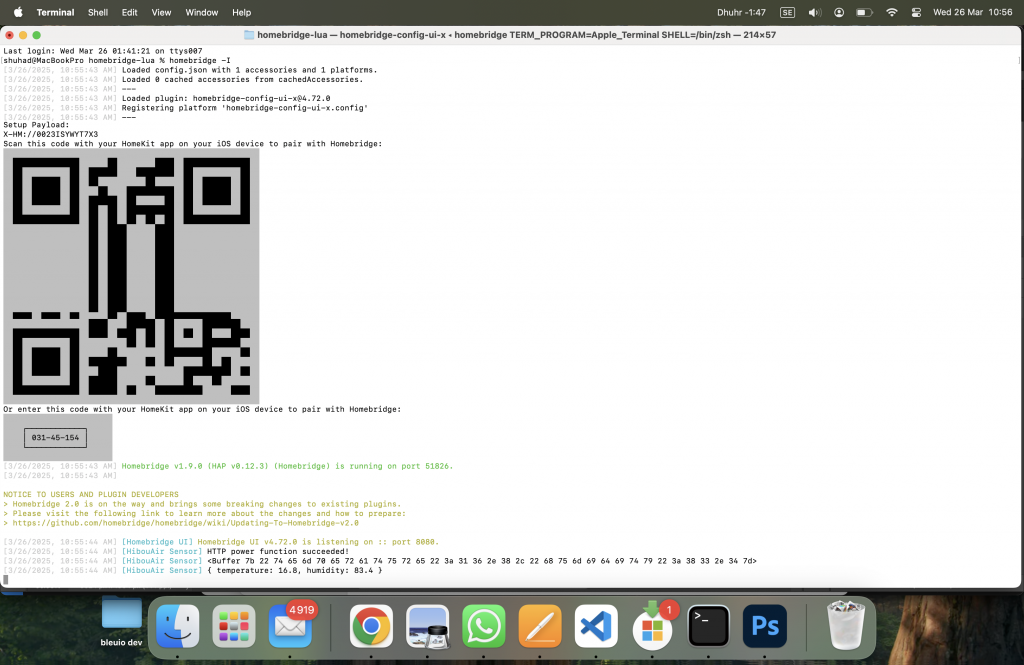
Output
This project showcases how BleuIO and Lua can be used to create a fast, simple, and platform-independent BLE integration with Apple Home. Unlike heavyweight setups or cloud-connected devices, this approach is minimal, local-first, and highly customizable. With BleuIO’s cross-platform compatibility and Lua’s tiny footprint, you can integrate BLE advertisement data into almost any platform—from macOS to Raspberry Pi to embedded Linux. This is just the beginning. You can extend this setup to support more metrics like VOC, CO₂, pressure, light.
Share this post on :

Building an Android Application to Connect BleuIO via Serial Port Using Angular & Capacitor

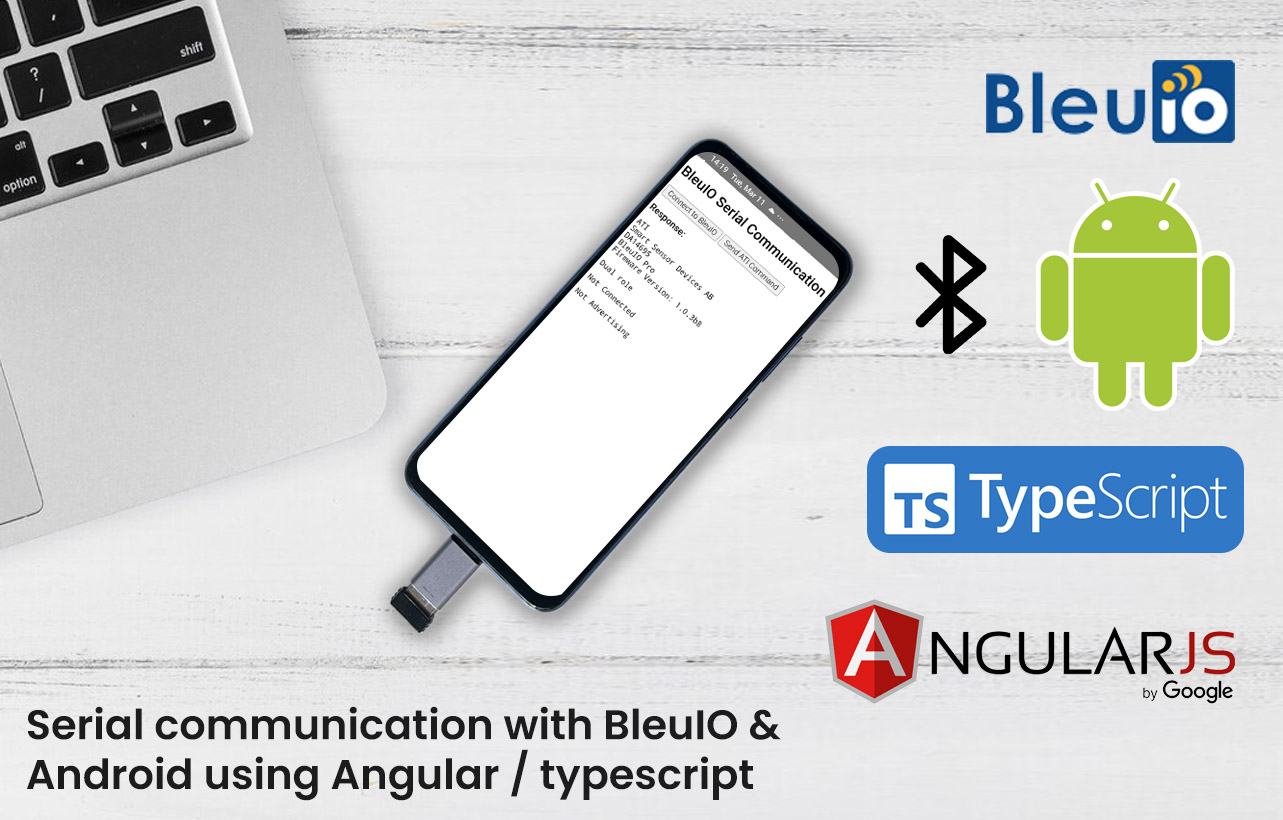
In this tutorial, we will walk through the process of building an Android application that connects to the BleuIO USB dongle via a serial port using Capacitor 6, Angular, and TypeScript. This application allows users to send and receive AT commands to configure and interact with BLE (Bluetooth Low Energy) devices directly from an Android device.

BleuIO is a powerful BLE USB dongle that enables communication with Bluetooth devices, making it an excellent tool for developing, debugging, and testing BLE applications. With this project, we can use an Android device to send AT commands to BleuIO over a serial connection, making it possible to configure and manage BLE operations without requiring a PC. This project works both on BleuIO and BleuIO Pro

Why Use Capacitor, Angular, and TypeScript?

This project is built using Capacitor 6, which provides seamless access to native device functionality, including USB serial communication. Angular is chosen for its structured approach, and TypeScript ensures type safety and better maintainability.

Capacitor plugins allow us to communicate with hardware like USB devices, and in this project, we use the @adeunis/capacitor-serial plugin to establish the serial communication with the BleuIO dongle.

Project Features

  • Establish a serial connection with BleuIO on an Android device.
  • Send AT commands to BleuIO and read responses.
  • Scan for nearby BLE devices directly from the Android app.
  • Built with Angular + TypeScript for scalability and maintainability.
  • Uses Capacitor 6 for direct hardware interaction.

Prerequisites

Before starting, ensure you have the following installed:

  • Node.js 18+
  • Angular CLI (npm install -g @angular/cli)
  • Capacitor CLI (npm install -g @capacitor/cli)
  • Java 17 (required for Capacitor 6)
  • Android Studio
  • Android device with OTG support
  • BleuIO USB Dongle
  • OTG cable (to connect BleuIO to your Android device)

Cloning the Repository & Setting Up the Project

1. Clone the Repository

First, clone the GitHub repository and navigate to the project folder:

git clone https://github.com/smart-sensor-devices-ab/bleuio-serial-android-angular-typescript.git
cd bleuio-serial-android-angular-typescript

2. Install Dependencies

Run the following command to install all required dependencies:

npm install

3. Build the Angular Application

Next, build the Angular app for production:

ng build --configuration production

4. Sync with Capacitor for Android

After building the Angular app, we need to sync it with Capacitor so it can run on an Android device:

npx cap sync android

5. Open the Project in Android Studio

To launch the project in Android Studio, run:

npx cap open android

6. Run the Application on an Android Device

  1. Connect your Android device via USB.
  2. Enable USB debugging in Developer Options.
  3. Click Run in Android Studio to install and launch the app.

Using the Application

1. Connect to BleuIO

  • Press the Connect to BleuIO button.
  • The app will request USB permissions for BleuIO.
  • Once granted, a serial connection is established.

2. Send AT Command

  • Press the Send ATI Command button.
  • This command retrieves device information from BleuIO.
  • The response will be displayed on the screen.

3. Scan for BLE Devices

  • Press the Scan BLE Devices button.
  • This will send the AT+CENTRAL command, followed by AT+GAPSCAN=3.
  • The list of nearby BLE devices will be displayed.

Understanding the Code

1. Serial Service (Handling Communication with BleuIO)

The SerialService handles serial communication with BleuIO. It requests USB permissions, opens the connection, sends AT commands, and processes responses.

Key Methods

  • connectToSerial(): Requests OTG permission, establishes a serial connection, and listens for incoming data.
  • sendATCommand(): Sends AT commands and processes the response.
  • scanBLEDevices(): Sends the BLE scanning commands and displays detected devices.

2. App Component (User Interface Logic)

The AppComponent connects the UI with the SerialService to handle user interactions.

Key Features

  • Calls connectToSerial() when the user clicks Connect to BleuIO.
  • Calls sendATCommand() when the user clicks Send ATI Command.
  • Calls scanBLEDevices() when the user clicks Scan BLE Devices.

3. UI (HTML & Styling)

The application provides three buttons:

<button (click)="connect()">Connect to BleuIO</button>
<button (click)="sendATCommand()">Send ATI Command</button>
<button (click)="scanBLEDevices()">Scan BLE Devices</button>

A response area is updated dynamically:

<pre>{{ responseText }}</pre>

Troubleshooting & Common Issues

1. USB Permission Denied

  • Ensure that you grant permissions when prompted.
  • If the issue persists, check OTG support on your Android device.

2. App Not Detecting BleuIO

  • Verify that the OTG cable is properly connected.
  • Ensure that the BleuIO dongle is recognized by your Android device.

3. npx cap sync android Fails

  • Make sure that Android Studio and Java 17 are installed.
  • Run npm install again to ensure all dependencies are installed.

Output

Source code

Source code is available on this GitHub Repository.

This project demonstrates how to connect and communicate with BleuIO using Capacitor 6, Angular, and TypeScript on an Android device. By leveraging the @adeunis/capacitor-serial plugin, we can send AT commands, retrieve device information, and even scan for BLE devices directly from an Android app.

With this foundation, developers can expand the application by adding custom AT commands, integrating data logging, or even building more advanced BLE applications. The full source code is available on GitHub for further customization and enhancements.

Share this post on :

How to Use BleuIO as a USB Serial Device on Android with Capacitor

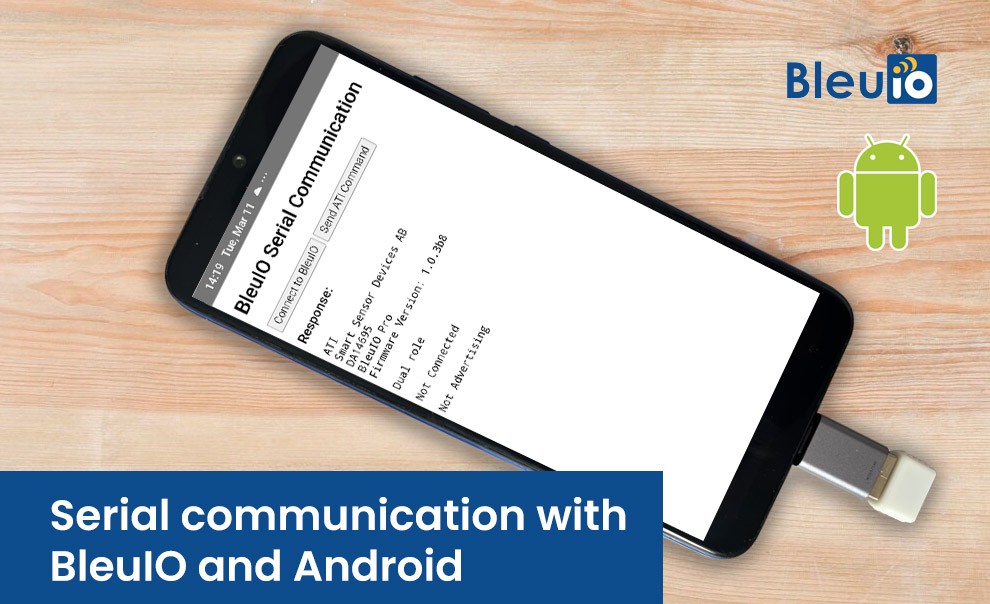
This project demonstrates how to use the BleuIO USB dongle as a serial port on an Android device via OTG (On-The-Go) USB. With Capacitor 6 and the @adeunis/capacitor-serial plugin, we establish a serial connection, send AT commands, and read responses in real time. This project works with both BleuIO and BleuIO Pro.

This tutorial provides a step-by-step guide to setting up serial communication with BleuIO on Android. The project connects to BleuIO via a serial port, sends basic ATI commands, and displays the received response on the screen. This example serves as a starting point for creating, testing, and debugging Bluetooth Low Energy (BLE) applications. It can be expanded to support additional commands and functionalities based on specific needs. The full source code is available for customization and further development.

Use Cases

The BleuIO USB dongle can be used in various applications that require serial communication on Android. One of the most common applications is Bluetooth Low Energy (BLE) development, where developers need to configure and test BLE modules by sending and receiving AT commands. This project allows for mobile debugging and real-time configuration of BLE devices without needing a PC.

Additionally, this setup is valuable for IoT and embedded systems, where devices communicate over a serial connection. With an Android phone acting as a serial terminal, engineers and developers can test, monitor, and debug hardware components in the field without requiring a laptop. Another important use case is USB-to-serial debugging, where embedded system engineers need to send commands and receive logs directly from an Android device using OTG.

For those working with sensor modules, microcontrollers, or custom embedded systems, this project simplifies the process of sending commands and reading responses directly from a mobile device. It also serves as an excellent starting point for developing Android applications that require serial communication through Capacitor.

Why Do We Need This?

Android devices do not natively support USB-to-serial communication. Unlike computers, which come with built-in serial drivers and terminal software, Android does not provide a direct way to communicate with serial devices over USB. This makes it difficult for developers, engineers, and embedded system designers to interact with BLE modules, sensors, and microcontrollers.

By using Capacitor 6 with the @adeunis/capacitor-serial plugin, we can bridge this gap and allow Android devices to function as serial terminals. This is especially useful when working with devices like BleuIO, where real-time communication is essential for configuring, testing, and debugging Bluetooth applications.

This project removes the need for external adapters or complex Android development, leveraging Capacitor’s web-based approach. It offers a simple and scalable way to integrate serial communication into mobile applications without requiring in-depth knowledge of Android’s USB APIs or native development tools.

Requirements

To use this project, you need a few essential components to establish serial communication between an Android device and BleuIO.

  • BleuIO or BleuIO Pro – The USB dongle used for Bluetooth Low Energy (BLE) communication. This project is designed to interact with BleuIO over a USB serial connection.
  • Android Device – A smartphone or tablet that supports USB OTG (On-The-Go), allowing it to function as a USB host and communicate with external devices.
  • OTG Cable or Adapter – Required to connect BleuIO to the Android device. Since most smartphones have USB-C or Micro-USB ports, an OTG adapter is needed to interface with the USB-A connector of BleuIO.

Installation & Setup

Install Node.js & Capacitor 6

BleuIO communication requires the @adeunis/capacitor-serial plugin, which is only compatible with Capacitor 6.

👉 First, install Node.js (if not installed):
Download Node.js

Create a Capacitor 6 Project

mkdir bleuio-serial
cd bleuio-serial
npm init -y
npm install @capacitor/core@6 @capacitor/cli@6

Install Android Platform

npm install @capacitor/android@6
npx cap add android

Install Serial Communication Plugin

npm install @adeunis/capacitor-serial

Ensure JDK 17 is Installed

Capacitor 6 requires JDK 17. Install it via:

sudo apt install openjdk-17-jdk  # Linux
brew install openjdk@17 # macOS

Verify installation:

java -version

It should output something like:

openjdk version "17.0.x"

OTG Permissions on Android

Why Do We Need OTG Permissions?

  • Android devices do not natively support serial USB communication.
  • OTG permissions allow USB host mode, so Android can communicate with external serial devices.

How to Enable OTG Permissions?

Modify AndroidManifest.xml:

<uses-feature android:name="android.hardware.usb.host"/>
<uses-permission android:name="android.permission.USB_PERMISSION"/>

Then, create device_filter.xml inside android/app/src/main/res/xml/:

<?xml version="1.0" encoding="utf-8"?>
<resources>
<usb-device vendor-id="0x2DCF" product-id="0x6002" />
</resources>

These values match the BleuIO Vendor ID & Product ID, allowing the system to recognize it.

Project Code Explanation

index.html

This file provides buttons to connect to BleuIO and send AT commands.

<!DOCTYPE html>
<html lang="en">
<head>
<meta charset="UTF-8">
<meta name="viewport" content="width=device-width, initial-scale=1.0">
<title>BleuIO Serial Communication</title>
</head>
<body>
<h2>BleuIO Serial Communication</h2>

<button onclick="connectToSerial()">Connect to BleuIO</button>
<button onclick="sendATCommand()">Send ATI Command</button>

<p><strong>Response:</strong></p>
<pre id="response">Waiting for response...</pre>

<script src="index.js" defer></script>
</body>
</html>

index.js

This file:

  • Requests USB permission
  • Opens a serial connection
  • Sends and reads AT commands
  • Handles continuous data streaming from BleuIO
const Serial = window.Capacitor.Plugins.Serial;

// Vendor ID & Product ID for BleuIO
const VENDOR_ID = 0x2DCF;
const PRODUCT_ID = 0x6002;

let fullResponse = ""; // Stores incoming data

async function connectToSerial() {
console.log("Requesting permission for BleuIO...");

try {
const permissionResponse = await Serial.requestSerialPermissions({
vendorId: VENDOR_ID,
productId: PRODUCT_ID,
driver: "CDC_ACM_SERIAL_DRIVER"
});

if (!permissionResponse.granted) {
console.error("Permission denied!");
document.getElementById("response").textContent = "Permission denied!";
return;
}

console.log("Opening serial connection...");
await Serial.openConnection({
baudRate: 115200,
dataBits: 8,
stopBits: 1,
parity: 0,
dtr: true,
rts: true
});

console.log("Serial connection opened!");
document.getElementById("response").textContent = "Connected to BleuIO!";

fullResponse = ""; // Clear previous response

// Register read callback to receive data continuously
await Serial.registerReadCallback((message, error) => {
if (message && message.data) {
console.log("Received Data:", message.data);
fullResponse += message.data + "\n";
document.getElementById("response").textContent = fullResponse;
} else if (error) {
console.error("Read error:", error);
}
});

} catch (error) {
console.error("Connection error:", error);
document.getElementById("response").textContent = "Connection error.";
}
}

async function sendATCommand() {
console.log("Sending ATI command...");

try {
fullResponse = ""; // Clear response buffer
await Serial.write({ data: "ATI\r\n" });

console.log("ATI command sent!");
console.log("Waiting for response...");

} catch (error) {
console.error("Command error:", error);
}
}

// Expose functions globally
window.connectToSerial = connectToSerial;
window.sendATCommand = sendATCommand;

Running the App

Sync and Build

npx cap sync android
npx cap run android

Open the App

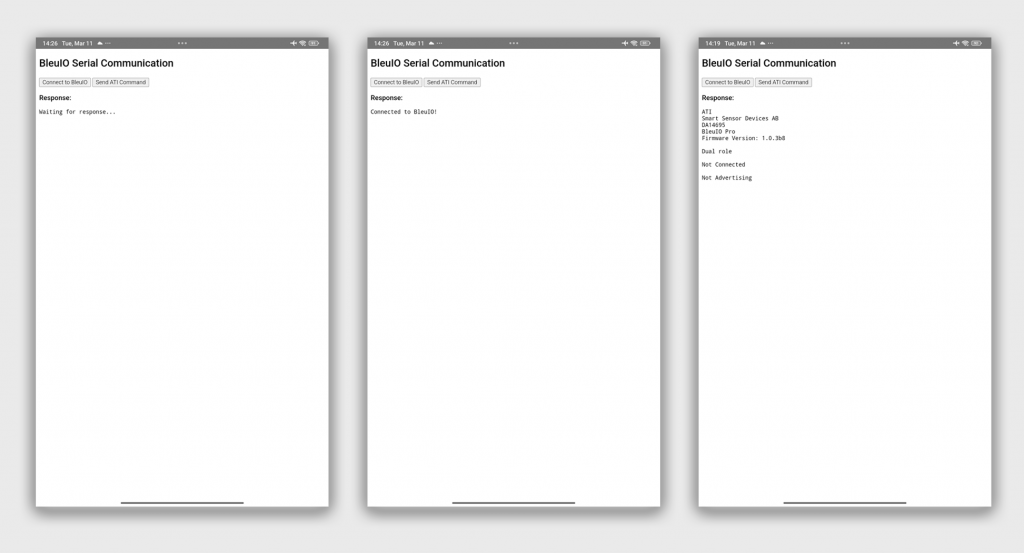
  1. Connect BleuIO to Android via OTG.
  2. Click “Connect to BleuIO” → A permission prompt should appear.
  3. Click “Send ATI Command” → Response should appear.

Final Results

After running, you should see output like:

Smart Sensor Devices AB
DA14695
BleuIO Pro
Firmware Version: 1.0.3b8

Dual role

Not Connected

Not Advertising

Output

Source code

https://github.com/smart-sensor-devices-ab/bleuio-serial-android

This project demonstrates how to use the BleuIO USB dongle as a serial communication device on an Android phone. By leveraging Capacitor 6 and the @adeunis/capacitor-serial plugin, we successfully established a serial connection, sent AT commands, and received responses via USB OTG.

This project is also available in typescript. Here is the source code with typescript

https://github.com/smart-sensor-devices-ab/bleuio-serial-android-typescript

With the growing demand for mobile-first development and hardware interaction via smartphones, this project provides a solid foundation for further expanding serial communication capabilities on Android.


Share this post on :