Real-Time BLE Proximity-Based LED Blinking with BleuIO: A Practical Guide

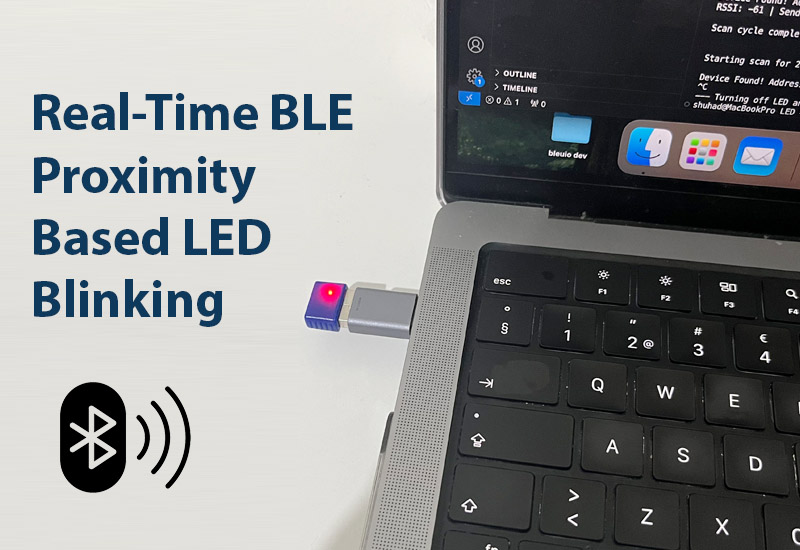
BleuIO, a versatile BLE USB dongle, simplifies BLE application development with its powerful AT commands and cross-platform compatibility. This tutorial demonstrates how to use BleuIO with Python to build a real-time BLE proximity-based LED control system.

In this example, we focus on monitoring the RSSI (Received Signal Strength Indicator) of a specific BLE device and controlling the LED blinking rate of BleuIO based on proximity. The closer the device, the faster the blinking rate. The script also ensures clean termination, turning off the LED when the program exits.

This tutorial uses the BleuIO Python library to showcase a practical use case. However, the concepts can be implemented in any programming language.

Devices and Tools Needed

  1. BleuIO Pro BLE USB Dongle
  2. Python Installed (Python 3.6 or newer recommended)
  3. BleuIO Python Library
    Install the library using
    pip install bleuio
  4. Source Code
    Get the complete source code from GitHub:
    GitHub Repository

Use Case: Real-Time LED Blinking Based on Proximity

Objective:

  1. Continuously monitor the RSSI value of a specific BLE device.
  2. Adjust the LED blinking rate of the BleuIO dongle based on the device’s proximity.
  3. Ensure the LED turns off when the script is terminated.

Workflow:

  1. Scan for BLE devices: Identify the target device using its MAC address.
  2. Read RSSI values: Fetch real-time signal strength data.
  3. Control LED: Adjust the blinking rate based on proximity:
    • Very Close: Fast blinking.
    • Close: Moderate blinking.
    • Far: Slow blinking.
    • Very Far: Very slow blinking.
  4. Graceful Exit: Turn off the LED when the script ends.

The Python Script

Below is the complete script for this project:

import time
import json
import atexit
from bleuio_lib.bleuio_funcs import BleuIO

rssi_value = None
dongle = None  

def scan_callback(scan_input):
    global rssi_value  
    try:
        device_data = json.loads(scan_input[0])  
        if device_data.get("addr") == "[1]6B:C0:5C:BD:CF:14":
            rssi_value = device_data["rssi"]  
            print(f"\nDevice Found! Address: {device_data['addr']}, RSSI: {rssi_value}")
    except json.JSONDecodeError as e:
        print(f"Error decoding JSON: {e}")
    except Exception as e:
        print(f"Unexpected error: {e}")

def send_led_command(dongle, rssi):
    if rssi is not None:  
        if rssi > -40:
            print(f"RSSI: {rssi} | Sending LED Command: 50/50")
            dongle.at_led(toggle="T", on_period="50", off_period="50")
        elif -60 <= rssi <= -40:
            print(f"RSSI: {rssi} | Sending LED Command: 100/100")
            dongle.at_led(toggle="T", on_period="100", off_period="100")
        elif -90 <= rssi < -60:
            print(f"RSSI: {rssi} | Sending LED Command: 200/200")
            dongle.at_led(toggle="T", on_period="200", off_period="200")
        else:
            print(f"RSSI: {rssi} | Sending LED Command: 300/300")
            dongle.at_led(toggle="T", on_period="300", off_period="300")
    else:
        print("No RSSI value available for LED command.")


def cleanup():
    if dongle:
        print("\n--- Turning off LED and cleaning up ---")
        dongle.at_led(0)

# Main logic
def main():
    global rssi_value, dongle  
    dongle = BleuIO()

    atexit.register(cleanup)

    dongle.register_scan_cb(scan_callback)

    print("\n--- Starting BLE Task ---\n")

    print("Setting device role to Central...")
    central_response = dongle.at_central()

    try:
        while True:
            print("\nStarting scan for 2 seconds...")
            dongle.at_gapscan(2)  
            time.sleep(3)  

            send_led_command(dongle, rssi_value)

            print("\nScan cycle completed. Restarting...\n")
            time.sleep(1)
    except KeyboardInterrupt:
        print("\n--- Script Terminated by User ---")

# Run the main function
if __name__ == "__main__":
    main()

How It Works

  1. Initialization: The script initializes the BleuIO dongle and sets it to Central role for scanning.
  2. Scan Callback: The scan_callback function extracts the RSSI value of the target device in real-time.
  3. LED Control: Based on the RSSI value:
    • RSSI > -40: Fast blinking (50ms on/off).
    • -60 <= RSSI <= -40: Moderate blinking (100ms on/off).
    • -90 <= RSSI < -60: Slow blinking (200ms on/off).
    • RSSI < -90: Very slow blinking (300ms on/off).
  4. Graceful Termination: The script turns off the LED when terminated with Ctrl + C.

Output

This example demonstrates how easy it is to use BleuIO for BLE applications. Whether you’re building proximity-based solutions or exploring BLE capabilities, BleuIO’s AT commands and Python library make it simple to get started.

Take this script, adapt it to your needs, and unlock the potential of BLE with BleuIO!

Share this post on :

New Firmware Release for BleuIO and BleuIO Pro: Enhanced Stability and Bug Fixes

We’re excited to announce the release of new firmware updates for our popular BleuIO and BleuIO Pro Bluetooth Low Energy USB dongles. These updates focus on improving the stability and performance of the devices while addressing some critical bugs reported by our users.

With these firmware releases, both BleuIO and BleuIO Pro are now better equipped to handle connection and scan operations, ensuring a smoother experience for developers building Bluetooth Low Energy (BLE) applications.

BleuIO Pro Firmware v1.0.2

The latest firmware for BleuIO Pro brings significant stability improvements and important bug fixes.

Key Updates

Stability Improvements:

  • Improved general stability for more consistent performance.
  • Enhanced stability during connection and scan operations.

Bug Fixes:

  • Resolved issues with incorrectly formatted verbose responses.
  • Fixed a bug where notifications/indications and GATT read operation responses would be cut off if they exceeded a certain length.
  • Fixed an issue where advertising would not automatically restart after a disconnection in verbose mode.

These improvements ensure a seamless experience for developers using BleuIO Pro in their BLE projects, whether for scanning devices, establishing connections, or maintaining robust advertising.


BleuIO Firmware v2.7.7

The new firmware for BleuIO focuses on improving the dongle’s overall stability and addressing bugs that could hinder performance.

Key Updates

Stability Improvements:

  • Enhanced general stability for day-to-day operations.
  • Improved connection and scan stability to ensure reliable performance during development and testing.

Bug Fixes:

  • Resolved issues with incorrectly formatted verbose responses.

These updates further solidify BleuIO as a reliable solution for developers working on BLE applications across various platforms.

How to Update Your Firmware

To take advantage of these updates, download the latest firmware from our firmware page. Ensure you select the correct firmware for your device—BleuIO or BleuIO Pro.

We’ve included a detailed step-by-step guide on the firmware page to make the update process simple and straightforward.

We encourage all users to update their firmware to the latest version to benefit from these stability improvements and bug fixes.

Share this post on :

BleuIO Featured in Renesas’ Success Story: A Testament to Innovation and Excellence

Renesas, a global leader in semiconductor solutions, has highlighted our Bluetooth Low Energy (BLE) USB dongle BleuIO in their Success Stories section. This recognition is a testament to the innovation and dedication behind BleuIO, making it easier for developers to create BLE applications.

A Seamless Way to Add Bluetooth Connectivity

In their feature titled A Seamless Way to Add Bluetooth Low Energy Connectivity to IoT Devices, Renesas acknowledges BleuIO’s plug-and-play simplicity and versatility. Built around Renesas’ SmartBond™ DA14695 Bluetooth chip, BleuIO helps developers to create secure and efficient BLE 5.2 applications with minimal effort. Whether you’re a beginner or an experienced developer, BleuIO eliminates complexities, allowing you to focus on your application logic.

Driving Innovation with Renesas

Renesas’ support has been instrumental in BleuIO’s success. Their contributions have enabled us to deliver a product that meets the highest standards of performance and reliability. As highlighted in their article, our partnership with Renesas has helped us scale globally, reaching new markets and delivering innovative solutions to our customers.

Read the full article on Renesas’ website here and discover how BleuIO can empower your IoT projects.

Share this post on :

Creating a BLE Chat Application Using BleuIO USB Dongle

Bluetooth Low Energy (BLE) has become a core technology in the modern world, enabling secure and efficient communication for IoT devices, wearables, healthcare gadgets, and more. One of the fascinating applications of BLE is in creating private communication systems. In this tutorial, we will explore how to create a BLE chat application using the BleuIO USB dongle, a powerful yet simple device for BLE application development.

Why This Project?

With increasing concerns about privacy, BLE chat offers a solution that keeps communication entirely local. Unlike internet-based messaging systems, BLE chat does not rely on servers or cloud storage, ensuring that no data leaves your devices. This project demonstrates a simple prototype of such a BLE-based communication system.

How It Works

The project involves two laptops, each connected to a BleuIO USB dongle. For simplicity, we designate one laptop as User 1 (Central role) and the other as User 2 (Peripheral role). Here’s a high-level breakdown of the workflow:

  1. Setup:
    Each laptop runs a script to initialize its BleuIO dongle. User 1 starts in a dual role and acts as the central device. User 2 also sets its dongle in a dual role but begins advertising itself.
  2. Connection:
    Once User 2 starts advertising, it displays its MAC address. User 1 uses this MAC address to connect to User 2.
  3. Messaging:
    After establishing a connection, the users can send and receive messages in real time. The communication is direct and local, with no reliance on external servers.

Setting Up the Project

The source code for this project is available on GitHub: BLE Chat Source Code. You can explore, experiment, and build on it to fit your needs.

Steps to Set Up the Project:

  1. Clone the Repository
    Open a terminal on both computers and run
    git clone https://github.com/smart-sensor-devices-ab/ble-chat.git
  2. Install Dependencies
    Navigate to the project directory and install the required Node.js dependencies
    cd ble-chat
    npm install
  3. Run the Server
    Start the server by running
    node server.js
    Ensure the server is running on both computers. The terminal should display messages confirming the dongle is detected.

Running the Scripts

Once the servers are running on both computers, follow these steps to use the BLE chat application:

  1. User 1 Setup:
    • Open the browser and navigate to http://localhost:3000.
    • Click “Chat as User 1.” This will initialize the BleuIO dongle in dual role mode.
  2. User 2 Setup:
    • On the second computer, open the browser and navigate to http://localhost:3000.
    • Click “Chat as User 2.” This will initialize the BleuIO dongle in dual role mode and start advertising. You’ll also see the MAC address of the dongle displayed on the screen. ble chat user 2
  3. Connecting the Devices:
    • Copy the MAC address from User 2’s screen and enter it on User 1’s screen in the provided input field.
    • Click “Connect” on User 1. Once the connection is established, you’ll see a confirmation message.
      ble chat user 1
  4. Start Chatting:
    • Use the chat interface on both devices to send messages back and forth. Messages sent from one device will instantly appear on the other device’s screen.
      ble chat screen

Output

In the video below, we demonstrate how this project works with two BleuIO dongles connected to two different computers. To provide a complete view, we are sharing the screen of the second computer to showcase how the chat functions in real-time.

Use Cases for BLE Chat

The BLE chat prototype we’ve created can inspire real-world applications. Here are some potential use cases:

Secure Local Communication:
BLE chat can be used for private messaging within offices, factories, or homes without the need for internet connectivity.

Education Projects:
BLE chat can be a great project for students learning about BLE technology and its applications.

Why Choose BleuIO for Your BLE Projects?

The BleuIO USB dongle makes BLE application development accessible for everyone, from beginners to advanced developers. Its built-in AT commands allow you to quickly prototype applications without diving into complex BLE stacks or SDKs. Whether you’re working on a small hobby project or an enterprise-level IoT solution, BleuIO provides the tools you need.

Here are some standout features of BleuIO:

  • Cross-Platform Compatibility: Works seamlessly on Windows, macOS, and Linux.
  • Simple AT Commands: No need for extensive coding; just use the built-in commands to control the dongle.
  • Lightweight and Portable: Easy to carry and set up for on-the-go development.

This BLE chat application demonstrates the power and simplicity of BLE communication using the BleuIO USB dongle. While it’s a prototype, it showcases how BLE can enable private, secure, and efficient messaging without relying on external networks.

If you’re interested in exploring this further, the source code for the project is available. You can modify and extend it to fit your specific needs. With BleuIO, the possibilities are endless.

Order Your BleuIO USB Dongle Today!
Ready to create your own BLE applications? Visit BleuIO’s to learn more and order your dongle today.

Share this post on :