We are thrilled to announce the release of the BleuIO Pro, the latest and most advanced addition to our range of Bluetooth Low Energy (BLE) USB dongles. Designed for the developers looking to create advance BLE 5.2 applications, the BleuIO Pro offers unmatched features, speed, and versatility.
Special Launch Offer: Save Big on BleuIO Pro
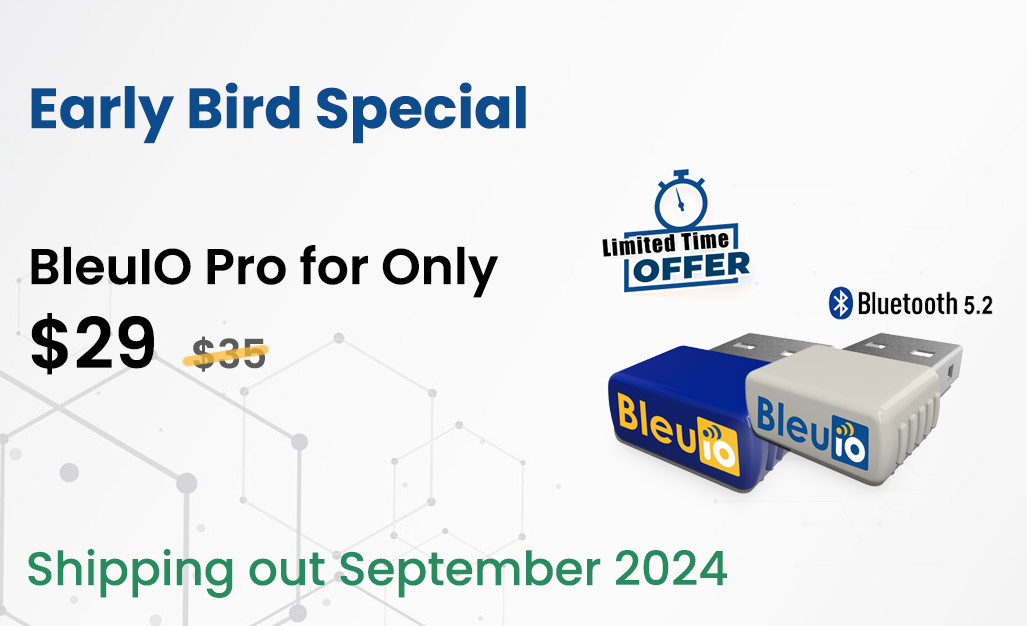
To celebrate the launch of the BleuIO Pro, we are offering an exclusive limited-time discount. Order now and get the BleuIO Pro for just $29, a significant saving off the regular price of $35. This offer is only available until September 2024, so don’t miss out on this opportunity to enhance your BLE projects with the most advanced BLE USB dongle on the market.
The BleuIO Pro builds upon the solid foundation of our original BleuIO, including all its amazing features while introducing significant enhancements to meet the demands of advanced BLE applications. Here’s what makes the BleuIO Pro a game-changer:
Renesas SmartBond DA14695 SoC: At the heart of the BleuIO Pro is the powerful Renesas SmartBond DA14695 System-on-Chip (SoC), ensuring robust performance and reliability.
Bluetooth® Low Energy 5.2: Experience the latest in BLE technology with BLE 5.2, offering improved connection stability, extended range, and higher data throughput.
32Mbit QSPI FLASH: With 32Mbit of Quad SPI Flash memory, the BleuIO Pro provides ample space for complex applications and data storage.
Transfer Speeds up to 2Mbps: Enjoy faster data transfer speeds, ideal for time-sensitive applications and large data exchanges.
Extended Advertising Packets: Utilize extended advertising packets to broadcast more data and improve the efficiency of your BLE communications.
Programmable LED: Customize the integrated LED for status indicators, notifications, or any application-specific functions.
Ideal for Advanced BLE Applications
The BleuIO Pro is perfect for developers looking to push the boundaries of BLE technology. Whether you’re working on IoT projects, wearable tech, smart home devices, or industrial automation, the BleuIO Pro provides the advanced capabilities you need.
Easy Development with AT Commands and Libraries
As with the original BleuIO, the BleuIO Pro can be easily programmed using AT Commands, making it accessible even for those new to BLE development. For faster and more sophisticated development, our Python and Javascript libraries offer extensive support and flexibility.
Don’t miss out on this opportunity to upgrade your toolkit and take your projects to the next level with the BleuIO Pro.
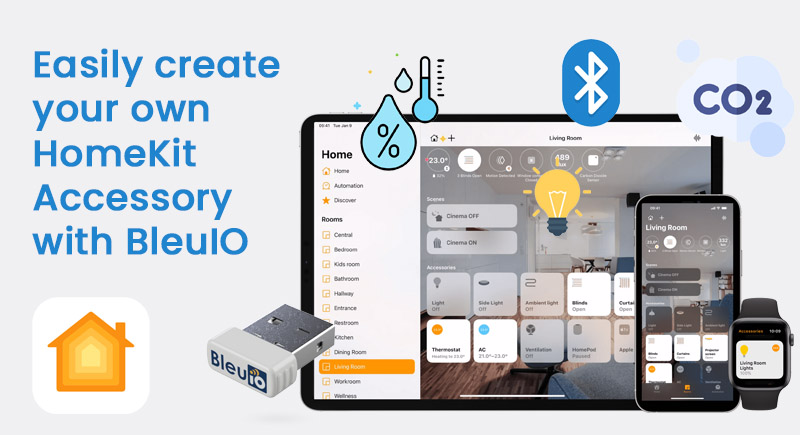
In this tutorial, we’ll walk you through the process of creating your own Apple HomeKit accessory that monitor and manage air quality data from a BLE device, specifically the HibouAir air quality monitoring device. By the end of this tutorial, you’ll have a functional BLE application that integrates with Apple’s HomeKit, demonstrating how easily you can develop BLE applications with the BleuIO dongle.
Overview of the Project
In this project, our goal is to create a BLE application that communicates with the HibouAir device, which provides air quality data. The application will:
Connect to a BleuIO USB dongle to communicate with BLE devices.
Scan for the HibouAir device using AT commands.
Decode the air quality data from the HibouAir device.
Integrate with HomeKit to display and manage the data in a smart home environment.
Update the accessory information and continuously monitor the air quality data.
What is HomeKit?
HomeKit is Apple’s framework for home automation that allows users to control smart home devices using their Apple devices. With HomeKit, you can control a wide range of devices like lights, thermostats, locks, and sensors through the Apple Home app, Siri voice commands, and other Apple devices.
The key features of HomeKit include:
Secure Communication: HomeKit uses end-to-end encryption to ensure that data transmitted between your devices and the Home app remains private and secure.
Integration with Siri: HomeKit-enabled devices can be controlled using Siri voice commands, enabling hands-free control of your smart home.
Automation: Users can create automated routines and scenes that trigger actions based on time, location, or device status. For example, you can set up a “Good Night” scene that turns off the lights and locks the door when you say goodnight to Siri.
What is HAP-NodeJS?
HAP-NodeJS is an open-source implementation of the HomeKit Accessory Protocol (HAP) written in Node.js. It allows developers to create HomeKit-compatible accessories and bridge devices that can be controlled through Apple’s HomeKit ecosystem.
Devices Required
To follow this tutorial, you will need:
BleuIO USB Dongle: A Bluetooth Low Energy USB dongle used to interface with BLE devices.
HibouAir Device: A BLE air quality monitoring device that provides air quality metrics such as temperature, CO2 levels, humidity, and light levels.
A Computer: Running Windows, macOS, or Linux , Raspberry Pi or any other platform that can run Node.js.
Connecting to BleuIO
To connect to the BleuIO dongle, we’ll use Node.js and the serialport package to communicate with the BLE device. The BleuIO dongle interfaces with your computer over a serial port, which allows you to send AT commands and receive data from BLE devices.
Decoding the Data
Once we receive the data from the HibouAir device, we need to decode it. The data is encoded in a specific format that we will parse and extract the relevant air quality metrics. We use a function to decode the advertisement data, which includes temperature, CO2 levels, humidity, and light levels.
Setting Up HomeKit Environment Data
We will use the hap-nodejs library to integrate our application with HomeKit. This will allow us to create HomeKit accessories that represent our air quality metrics. We set up services for temperature, CO2 levels, humidity, and light, and update these services with real-time data from the HibouAir device.
Running the Script
Here’s a step-by-step guide on how to set up and run the script:
Install Required Packages First, make sure you have Node.js installed on your computer. Then, install the required npm packages by running npm install hap-nodejs serialport
Create the Script Save the following code as hibouair.js or clone it from https://github.com/smart-sensor-devices-ab/bleuio-hibouair-homekit-integration
const hap = require('hap-nodejs');
const { SerialPort } = require('serialport');

const Accessory = hap.Accessory;
const Characteristic = hap.Characteristic;
const CharacteristicEventTypes = hap.CharacteristicEventTypes;
const Service = hap.Service;

// Get the device ID from the command-line arguments
const deviceId = process.argv[2];

if (!deviceId) {
  console.error(
    'Device ID not present. Please provide the device ID as follows:'
  );
  console.error('node hibouair.js <device_id>');
  process.exit(1);
}

// Define the manufacturer name you're looking for
const targetManufacturer = 'Smart Sensor Devices';

// Buffers to hold the incoming data
let buffer = '';
let scanningDetected = false;
let responseFound = false;
let port; // Variable to hold the SerialPort instance

// Initialize HomeKit accessories globally
let temperature, co2, humidity, light;

async function connectAndSendCommands() {
  try {
    // Get a list of all serial ports
    const ports = await SerialPort.list();

    // Find the port with the specified manufacturer
    const targetPort = ports.find(
      (port) => port.manufacturer === targetManufacturer
    );

    if (!targetPort) {
      console.log(`No port found with manufacturer: ${targetManufacturer}`);
      return;
    }

    // Log the selected port
    console.log(`Connecting to port: ${targetPort.path}`);

    // Create a new SerialPort instance for the selected port
    port = new SerialPort({
      path: targetPort.path,
      baudRate: 9600, // Adjust the baud rate as needed
    });

    // Event handler for when the port opens
    port.on('open', () => {
      console.log(
        `Port ${targetPort.path} is open and ready for communication.`
      );

      // Write the initial command
      port.write('AT+CENTRAL\r\n', (err) => {
        if (err) {
          console.error('Error writing initial command:', err.message);
        } else {
          console.log('Initial command sent: AT+CENTRAL');
        }
      });

      // Start the periodic scanning for BLE data
      setInterval(() => {
        port.write(`AT+FINDSCANDATA=${deviceId}=5\r\n`, (err) => {
          if (err) {
            console.error('Error writing scan command:', err.message);
          } else {
            console.log(`Scan command sent: AT+FINDSCANDATA=${deviceId}=5`);
          }
        });
      }, 20000); // 20000 milliseconds = 20 seconds
    });

    // Event handler for when data is received on the port
    port.on('data', (data) => {
      buffer += data.toString();
      processBuffer();
    });

    // Event handler for when there is an error
    port.on('error', (err) => {
      console.error('Error:', err.message);
      if (port) {
        port.close(() => {
          console.log('Port closed due to error.');
        });
      }
    });
  } catch (err) {
    console.error('Error listing or connecting to serial ports:', err);
    if (port) {
      port.close(() => {
        console.log('Port closed due to error.');
      });
    }
  }

  function processBuffer() {
    // Split the buffer into lines
    const lines = buffer.split('\r\n');

    for (let i = 0; i < lines.length; i++) {
      const line = lines[i].trim();

      if (line === 'SCANNING...') {
        scanningDetected = true;
      } else if (line === 'SCAN COMPLETE') {
        scanningDetected = false;
      } else if (scanningDetected && line.length > 0) {
        // Extract the data from the line
        const dataMatch = line.match(/^\[.*?\] Device Data \[ADV\]: (.+)$/);
        if (dataMatch && dataMatch[1]) {
          const extractedData = dataMatch[1].trim();
          console.log('Extracted data:', extractedData);

          // Decode the data
          const decodedData = advDataDecode(extractedData);
          console.log('Decoded data:', decodedData);

          responseFound = true;
          buffer = ''; // Clear the buffer after finding the response

          if (!temperature || !co2 || !humidity || !light) {
            setupAccessory(decodedData); // Setup accessory if not already done
          } else {
            updateAccessory(decodedData); // Update accessory with decoded data
          }

          return;
        }
      }
    }

    // Keep the remaining buffer if no relevant line was found
    buffer = lines[lines.length - 1]; // Retain the last part of the buffer
  }

  // Function to decode the advertisement data
  function advDataDecode(adv) {
    let pos = adv.indexOf('5B0705');
    let dt = new Date();
    let currentTs =
      dt.getFullYear() +
      '/' +
      (dt.getMonth() + 1).toString().padStart(2, '0') +
      '/' +
      dt.getDate().toString().padStart(2, '0') +
      ' ' +
      dt.getHours().toString().padStart(2, '0') +
      ':' +
      dt.getMinutes().toString().padStart(2, '0') +
      ':' +
      dt.getSeconds().toString().padStart(2, '0');
    let tempHex = parseInt(
      '0x' +
        adv
          .substr(pos + 22, 4)
          .match(/../g)
          .reverse()
          .join('')
    );
    if (adv) dataShowing = true;
    if (tempHex > 1000) tempHex = (tempHex - (65535 + 1)) / 10;
    else tempHex = tempHex / 10;
    return {
      boardID: adv.substr(pos + 8, 6),
      type: adv.substr(pos + 6, 2),
      light: parseInt(
        '0x' +
          adv
            .substr(pos + 14, 4)
            .match(/../g)
            .reverse()
            .join('')
      ),
      pressure:
        parseInt(
          '0x' +
            adv
              .substr(pos + 18, 4)
              .match(/../g)
              .reverse()
              .join('')
        ) / 10,
      temp: tempHex,
      hum:
        parseInt(
          '0x' +
            adv
              .substr(pos + 26, 4)
              .match(/../g)
              .reverse()
              .join('')
        ) / 10,
      voc: parseInt(
        '0x' +
          adv
            .substr(pos + 30, 4)
            .match(/../g)
            .reverse()
            .join('')
      ),
      pm1:
        parseInt(
          '0x' +
            adv
              .substr(pos + 34, 4)
              .match(/../g)
              .reverse()
              .join('')
        ) / 10,
      pm25:
        parseInt(
          '0x' +
            adv
              .substr(pos + 38, 4)
              .match(/../g)
              .reverse()
              .join('')
        ) / 10,
      pm10:
        parseInt(
          '0x' +
            adv
              .substr(pos + 42, 4)
              .match(/../g)
              .reverse()
              .join('')
        ) / 10,
      co2: parseInt('0x' + adv.substr(pos + 46, 4)),
      vocType: parseInt('0x' + adv.substr(pos + 50, 2)),
      ts: currentTs,
    };
  }
}

// Function to setup HomeKit accessory
function setupAccessory(data) {
  const accessoryUuid = hap.uuid.generate('hap.hibouair.sensor');
  const accessory = new Accessory('HibouAir', accessoryUuid);

  // Create a function to initialize services
  function initializeService(
    serviceType,
    serviceName,
    initialValue,
    characteristicType
  ) {
    const service = new serviceType(serviceName);

    const characteristic = service.getCharacteristic(characteristicType);

    characteristic.on(CharacteristicEventTypes.GET, (callback) => {
      console.log(`Queried current ${serviceName}: ${initialValue}`);
      callback(undefined, initialValue);
    });

    accessory.addService(service);

    return {
      service,
      characteristic,
      initialValue,
    };
  }

  // Initialize temperature, CO2, humidity, and light services
  temperature = initializeService(
    Service.TemperatureSensor,
    'Temperature Sensor',
    data.temp,
    Characteristic.CurrentTemperature
  );

  co2 = initializeService(
    Service.CarbonDioxideSensor,
    'CO2 Sensor',
    data.co2,
    Characteristic.CarbonDioxideLevel
  );

  humidity = initializeService(
    Service.HumiditySensor,
    'Humidity Sensor',
    data.hum,
    Characteristic.CurrentRelativeHumidity
  );

  light = initializeService(
    Service.LightSensor,
    'Light Sensor',
    data.light,
    Characteristic.CurrentAmbientLightLevel
  );

  // Set accessory information
  accessory
    .getService(Service.AccessoryInformation)
    .setCharacteristic(Characteristic.Manufacturer, 'Smart Sensor Devices')
    .setCharacteristic(Characteristic.SerialNumber, deviceId);

  // Publish the accessory
  accessory.publish({
    username: '17:51:07:F4:BC:8B',
    pincode: '123-45-678',
    port: 47129,
    category: hap.Categories.SENSOR, // value here defines the symbol shown in the pairing screen
  });

  console.log('Accessory setup finished!');
}

// Function to update HomeKit accessory with new data
function updateAccessory(data) {
  temperature.initialValue = data.temp;
  co2.initialValue = data.co2;
  humidity.initialValue = data.hum;
  light.initialValue = data.light;

  console.log(`Updated current temperature: ${temperature.initialValue}`);
  console.log(`Updated current CO2 level: ${co2.initialValue}`);
  console.log(`Updated current Humidity level: ${humidity.initialValue}`);
  console.log(`Updated current light level: ${light.initialValue}`);

  // Update the characteristic values
  temperature.service.setCharacteristic(
    Characteristic.CurrentTemperature,
    temperature.initialValue
  );
  co2.service.setCharacteristic(
    Characteristic.CarbonDioxideLevel,
    co2.initialValue
  );
  humidity.service.setCharacteristic(
    Characteristic.CurrentRelativeHumidity,
    humidity.initialValue
  );
  light.service.setCharacteristic(
    Characteristic.CurrentAmbientLightLevel,
    light.initialValue
  );
}

// Call the function to connect and send commands
connectAndSendCommands();
Run the Script
Execute the script from your terminal by providing the device ID as an argument:
node hibouair.js 220069
This command will start the script, connect to the BleuIO dongle, scan for the HibouAir device, decode the data, and set up the HomeKit accessories with the real-time data from the device.
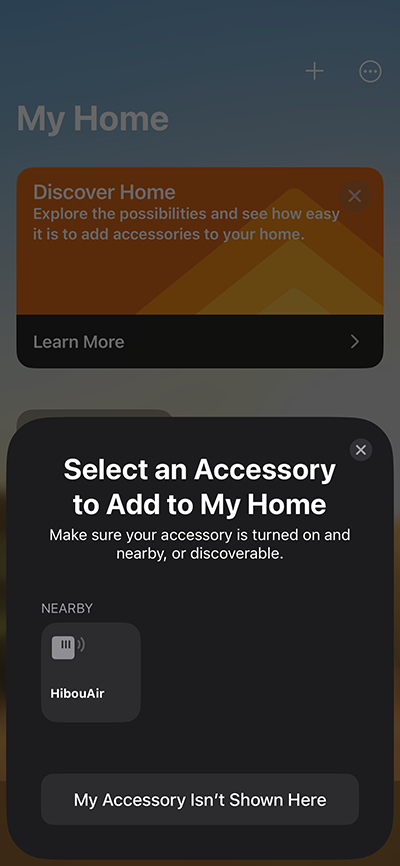
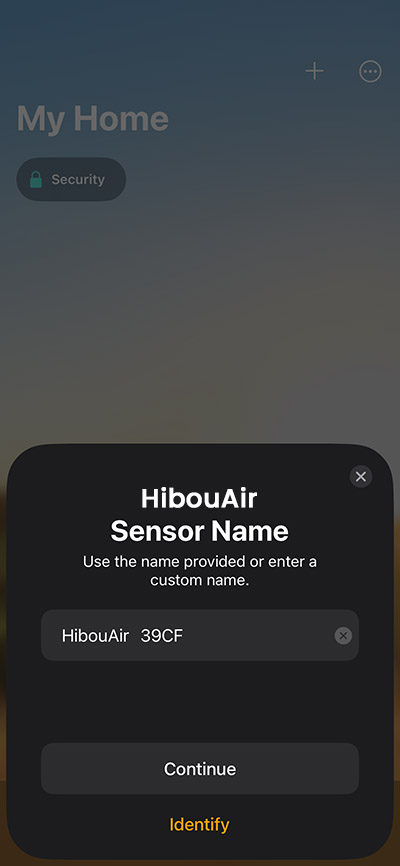
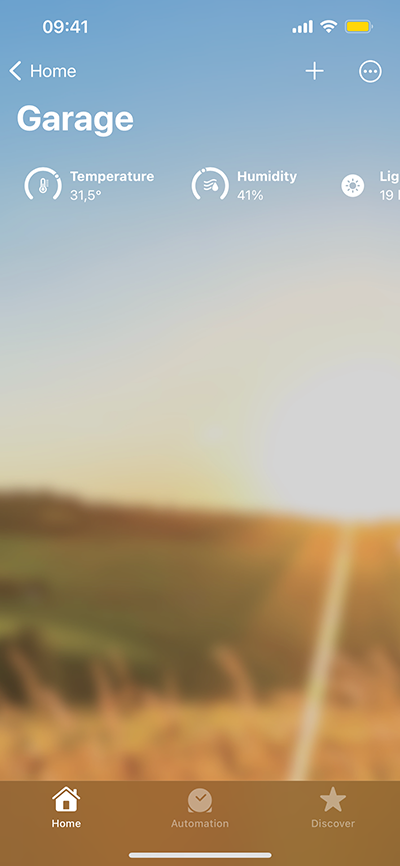
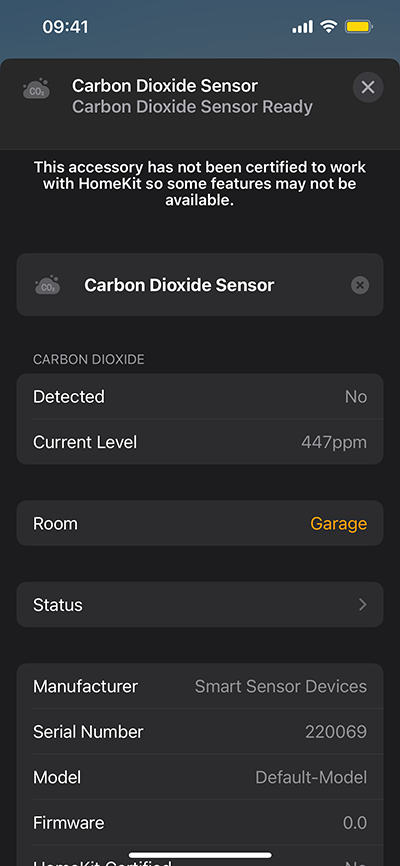
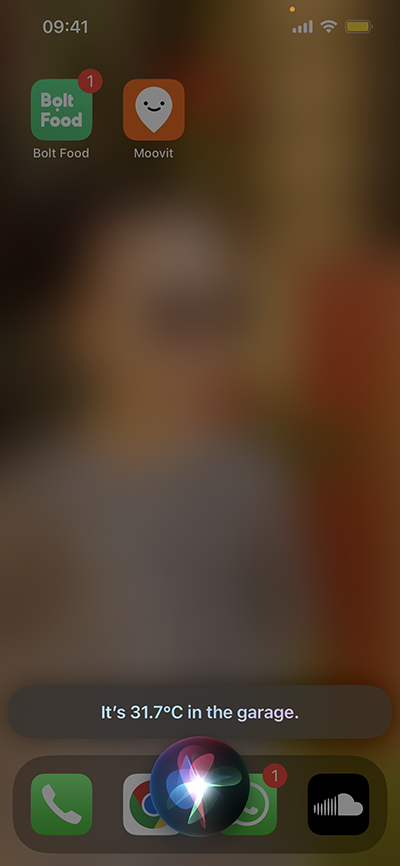
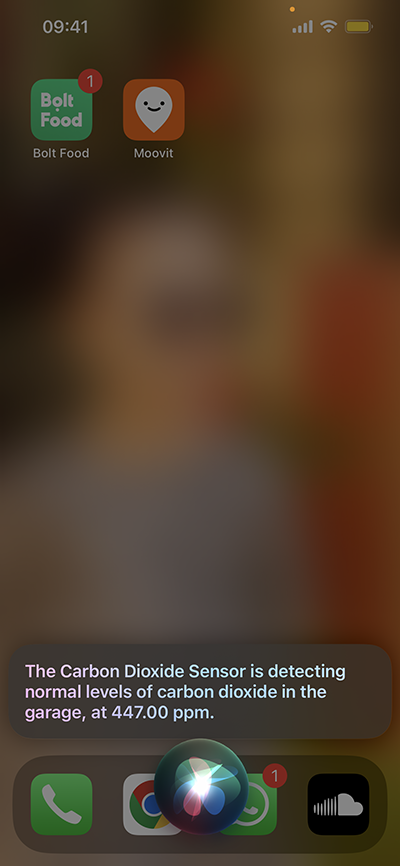
Output
Screenshot
This tutorial demonstrates how easy it is to develop BLE applications using BleuIO and integrate them with HomeKit. By following these steps, you can create real-time monitoring solutions for a variety of BLE-enabled devices, enhancing the functionality of your smart home environment.
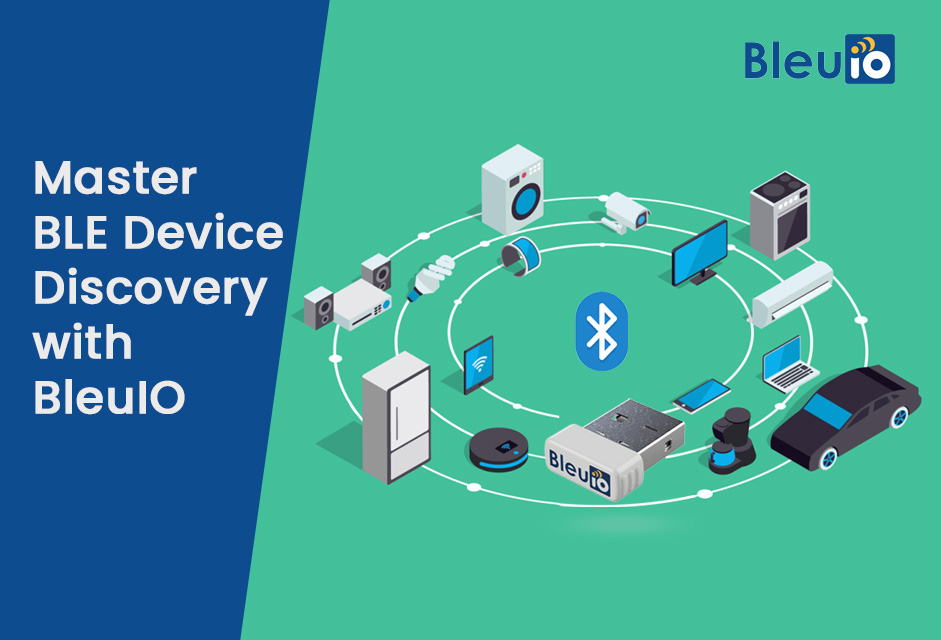
Enhancing BLE Applications with BleuIO: Efficient Device Scanning and Data Retrieval
In the world of Bluetooth Low Energy (BLE) technology, discovering and connecting to nearby devices is a foundational feature. Whether you are developing a BLE-enabled smart home system, a fitness tracker, or an industrial IoT application, the ability to scan for nearby devices and retrieve data efficiently is crucial. The BleuIO USB dongle, with its user-friendly AT commands, simplifies this process significantly. This article explores how to utilize the scanning features of BleuIO to enhance your BLE applications.
Why Efficient Device Scanning is Essential
Efficient scanning for BLE devices is vital for several reasons:
Device Discovery: Quickly identifying and connecting to nearby devices is crucial for seamless user experiences in applications such as smart home systems, wearables, and more.
Data Retrieval: Scanning allows you to gather advertising and response data from nearby BLE devices, which can be used for various purposes, from device identification to obtaining sensor readings.
Power Management: Optimizing scan parameters helps conserve battery life, which is particularly important for portable and battery-operated devices.
How BleuIO Can Be Helpful
The BleuIO USB dongle offers a range of AT commands that make BLE development straightforward and efficient. Key among these are commands for scanning nearby devices and retrieving advertising data. Let’s dive into three essential commands: AT+GAPSCAN, AT+FINDSCANDATA, and AT+SCANTARGET.
Command: AT+GAPSCAN
The AT+GAPSCAN command initiates a Bluetooth device scan, either indefinitely or for a specified duration. This command is only accepted when the device is in the central role and not connected to any other device.
Usage:
AT+GAPSCAN starts an indefinite scan.
AT+GAPSCAN=seconds starts a scan for the specified number of seconds.
In this example, the AT+GAPSCAN command scans for nearby BLE devices, displaying their addresses and signal strengths (RSSI).
Practical Applications of AT+GAPSCAN
Smart Home Systems: Automatically discover and list all BLE-enabled devices in your home, such as smart lights, locks, and thermostats.
Wearable Devices: Quickly identify nearby fitness trackers or health monitors for data synchronization.
Retail Environments: Scan for BLE beacons that provide location-based advertisements or information.
Command: AT+FINDSCANDATA
The AT+FINDSCANDATA command scans for advertising and response data containing specific search parameters. This scan can run indefinitely or for a set duration and is particularly useful for filtering devices based on their advertised data.
Usage:
AT+FINDSCANDATA=search_params starts an indefinite scan for devices containing the specified search parameters.
AT+FINDSCANDATA=search_params=seconds scans for the specified duration.
Example:
AT+FINDSCANDATA=FF5
SCANNING...

[00:D4:2E:CD:72:23] Device Data [ADV]: 02010618FF5B00110101010101010101011405326845343864353466757675

[D7:D3:AA:00:B5:24] Device Data [ADV]: 02010618FF540930430924302903049320943094F90890548359049E495432

SCAN COMPLETE
In this example, the AT+FINDSCANDATA command scans for devices advertising data that contains the string “FF5”.
Practical Applications of AT+FINDSCANDATA
Custom Applications: Filter and find specific BLE devices in environments with many BLE signals.
Targeted Marketing: Identify BLE beacons with specific advertising data for targeted advertising campaigns.
Industrial Monitoring: Locate and interact with BLE sensors that provide specific types of data.
Command: AT+SCANTARGET
The AT+SCANTARGET command scans for advertising and response data from specific devices. You can scan for one or multiple devices, and the scan continues indefinitely unless a timer is set.
Usage:
AT+SCANTARGET=[addr_type]slave_address starts an indefinite scan for the specified device.
AT+SCANTARGET=[addr_type]slave_address=seconds scans for the specified device for the given duration.
Multiple devices can be scanned by separating addresses with a semicolon (;).
Example:
AT+SCANTARGET=[0]00:00:00:00:00:01
SCANNING...

[00:00:00:00:00:01] Device Data [ADV]: DataXYZ

[00:00:00:00:00:01] Device Data [RESP]: DataXYZ
In this example, the AT+SCANTARGET command scans for advertising and response data from the device with address 00:00:00:00:00:01.
Practical Applications of AT+SCANTARGET
Device Tracking: Continuously monitor specific devices for location and status updates.
Data Collection: Retrieve advertising and response data from specific BLE sensors in a targeted manner.
Security Systems: Monitor specific BLE-enabled security devices for activity and alerts.
Testing your BLE application
Testing is critical phases in the development of BLE applications. The scanning features of the BleuIO USB dongle, particularly the AT+GAPSCAN, AT+FINDSCANDATA, and AT+SCANTARGET commands, make these tasks easier and more effective for BLE developers.
During the testing phase, developers need to verify that their BLE applications can reliably discover and interact with nearby devices. The AT+GAPSCAN command allows developers to initiate comprehensive scans of the BLE environment, quickly identifying all nearby devices along with their signal strengths (RSSI). This functionality is essential for:
Range Testing: Evaluating the effective communication range of the application, which is crucial for applications requiring long-distance connectivity, such as smart home systems or industrial IoT.
Compatibility Testing: Ensuring the application can detect and communicate with a wide range of BLE devices, regardless of manufacturer or model.
Performance Testing: Assessing how well the application performs in environments with multiple BLE devices, including signal interference and response times.
The scanning features of the BleuIO USB dongle are indispensable tools for BLE developers, especially during the testing and prototyping phases. Commands like AT+GAPSCAN, AT+FINDSCANDATA, and AT+SCANTARGET not only streamline the discovery and interaction with nearby devices but also enhance the efficiency and effectiveness of the development process. With these powerful scanning capabilities, developers can ensure their BLE applications are robust, reliable, and ready for real-world use.
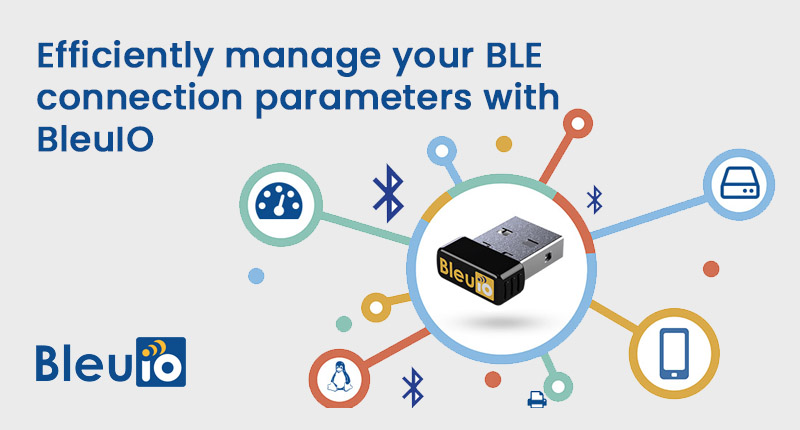
In Bluetooth Low Energy (BLE) technology, efficient device connectivity is crucial. Whether you’re developing a smart home solution, a wearable health monitor, or an industrial IoT application, managing how your device searches for and connects to others can significantly impact its performance. This is where the BleuIO USB dongle comes in, offering an array of intuitive AT commands to streamline BLE application development. One such command, AT+CONNSCANPARAM, is particularly valuable for fine-tuning connection parameters. This article explores why this feature is essential, how it can be beneficial, and practical applications in the real world.
Why Connection Parameters Matter
Connection parameters in BLE devices dictate how often and how long a device scans for other devices. Proper configuration of these parameters is vital for several reasons:
Power Efficiency: BLE devices are often battery-powered. Efficient scanning helps conserve battery life, extending the operational period of the device.
Performance: The frequency and duration of scans can affect how quickly and reliably devices discover each other and establish connections.
Scalability: In environments with multiple BLE devices, optimized scanning reduces interference and improves overall communication quality.
How BleuIO Can Be Helpful
The BleuIO USB dongle simplifies BLE development with its user-friendly AT commands. The AT+CONNSCANPARAM command is particularly powerful, allowing developers to set and query the scan interval and scan window parameters, thus optimizing the device’s connectivity according to specific application needs. This flexibility is invaluable for creating efficient, responsive, and reliable BLE applications.
Introducing the AT+CONNSCANPARAM Command
The AT+CONNSCANPARAM command is designed to set or query the connection scan window and interval. These parameters are crucial for managing how the BLE device initiates scans and how long it scans for during each interval.
Scan Interval: The time between consecutive scans.
Scan Window: The duration of each scan within the interval.
The command ensures the scan window is always equal to or smaller than the scan interval. Values can be set in steps of 0.625 milliseconds (ms), with the interval ranging from 2.5 ms to 10,240 ms.
Practical Applications in Real Life
Let’s explore how AT+CONNSCANPARAM can be applied in various real-world scenarios:
Wearable Health Monitors: In wearable devices like fitness trackers or heart rate monitors, battery life is a critical factor. By adjusting the scan interval and window, developers can optimize these devices to scan less frequently but for longer periods, conserving battery while maintaining reliable data transmission. AT+CONNSCANPARAM=800=400 This command sets the scan interval to 500 ms and the scan window to 250 ms, balancing power efficiency with performance.
Smart Home Devices: Devices such as smart locks or light bulbs need to be responsive to user commands. A shorter scan interval and longer scan window can enhance responsiveness. AT+CONNSCANPARAM=200=150 Here, the scan interval is 125 ms, and the scan window is 93.75 ms, ensuring quick response times while maintaining reasonable power consumption.
Industrial IoT: In environments with numerous BLE devices, such as a factory floor, optimizing scan parameters can reduce interference and improve connectivity stability. AT+CONNSCANPARAM=400=200 This sets the scan interval to 250 ms and the scan window to 125 ms, ensuring efficient and stable communication amidst many devices.
Setting and Querying Connection Scan Parameters
To set the connection scan parameters, use the command in the following format:
AT+CONNSCANPARAM=scan_intv_ms=scan_win_ms
For example:
AT+CONNSCANPARAM=200=100
OK
This sets the scan interval to 125 ms (200 * 0.625 ms) and the scan window to 62.5 ms (100 * 0.625 ms). The device responds with OK indicating success.
This means the scan interval is 200 ms (320 * 0.625 ms) and the scan window is 100 ms (160 * 0.625 ms).
The AT+CONNSCANPARAM command on the BleuIO USB dongle provides developers with a powerful tool to optimize BLE connectivity for various applications. By understanding and leveraging this command, you can enhance the power efficiency, performance, and scalability of your BLE devices, making them more reliable and effective in real-world scenarios.
Unlock the full potential of your BLE projects with BleuIO. Get your dongle today and start creating smarter, more efficient BLE applications.