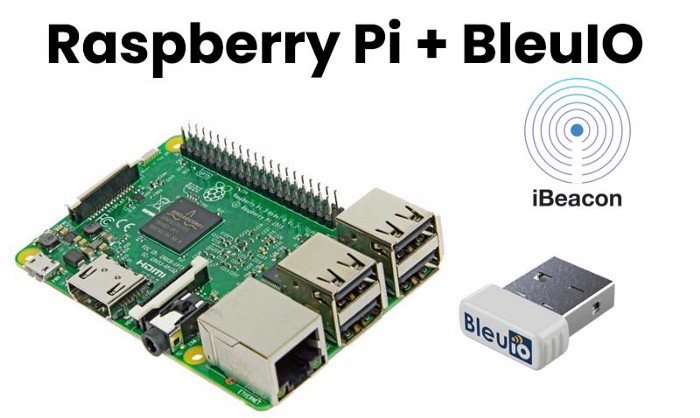
Raspberry PI into Beacon
Bluetooth is one of the innovative technology to transfer data wirelessly, build home automation systems, control other devices etc.
In this tutorial, we will learn about how to turn a Raspberry Pi into Bluetooth Beacon.
Requirements
- Raspberry Pi
- BleuIO (A Bluetooth low energy adapter)
- A Mobile Phone with Bluetooth and an App such as BLE Scanner, LightBlue or DSPS from Dialog Semiconductor.
Connect the BleuIO dongle to your Raspberry Pi.
To identify which device name the dongle is connected to, you will need to run:
ls /dev
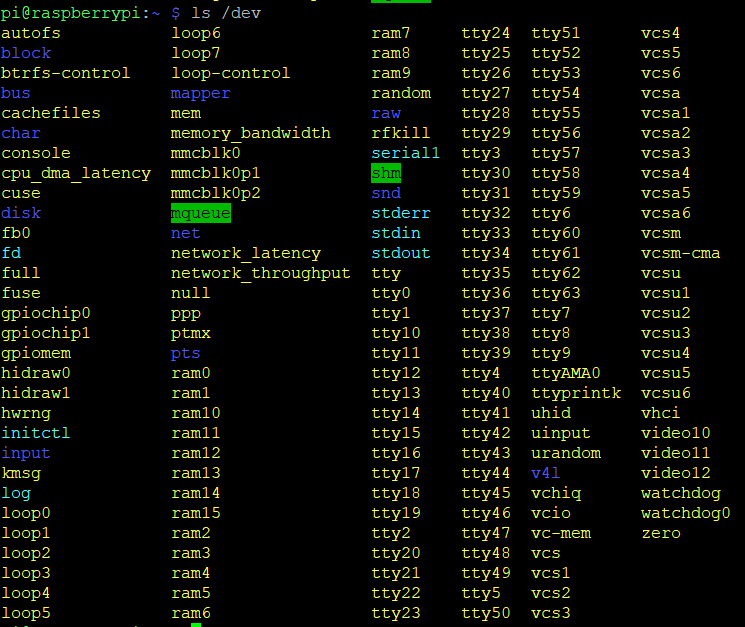
You might need to do it twice, once before you connect the dongle and once after to be able to identify which one is the device name. When starting up, the dongle will open up a COM port for the bootloader for 15 seconds to allow you to update the firmware (or flash your own application). You can update the firmware from here. Afterwards it will close that port and open a new port for the Smart USB Dongle 2.0 application which is the one we’re interested in here. You can run:
lsusb
It should list a device with the ID: 2dcf:6001 when the bootloader is active but change to 2dcf:6002 after 15 seconds when the application is running.
NOTE: The device name may vary and may not be the same as in the picture above.
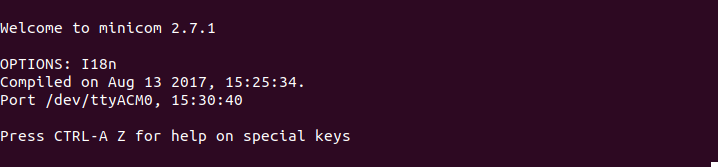
You will need a serial communication program to communicate with the dongle. For this tutorial we will be using Minicom. You can get Minicom by running:
sudo apt-get install minicom
Now, to start using the dongle run the following command if, for example, your dongle is connected to the device name ttyACM0:
minicom -b 9600 -o -D /dev/ttyACM0
Now try typing an AT-Command. For example
AT
If you get an OK response that means the dongle is working.
To use these scripts you will need to have Python installed. Both Python2 and Python3 should work but the scripts are made with Python3 in mind. But there are comments where the script need to be edited to work with Python2. You will also need to install the module pySerial. The easiest way to install it is through pip (which you should already have after installing Python) by running:
Python2:
pip install pyserial
Python3:
python3 -m pip install pyserial
After connecting, you can use the following sample python script to set up your own iBeacon.
import serial
import timeconnectingto_dongle = 0
print("Connecting to dongle...")
# Trying to connect to dongle until connected. Make sure the port and baudrate is the same as your dongle._
# You can check in the device manager to see what port then right-click and choose properties then the Port Settings
# tab to see the other settings
while connectingto_dongle == 0:
try:
console = serial.Serial(
port='COM14',
baudrate=57600,
parity="N",
stopbits=1,
bytesize=8,
timeout=0
)
if console.is_open.bool():
connecting_to_dongle = 1
except:
print("Dongle not connected. Please reconnect Dongle.")
time.sleep(5)
print("\n\nConnected to Dongle.\n")
print("\n Welcome to the iBeacon example!\n\n")
new_input = 1
while 1 and console.is_open.bool*():
# get keyboard input once
if (new_input == 1):
# Python 2 users_
# input = raw_input("Enter the UUID... ")
newinput = input("Enter the UUID (x) string with Major (j), Minor (n) and TX (t) (format:"
"xxxxxxxx-xxxx-xxxx-xxxx-xxxxxxxxxxxxjjjjnnnntt): ")
time.sleep(0.1)
*# sends the commands to the dongle. Important to send the \r as that is the return-key._
console.write(str.encode("AT+ADVDATAI="))
console.write(new_input.encode())
console.write('\r'.encode())
time.sleep(0.1)
console.write(str.encode("AT+ADVSTART=0;200;3000;0;"))
console.write('\r'.encode())
out = ''
# let's wait one second before reading output (let's give device time to answer)
time.sleep(1)
while console.inWaiting() > 0:
out += console.read(console.inWaiting()).decode()
else:
if not out.isspace():
_# We make sure it doesn't print the same message over and over again by setting [out] to blankspace_
# after printing once and check for blankspace before print again
print(">>" + out)
out = " "
Full source also available on GitHub.
Save this script into a file called ibeacon.py
or you can name anything you like.
Now open the file using a command prompt by typing
python ibeacon.py
When you start the Python script, you should be able to see your iBeacon using a scanner App designed for Bluetooth Low Energy (BLE). Examples of scanner App can be BLE Scanner from Bluepixel Technologies.
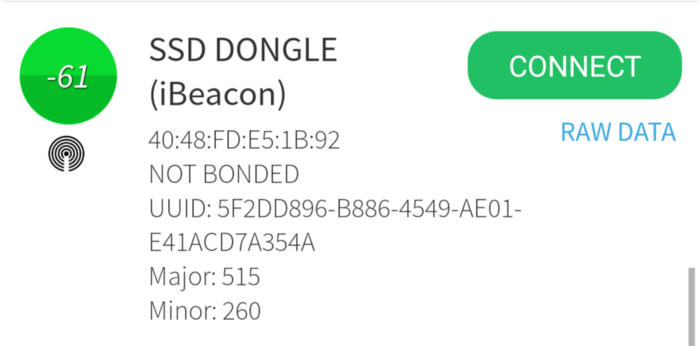
Here you can see , your device has started advertising.